A beautifully designed background can completely change the overall look of your website. From simple textures and patterns to complex designs, with simple tools and techniques you can easily create abstract and vibrant backgrounds to accentuate the overall design. This particular photoshop tutorial is designed to create a simple tile background. A few simple steps and you can add vibrant colors to your background.
Follow this step by step guide to learn how to create a colorful tile background in Photoshop.
Step # 1 – Open up a New Document
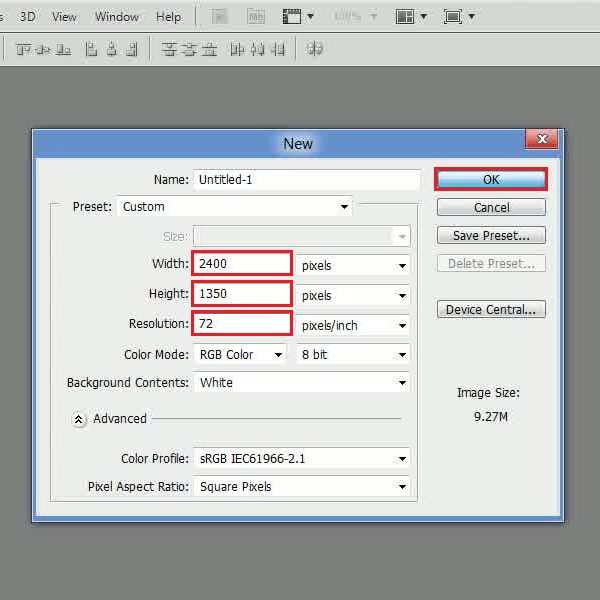
First of all, launch Adobe Photoshop and open up a new document. For this purpose, go to the “File” menu and select the “New” option from the list. Now set the width of the new document as “2400 pixels”, height to “1350 pixels” and resolution as “72 pixels/inch”. Once done, click on the “OK” button to open it.
Step # 2 – Choose a the Noise Samples pattern
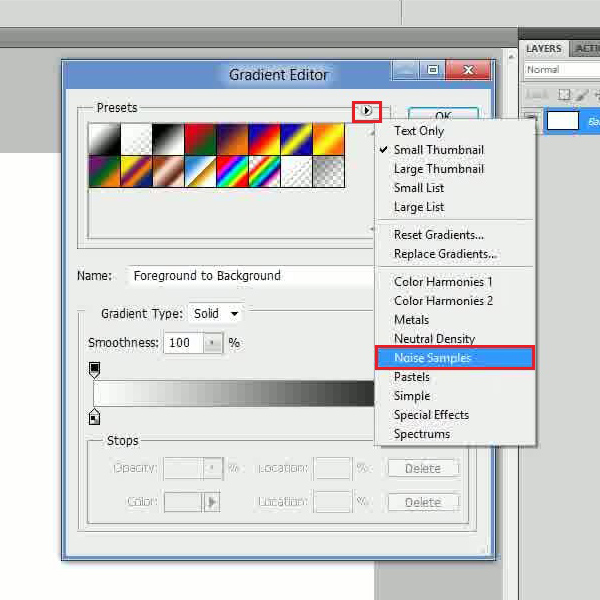
Once the new document has opened, click on the “Gradient” tool from the menu located at the left corner of the screen. Now click on the “Edit Gradient” option to open the “Gradient Editor” panel. Once the panel has opened, click on the small arrow located at the corner to open up a menu. Now click on the “Noise Sample” option from the list to load the presets.
Step # 3 – Select the Sunrise Gradient
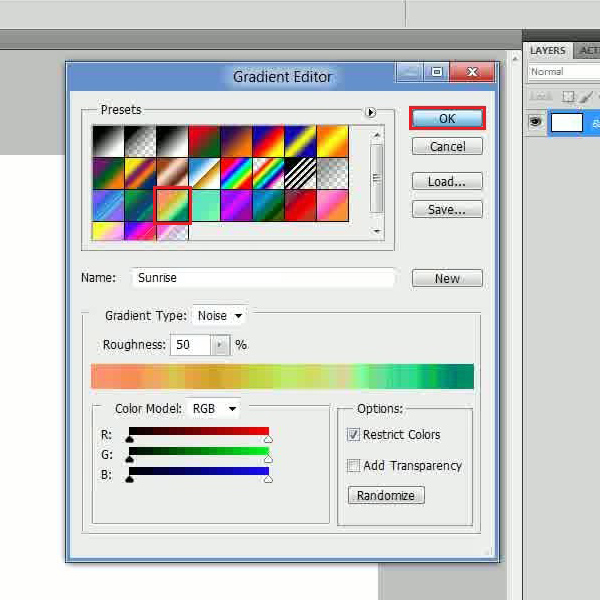
In the next step, click on the “Sunrise” gradient from the preset’s list to select it. Now click on the “OK” button to exit from this panel. Once you are back on the blank document, draw the gradient from left to right on the page.
Step # 4 – Apply the Unsharp Mask
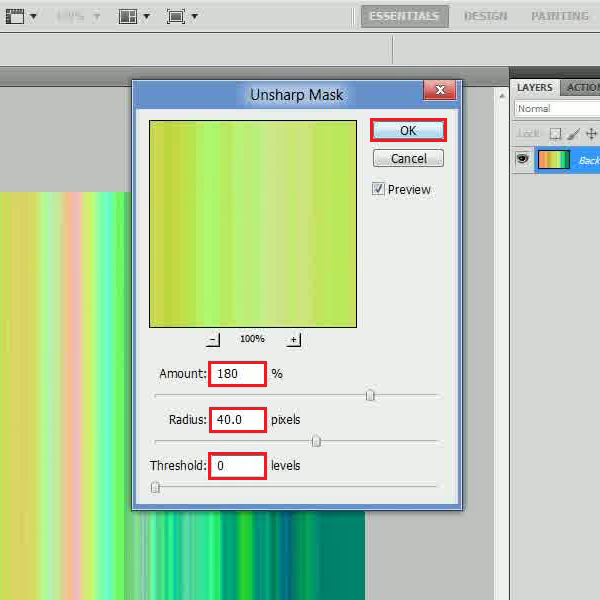
Now go to the “Filter” menu, select “Sharpen” and click on the “Unsharp Mask” option from the list. In the filter settings panel, set its amount to “180 percent”, radius to “40 pixels” and threshold level to “0”. After changing these settings, click on the “OK” button to apply it on the image.
Step # 5 – Select the Patchwork Texture
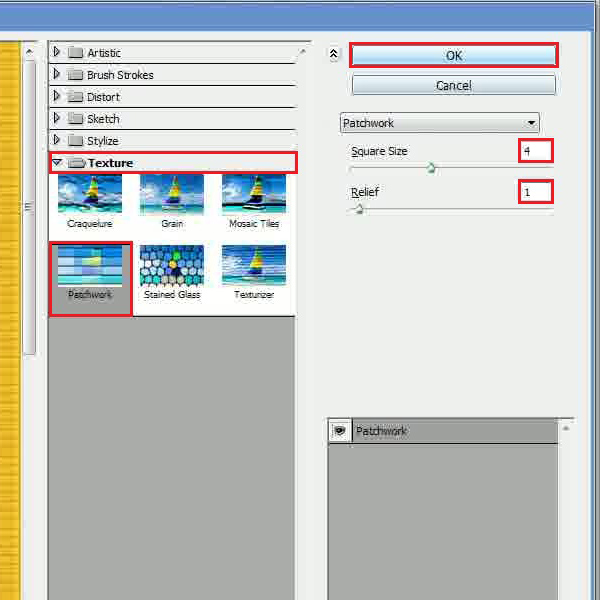
In the final step, go back to the “Filter” menu again, and click on the “Filter Gallery” option from the list. In the filter settings panel, click on the “Texture” option to expand the category and select the “patchwork” filter from the list. Now set the square size to “4”, relief to “1” and click on the “OK” button to apply it. And that’s basically it. Now you have a nice and colorful tile background ready.
 Home
Home