Photoshop is all about bringing your creativity on to the canvas. From basic techniques to advanced filters, anything and everything is possible with this particular software. Transform your digital images using simple photo manipulation techniques and convert simple photographs to an inspiring work of art.
Follow this step by step guide to learn how to create a dreamy portrait in Photoshop.
Step # 1 – Load an Image
In the first step, launch Adobe Photoshop and load an image on which you want to create a dreamy portrait effect.
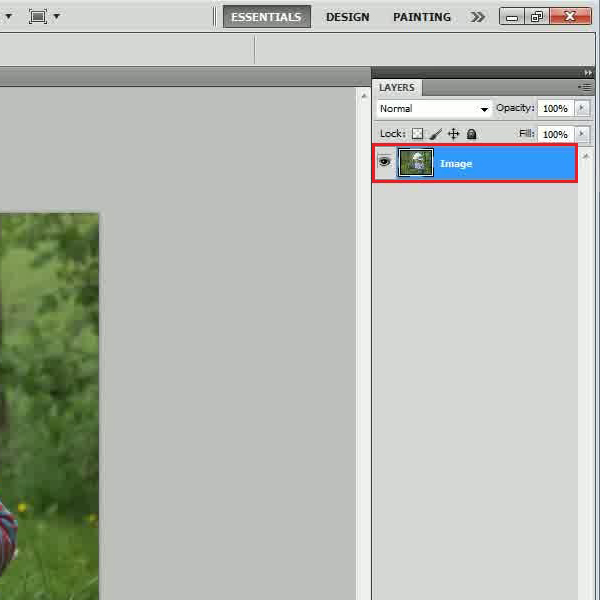
Step # 2 – Create a Duplicate layer
Now create a duplicate copy of the “Image” layer. You can press CTRL J for this purpose.. Once done, right click on it and select the “Create Smart Object” option from the menu. This will convert the layer into a smart object.
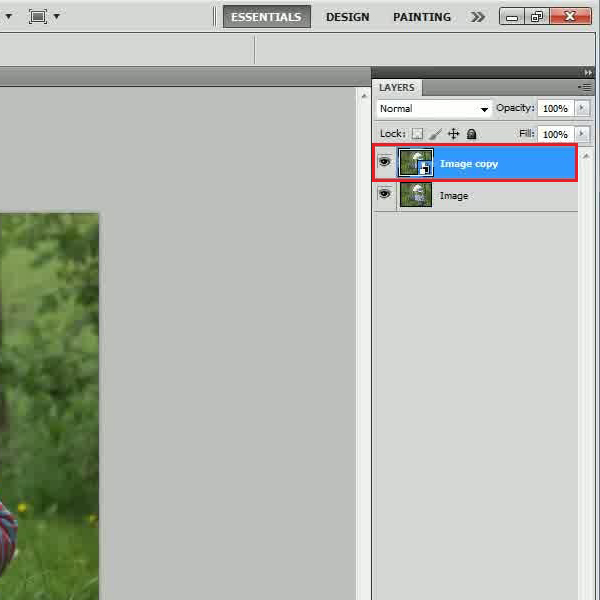
Step # 3 – Apply the Motion Blur Filter
Once done, go to the “Filter” menu, select “Blur” and click on the “Motion Blur” filter from the list. In the filter’s settings panel, set the “Angle” to “45 degrees” and “Distance” to “300 pixels”. After changing these settings, click on the “OK” button to apply it on the image.
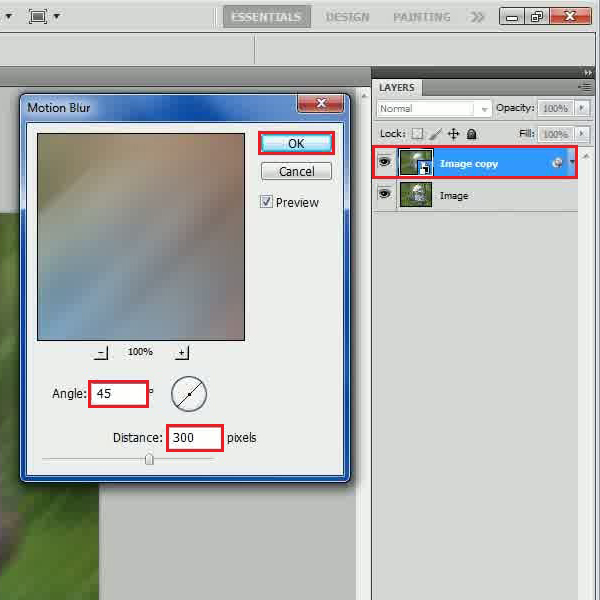
Step # 4 – Apply the Motion Blur Filter once more
In the next step, duplicate the layer and click on the smart filter option to open the motion blur settings. In the filter settings panel, set the “Angle” to “-45 degrees” and “Distance” to “300 pixels”. After changing these settings, click on the “OK” button to apply it on the image.
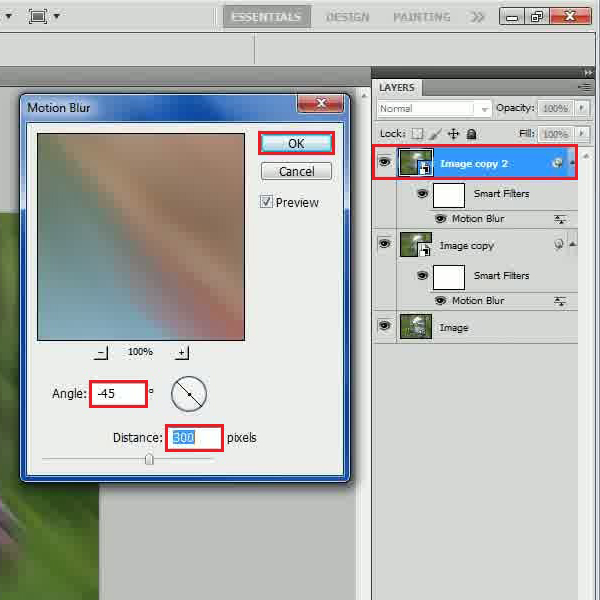
Step # 5 – Change the Blending Mode
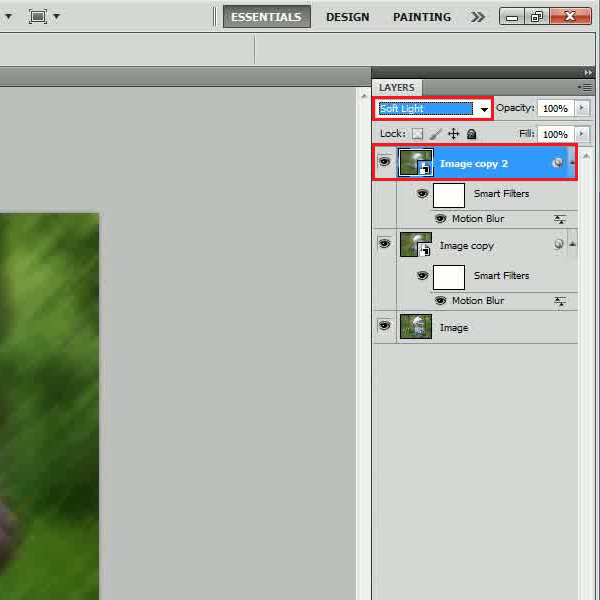
After applying the filter on the layer, go to the “Blending Mode” option and change it to “Soft Light”.
Step # 6 – Apply the Motion Blur Filter again
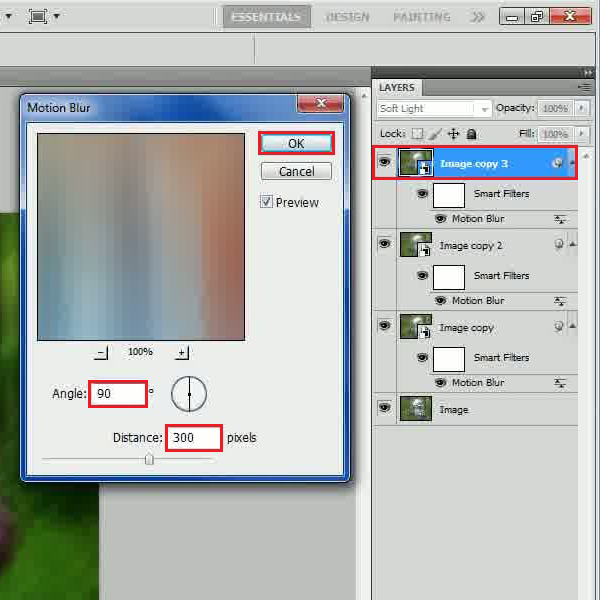
Duplicate the layer once more and click on the smart filter option to open the motion blur settings. In the filter settings panel, set the “Angle” to “90 degrees” and “Distance” to “300 pixels”. After changing these settings, click on the “OK” button to apply it on the image.
Step # 7 – Change the Blending Mode
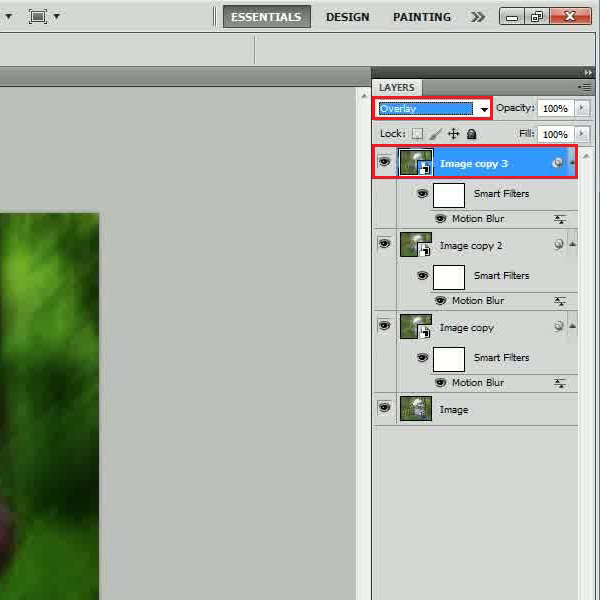
After applying the filter on the layer, go to the “Blending Mode” option and change it to “Overlay”.
Step # 8 – Create a Group
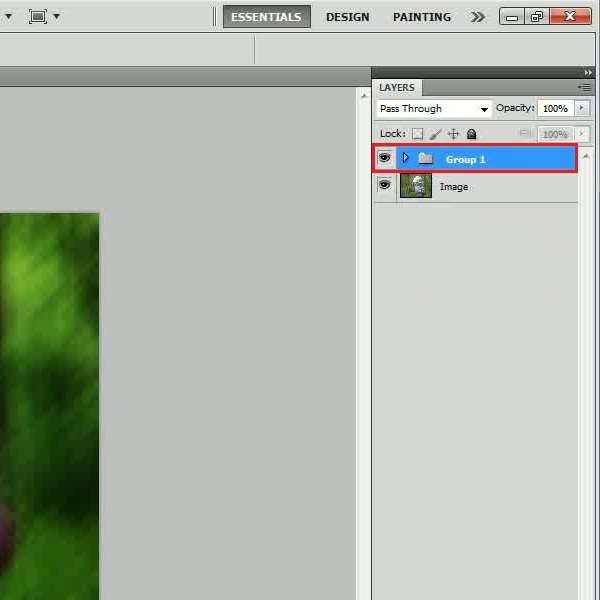
Now in this step, select all the layers except the original “Image” layer and press “CTRL+G” on the keyboard to place them in a group.
Step # 9 – Create a Layer Mask
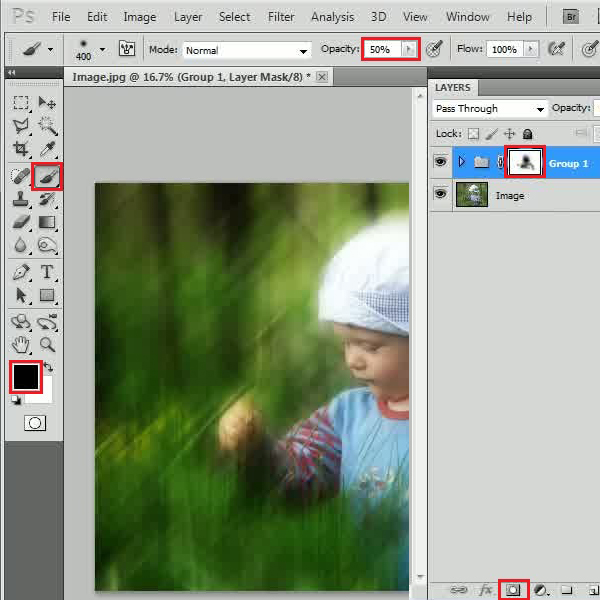
Now we will add a layer mask to the newly created group. For this, click on its icon located at the bottom of the layer’s panel. Now select the “Brush” tool from the menu, change its opacity to “50 percent” and start painting slightly over the image where you want to focus on, using black color for the fill.
Step # 10 – Create a Glow over the Image
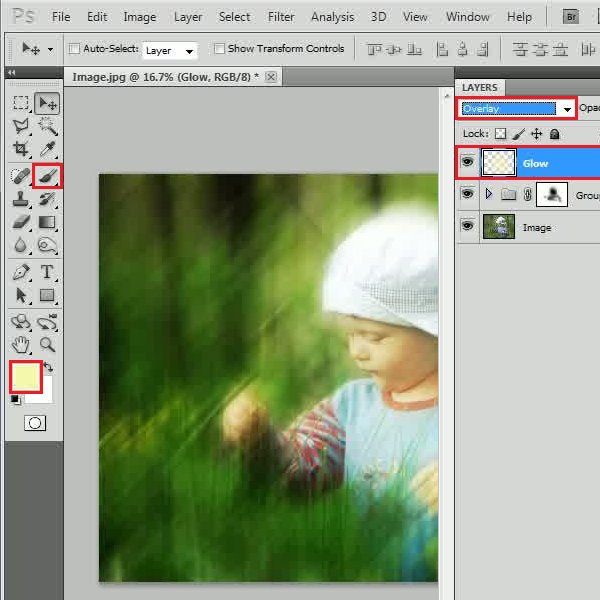
In the last step, add a new layer and change its name to “Glow”. Now select the “Brush” tool from the menu and reduce the opacity to “50 percent”. Choose a light yellow color for the “Foreground” and start painting over the image. Once done, change the “Blending Mode” of this layer to “Overlay” and you’re done.
 Home
Home