Creating effects or enhancing the image quality is very easy if it is done the right way. With only the basic tools and simple image manipulation techniques you can get a lot done. Through some basic smart filters you can easily add rain, sky, storm or even water effects to your photos. Here we are adding a realistic water reflection to an image.
Follow this step by step guide to learn how to create a water reflection in Photoshop.
Step # 1 – Load an Image
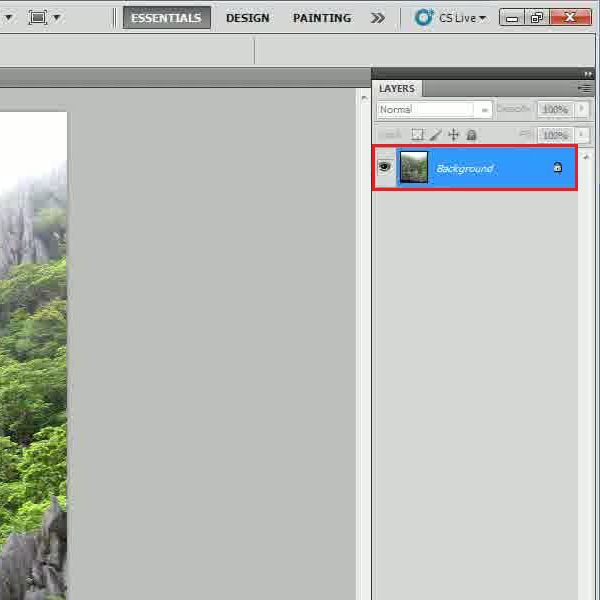
In the first step, launch Adobe Photoshop and load an image on which you want to work on. Here we are using scenery in which the lower part of the image is perfect for creating a water effect.
Step # 2 – Increase the Canvas Size
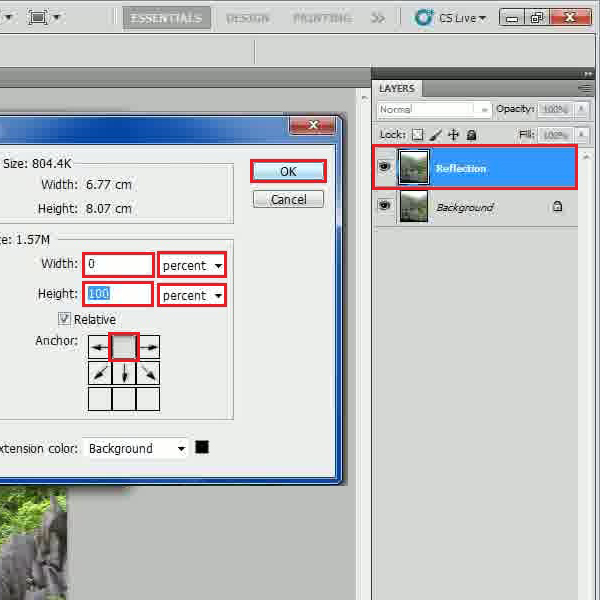
After loading the image, duplicate the background layer and change its name to “Reflection”. Now go to the “Image” menu and click on the “Canvas Size” option from the list. In the canvas settings panel, choose the “Percent” option from the menu. After selecting it, set the “Height” to “100 percent”. Now click on the top middle “Anchor” to select it. After changing these values, click on the “OK” button to apply it on the image.
Step # 3 – Flip the Image
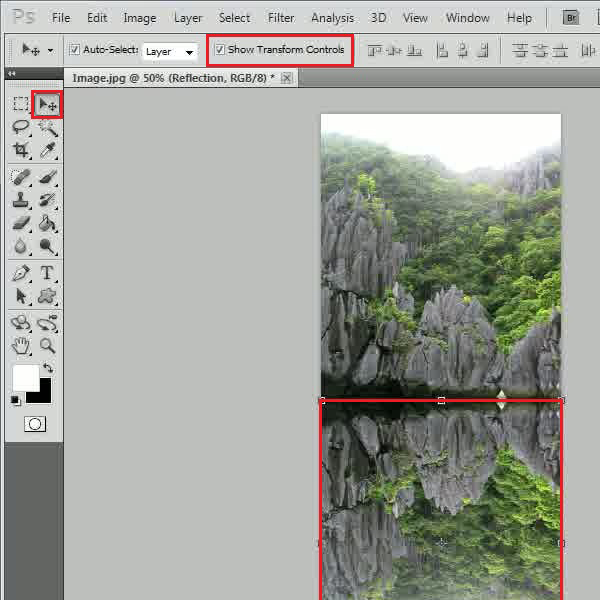
In this step, select the “Move” tool form the menu and click on the “Show Transform Controls” option. Now flip the image upside down and place it below the original image.
Step # 4 – Apply the Noise Filter
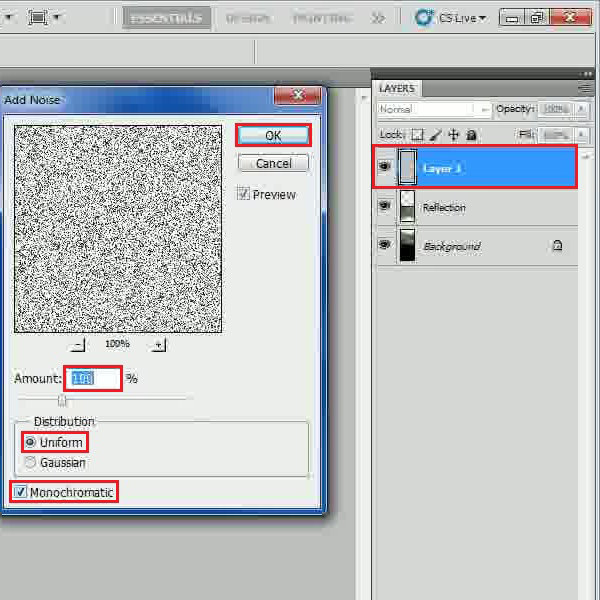
Now insert a new layer and fill it with the “White” color by using the “Paint Bucket” tool form the menu. After completing this, go to the “Filter” menu, select “Noise” and click on the “Add Noise” filter from the list. In the filter settings panel, set the “Amount” to “100 percent” and select the “Uniform” and “Monochromatic” options. After changing these values, click on the “OK” button to apply this filter on the image.
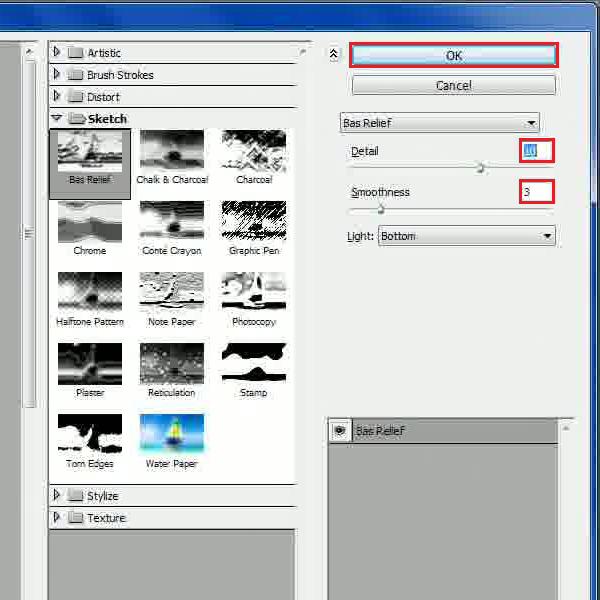
Step # 5 – Apply the Bas Relief Filter
Go to the “Filter” menu once more, select “Sketch” and click on the “Bas Relief” filter from the list. In the filter settings panel, set the “Detail” level to “10” and the “Smoothness” level to “3”. After changing these values, click on the “OK” button to apply this filter on the image.
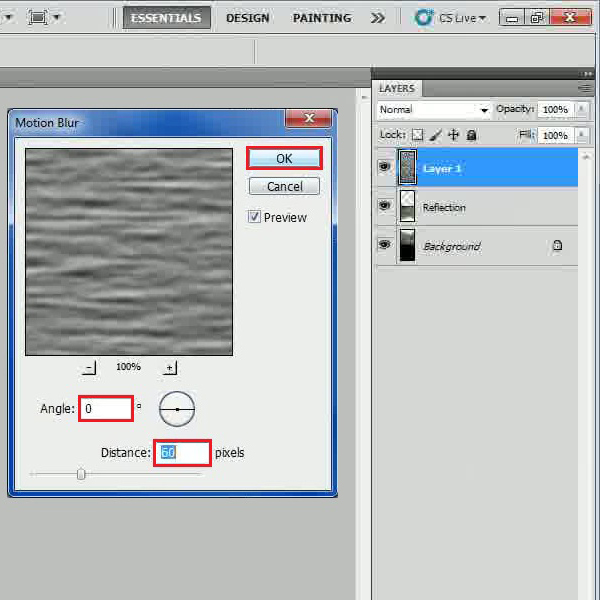
Step # 6 – Apply the Motion Blur Filter
In this step go to the “Filter” menu, select “Blur” and click on the “Motion Blur” filter from the list. In the filter settings panel, set the “Angle” to “0 degree” and the “Distance” to “60 pixels”. After changing these settings, click on the “OK” button to apply this filter on the image.
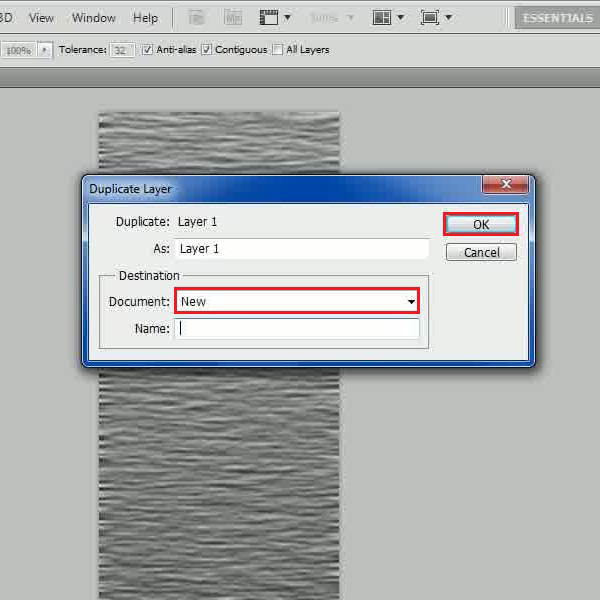
Step # 7 – Create a New Document
Right click on the layer and select the “Duplicate layer” option from the menu. Choose the “New Document” option from the menu and click on the “OK” button to continue.
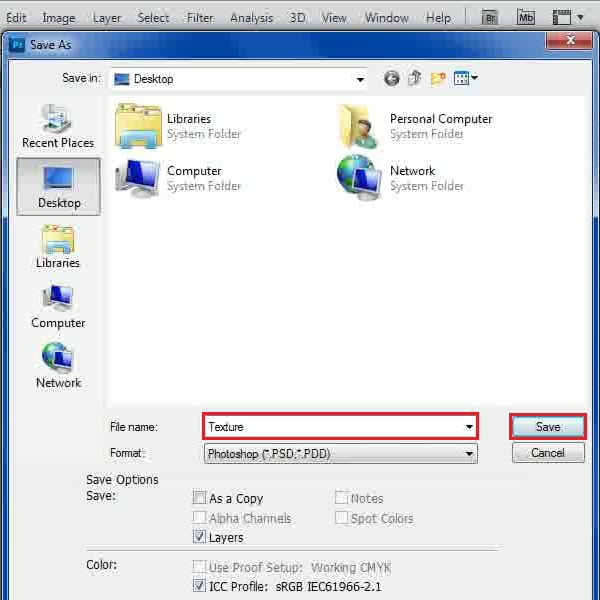
Step # 8 – Saving the file
Once done, a new window will open which allows you to save current file. Name the file and click on the “Save” button to save this file in the PSD format. After saving the texture file, close this document, move over to the Image and delete the textured layer.
Step # 9 – Apply the Glass Distortion Filter
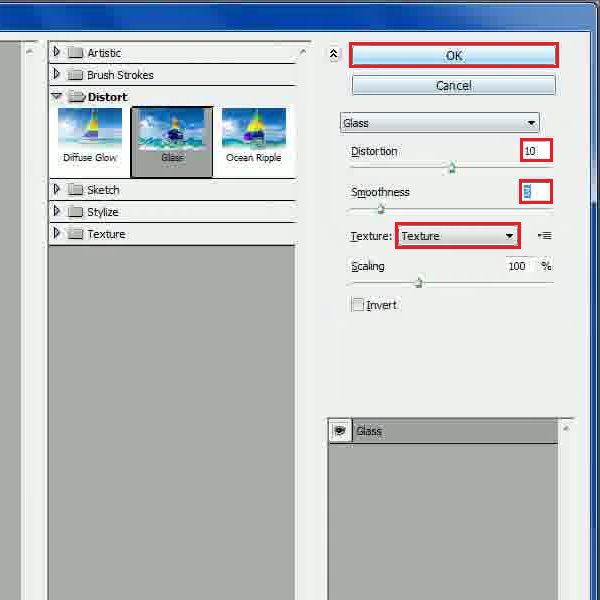
In the final step, go to the “Filter” menu, select “Distort” and click on the “Glass” filter from the list. In the filter settings panel, set the “Distortion” level to “10” and the “Smoothness” level to “3”. Now select the “Texture.psd” file for the “Texture” option which we created in the previous step. After changing these values, click on the “OK” button to apply this filter on the image.
 Home
Home