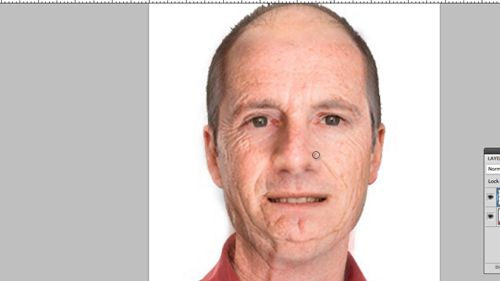
In this tutorial you are going to learn how to make someone go from young to old in Photoshop. By the end of this tutorial you will have create a result that looks like this, from this original photograph.
Step # 1 – Opening the Images
Start Photoshop and you are going to need to have open the photo that you want to convert. You will also need a source image of an old person, as you can see here we have a standard portrait image of both people – this makes this much easier.
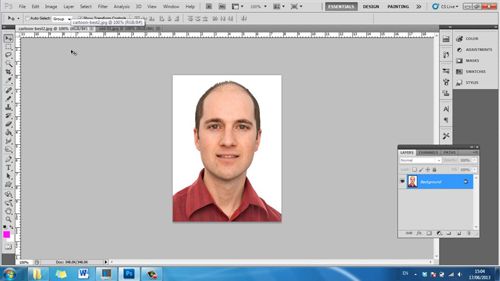
Step # 2 – Inserting a Guide
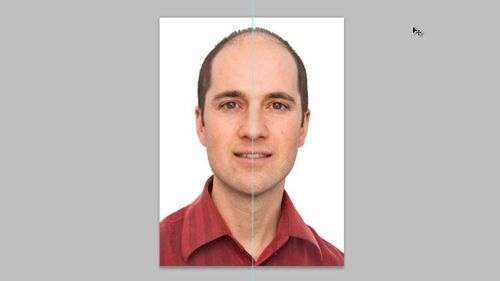
You are now going to want to insert something called guides onto the image, these will help us match the two faces up for transferring the elements of age from the one photo to the other. With the younger persons photograph open, click “View” then “New Guide”. In the dialog box that appears click “OK”. Make sure the “Move Tool” is selected from the menu on the left and use this to drag the guide through the center of the nose. As you can see it doesn’t quite split the face down the middle.
Step # 3 – Lining up the Image
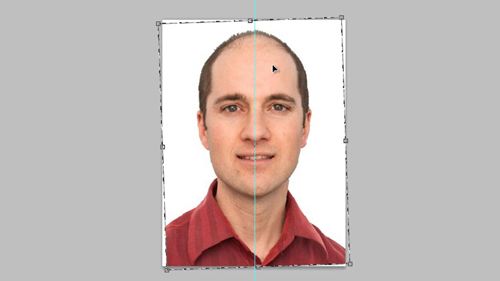
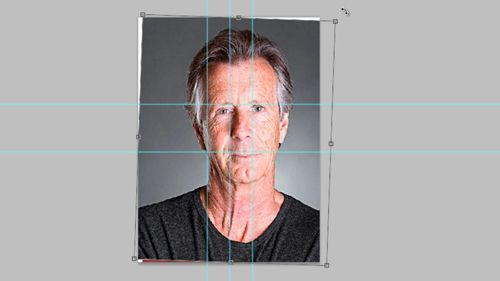
We are going to need to correct this, so the face is exactly level. Press “Control + A” on the keyboard and the move the cursor to the edge of the image, when the rotate option appears, rotate the image until the guide splits the face down the middle. You can also move the image by holding control and clicking on it to better match things up. When done, press “return” and then “Control + D” to cancel the selection.
Step # 4 – Completing the Guides
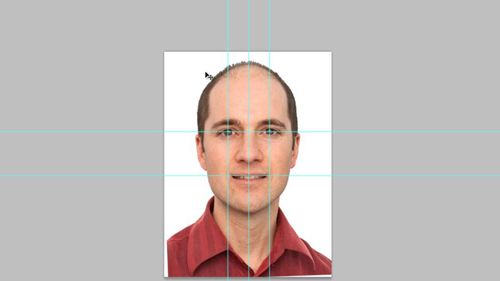
Now, click “View”, click “New Guide” and then click “OK” in the dialog box. Move this guide through the center of one of the eyes. Repeat this process for the second eye. Now create a new guide but this time in the dialog box that appears click “horizontal” and then “OK”. Move this guide so that it runs through the corners of the mouth. Add another horizontal guide and move it so that it runs through both eyes.
Step # 5 – Resizing the Image
Now go to the image of the old person and press “Control + A” on the keyboard. Press “Control + C” then return to the original image and then press “Control + V”. The image of the old person will be placed on top of the current image. You now need to use the boxes on the edge of the image to place the features of this person on the matching features of the image below. You can also use the rotation feature as before as well as the move feature. If you don’t remember where any of the elements were you can press return then use the eye selector in the layers panel to make it invisible and visible again.
Step # 6 – Merging the Images and Removing the Guides
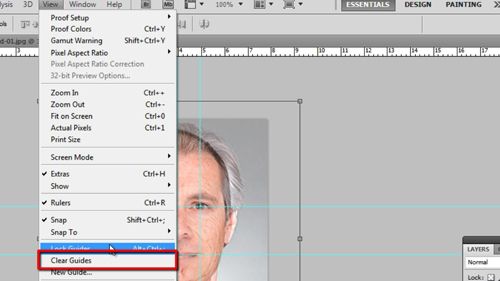
When you have the images lined up as you wish, press “return” to confirm the transformation. What you now want to do is select the opacity option from the left and reduce it so that you can see both of the images at the same time. You should also now remove the guides, so click “View” then “Clear Guides”. You can already see that the image is looking quite effective and now we are going to focus on tidying it up.
Step # 7 – Removing the Unwanted Elements
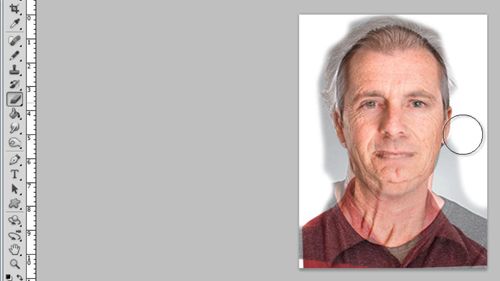
Select the eraser tool from the menu on the left and then right click onto the image, set a mid range hardness and a size that appears similar to this on your image (the actual pixel setting will depend on the resolution of your image). Use the eraser to remove the background and any other parts of your image that you don’t want to change. Here that also includes the shirt and hair.
Step # 8 – Finishing up the Images
Now we are going to want to remove some of other elements of the older image that look out of place. Typically this will be the eyes and mouth. Zoom in on the eyes first, then right click on the image and select a smaller brush size. Use this brush to remove just the center of the eyes. Now go down to the mouth and use the eraser to remove the details here. How this process works on your images will largely depend on the images you are using. Now zoom out of your image and you will see that you have a rather effective result and that is how to make someone go from young to old in Photoshop.
 Home
Home