In this tutorial, we will show you a simple method to create a nice and colorful sales tag. We will start it with a blank page and use some custom shapes to draw it. Later we will add some colors, apply gradients, adjust blending options and end up creating a sleek styled sales tag.
Follow this step by step guide to learn how to create a Sales Tag in Photoshop.
Step # 1 – Draw a Sales Tag Shape
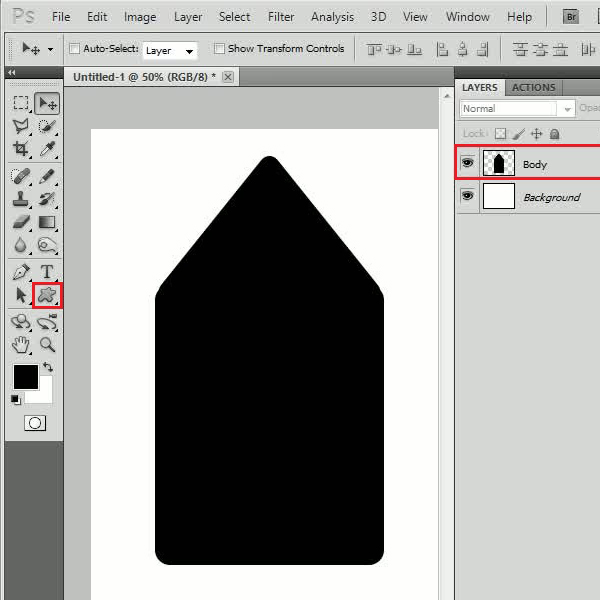
In the first step, select the “Rounded Rectangular” tool, set its radius to “30px” and draw rectangular shape on the page. Now select the “Custom Shape” tool, choose a “Diamond” shape and draw it over the previous shape. Once done, combine both layers, rename it to “Body” adjust its placing at the center of the page.
Step # 2 – Adjust the Inner Shadow Settings
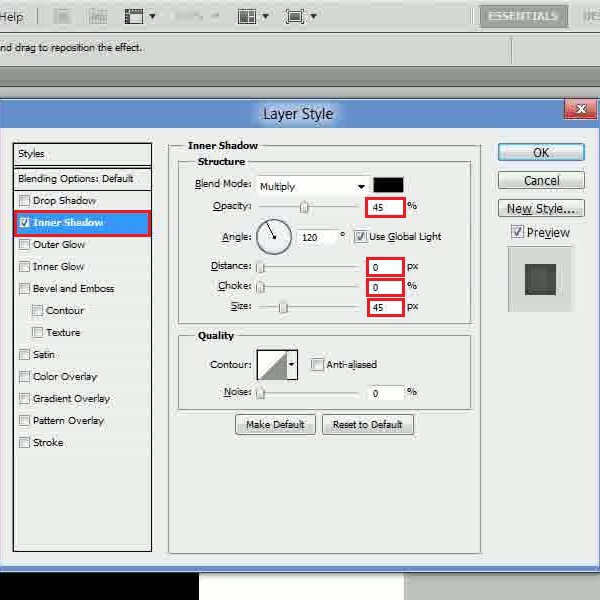
Now open the blending options of the “Body” layer and move over to the “Inner Shadow” tab. Set the opacity to “45 percent”, distance to “0px”, choke to “0 percent” and size to “45px”.
Step # 3 – Adjust the Gradient Overlay Settings
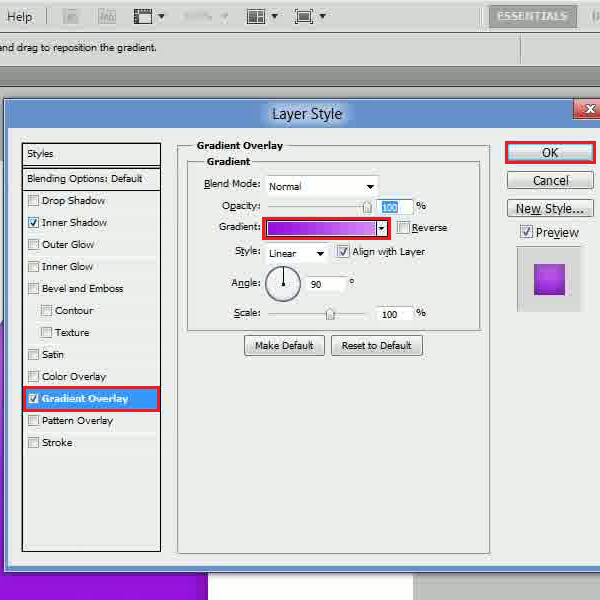
In the next step, click on the “Gradient Overlay” tab and click on the gradient option. Now choose the color as “9503e1” for the left and “d685ff” for the right gradient. After changing these settings, click on the “OK” button to apply them.
Step # 4 – Insert a Tag Hole
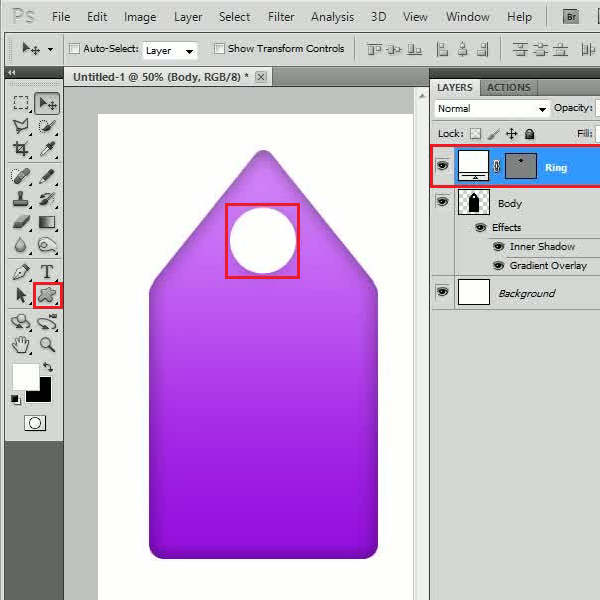
Once done, select the “Custom Shape” tool, choose a “Ring” shape and draw it on the top of the sales tag. Change its layer name to “Ring”, select the “Body” layer and remove the inner portion of the ring by using the “Eraser” tool.
Step # 5 – Adjust the Inner Shadow Settings
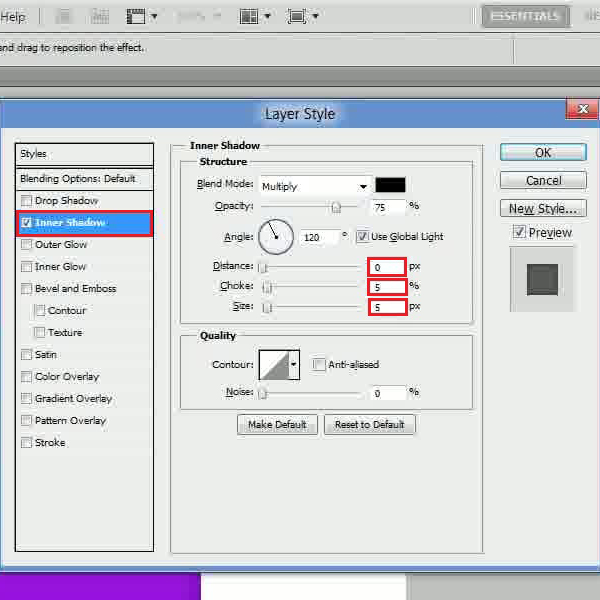
Now open the blending options of the “Ring” layer and move over to the “Inner Shadow” tab. In this tab, set the distance to “0px”, choke to “5 percent” and size to “5px”.
Step # 6 – Adjust the Gradient Overlay Settings
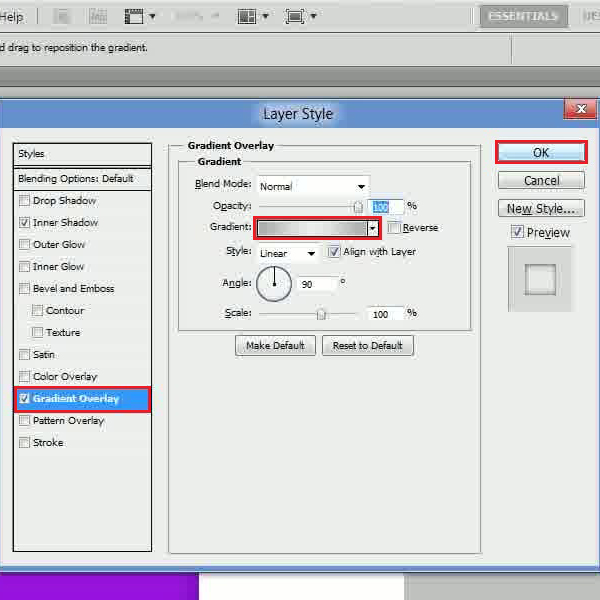
In the next step, move over to the “Gradient Overlay” tab and click on the gradient option. Now choose the color as “acadae” for left and right gradients while “ededed” for the middle gradient. After changing these settings, click on the “OK” button to apply it.
Step # 7 – Draw a Tag Shape
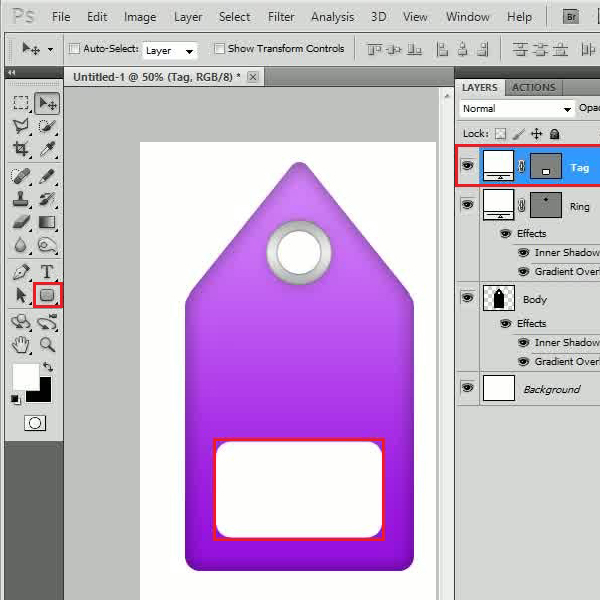
Now draw another rounded rectangular shape, adjust its size and placing and rename it to “Tag”. Once done, double click on its layer to open up its blending options.
Step # 8 – Adjust the Inner Glow Settings
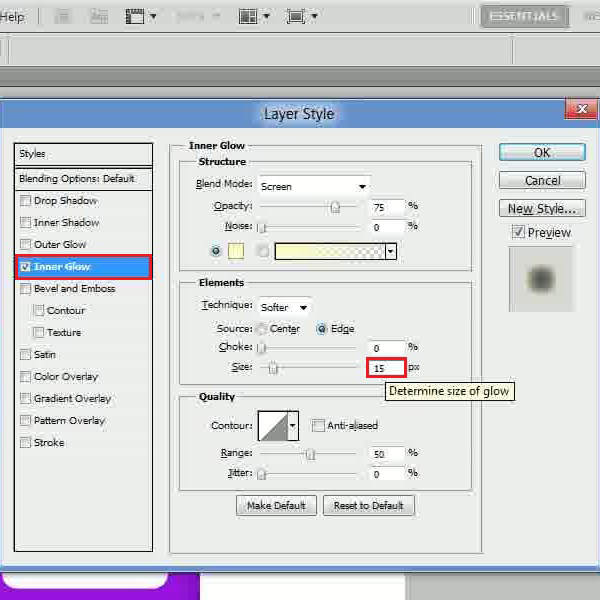
In the next step, Move over to the “Inner Glow” tab and set its size to “15px”.
Step # 9 – Adjust the Gradient Overlay Settings
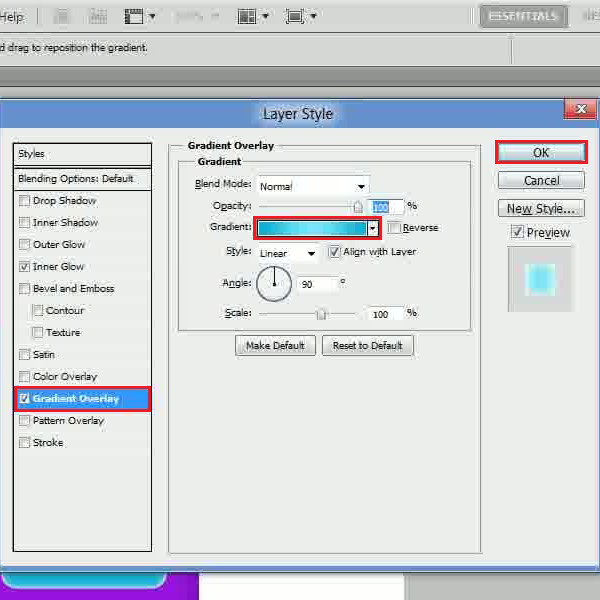
Now move over to the “Gradient Overlay” tab and click on the gradient option. Choose the color as “04afd1” for left and right gradients while “79e7fc” for the middle gradient. After changing these settings, click on the “OK” button to apply it.
Step # 10 – Insert Text
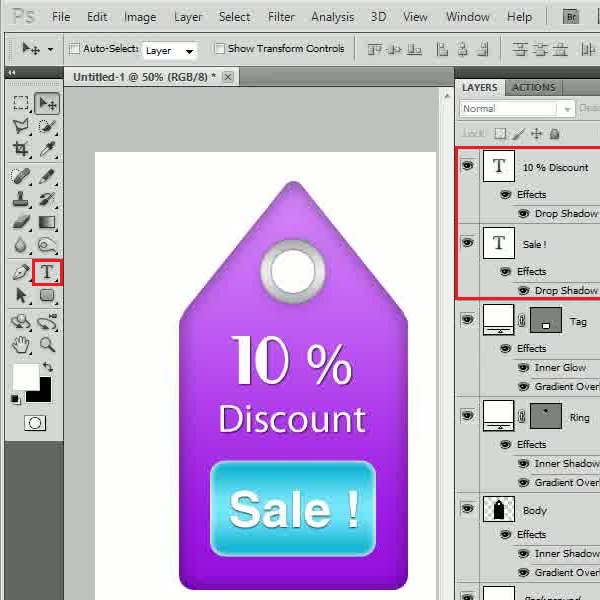
In the final step, select the “Text” tool from the menu and insert some text according to your choice and requirements. Add a drop shadow on text layers and you’re done.
 Home
Home