In Adobe different Illustrator fonts can be given a sketch effect by applying the simple scribble effect. This effect can also be saved and used later on for a separate illustration. In this tutorial, we will teach you how to create a sketch effect in your typography in Adobe Illustrator.
Step # 1 – Enter text
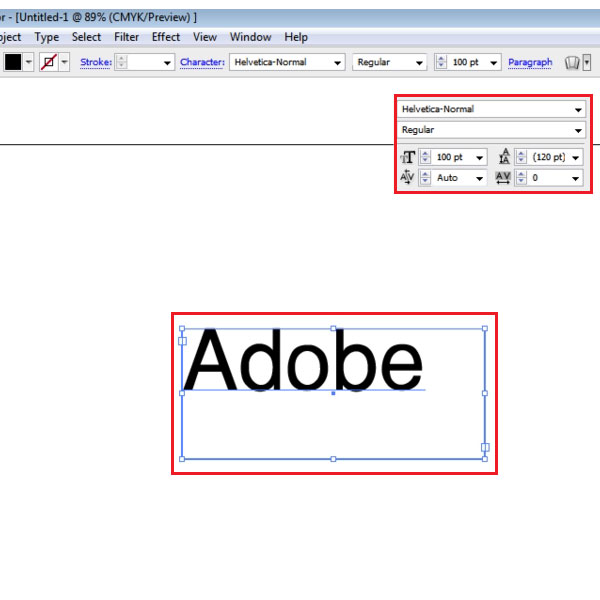
First of all, select the “text tool” from the tool panel and make a text box. Enter what you want to write in the text box. Once done, specify the font type and size from the text panel. In case the panel isn’t already being displayed, press the keys “ctrl + t” in order to open it. In this tutorial, we have chosen the font type as “Helvetica-normal” and the size as “100pt”.
Step # 2 – Remove the text color
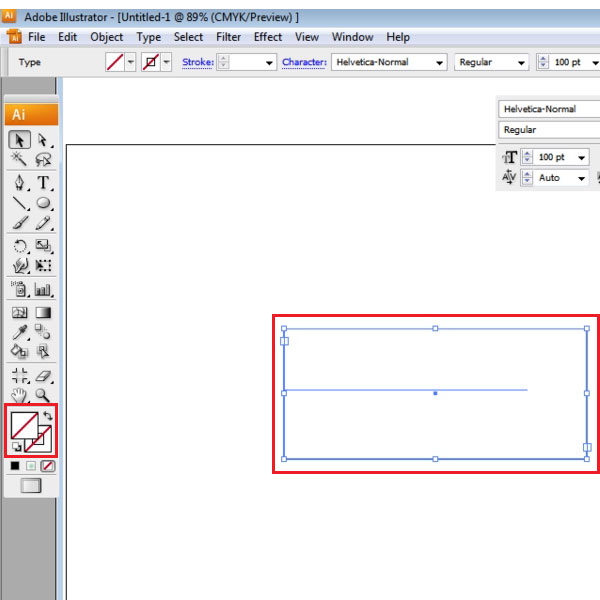
Select the text with the help of the “selection tool” and remove color from the text by clicking on the “none” option, right below the color box on the tool panel.
Step # 3 – Add a new fill
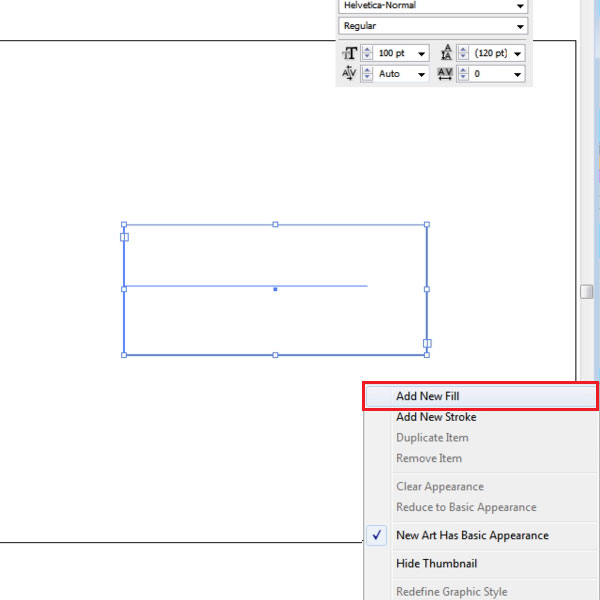
Once the text has been selected, open the “appearance” panel on the right. From the arrow on the right of the panel, choose the “add new fill” option. Once selected, under the “effect” menu, go to “stylize” and select the “scribble” option in order to open up the settings. In this manner, you can adjust the settings as per your preferences.
Step # 4 – Add the “scribble” effect
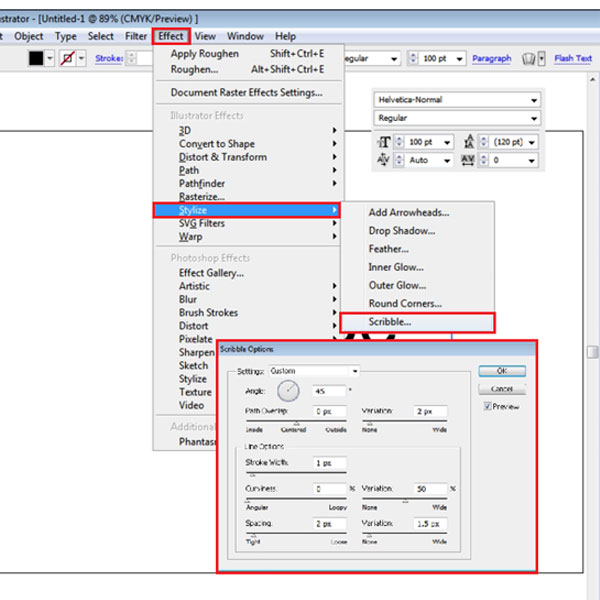
Without deselecting the fill, under the “effect” menu, go to “stylize” and select the “scribble” option. A settings window will appear by the name of Scribble Options. Over here, you can adjust the settings as per your requirements.
Step # 5 – Alter the text size
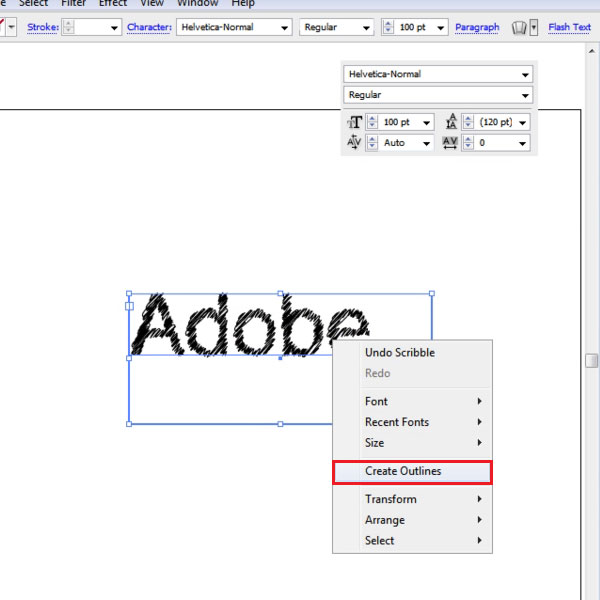
In order to increase the size of the text, you can either increase the font size or right click on the text and select the “create outlines” option. Over here, you can increase the font manually. However, remember that if you create outlines, then you cannot change the font type later on.
Step # 6 – Save the sketching effect
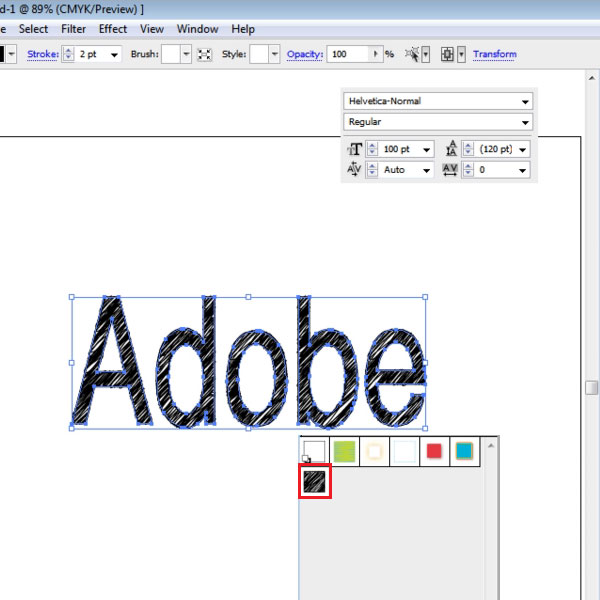
This sketching effect can be saved in the “graphics” panel. So if you want to add it to any another illustration, you will not have to make this effect from scratch. Save it in the graphics panel by simply dragging it there.
Step # 7 – Apply the saved effect
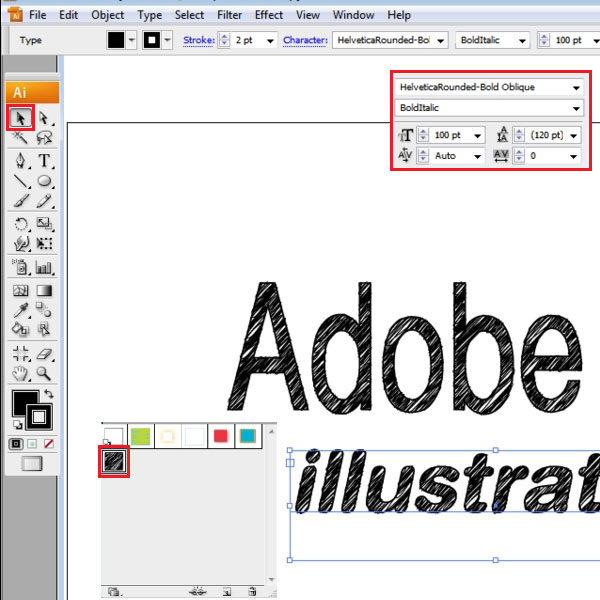
In order to understand how to apply this later on, enter text in another separate box. In the tutorial, we have chosen the font type as “Helvetica-CondensedBlack Oblique” and the font size as “100”. Do so by means of the selection tool and simply click on the graphic style you had saved in the panel earlier. The sketch style will automatically be applied.
 Home
Home