In this tutorial, we are going to use Adobe Photoshop to create a nice wooden textured background. We will use basic Photoshop tools, and few blending options to complete our design. After going through this tutorial, you will get a fair idea on how to use different blending options to create certain effects on image.
Follow this step by step guide to learn how to create a wooden background in Photoshop.
Step # 1 – Unlocking the Background Layer
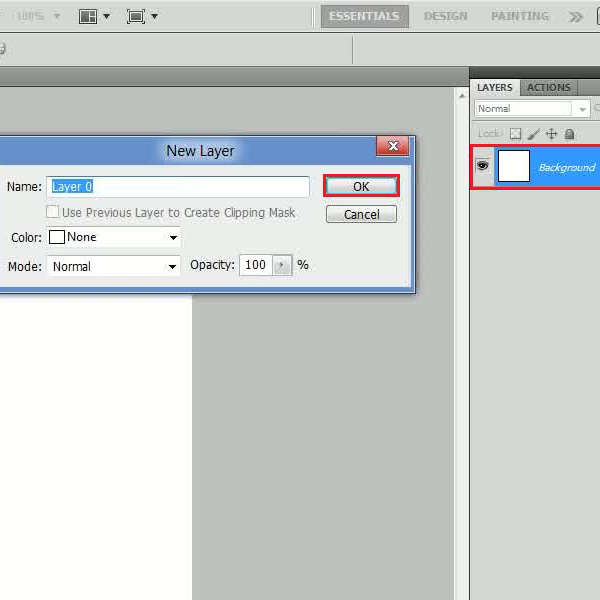
In the first step of this tutorial, launch Adobe Photoshop and open up a new document. Once it has opened, move over to the “Layers Panel” and double click on the “Background” layer. A small settings window will open in front of the screen. Click on the “OK” button to close this window. Now you can see that the “Lock” icon has been removed from this layer. Once done, double click on this layer again to open its blending options.

Step # 2 – Adjusting the Inner Shadow Settings
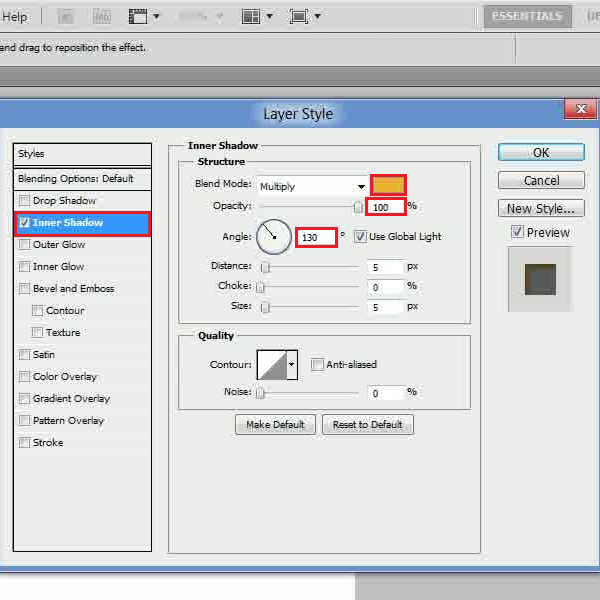
Once the blending options window has opened, move over to the “Inner Shadow” tab. In this tab, choose the color of the shadow by entering its color as “f0b12a”. Now set its opacity to “100 percent” and angle to “130 degrees”.

Step # 3 – Adjusting the Bevel and Emboss Settings
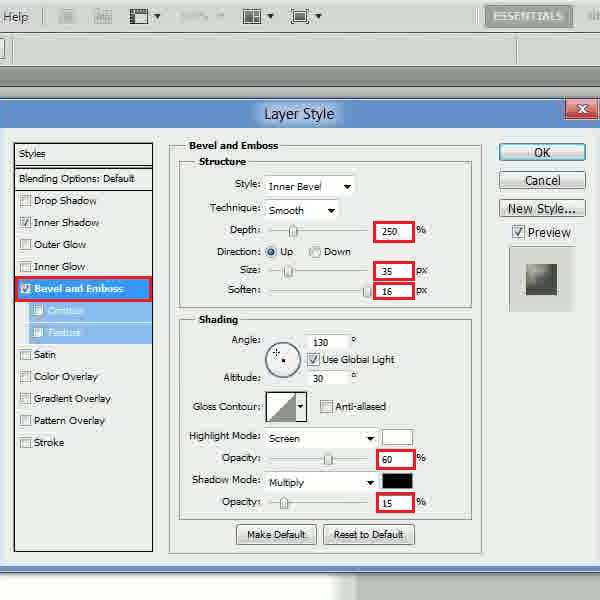
After adjusting the “Inner Shadow” settings, move over to the “Bevel Emboss” tab. In this tab, set its depth to “250 percent”, size to “35px” and soften to “16px”. Once done, change the highlight mode’s opacity to “60 percent” and shadow mode’s opacity to “15 percent”.

Step # 4 – Adjusting the Pattern Overlay Settings
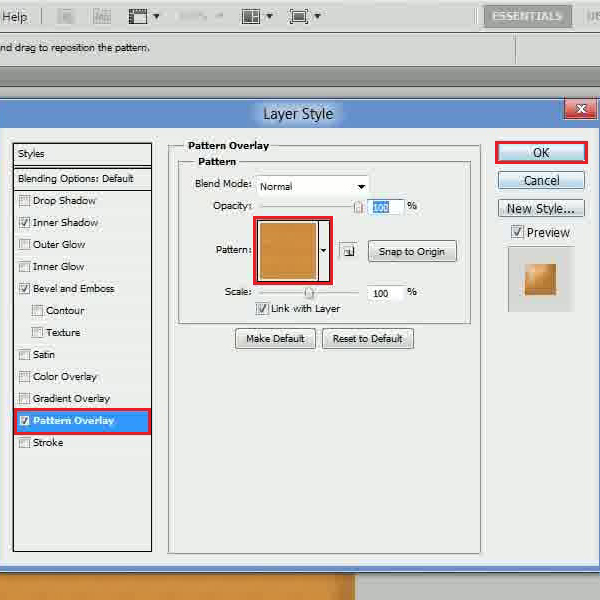
Now in the last step, move over to the “Pattern Overlay” tab. In this tab, click on the “Pattern: option to open the pattern selection panel. In this panel, choose the “Wooden” texture and click on the “OK” button to apply it. After completing these settings and adjustments of blending different blending modes, a nice wooden textured background will be ready on your canvas. Now save this design for further use.

 Home
Home