Photoshop allows you to create different kinds of designs and patterns through its helpful tools and filters. It offers a vast range of filters that helps you to create nice and beautiful textures, patterns, and effects. Here we are creating an old and burnt paper texture over a blank page. In order to add more beauty to the concept, we will add a map over the texture to create a realistic looking treasure map.
Follow this step by step guide to learn how to create an old burn treasure map in Photoshop.
Step # 1 – Loading a Parchment Paper Action
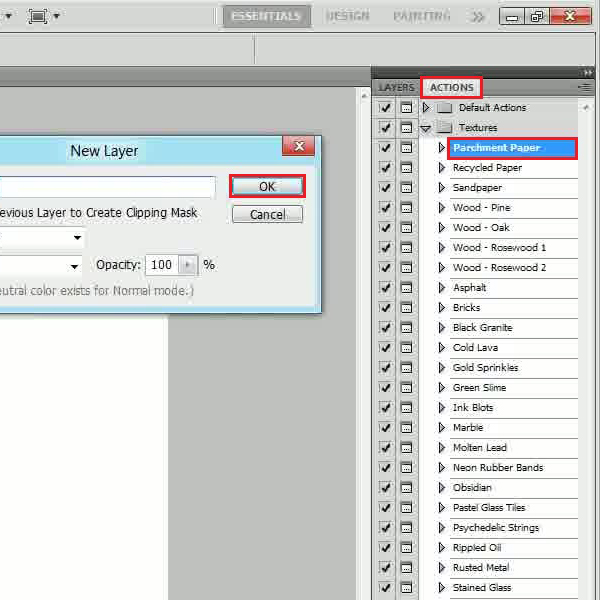
In the first step, launch Adobe Photoshop and open up a new document with a blank white page. Now go to the “Actions” tab, select “Textures” and click on the “Parchment Paper” texture from the list. Click on the “Play Selection” button located at the bottom of the panel and click on the “OK” button to continue. Once you have clicked on the “OK” button, a message window will appear asking you to either proceed with the action or not. Now click on the “Continue” button to proceed.
Step # 2 – Adjusting Filter Settings
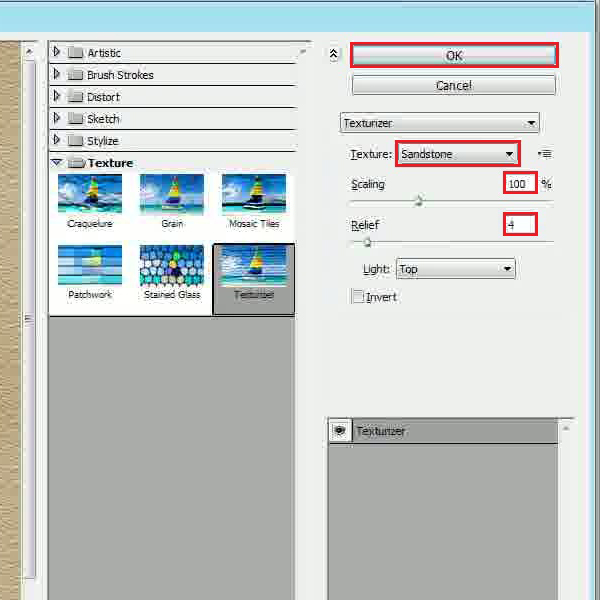
Once you have clicked on the “OK” button, a filter settings panel will appear in front of your screen which allows you to add a texture on your page. In this panel, select the “Texture” as “Sandstone”, set the “Scaling” to “100 percent”, “Relief” to “4” and click on the “OK” button to apply it on the image.
Step # 3 – Using the Eraser Tool
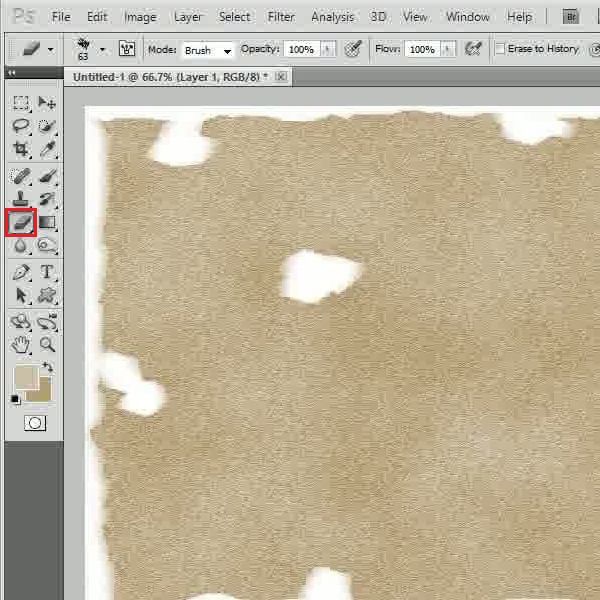
In the next step, select the “Eraser” tool from the menu and remove corners and some small portions in the middle to create a nice torn and ragged paper effect.
Step # 4 – Using the Burn Tool
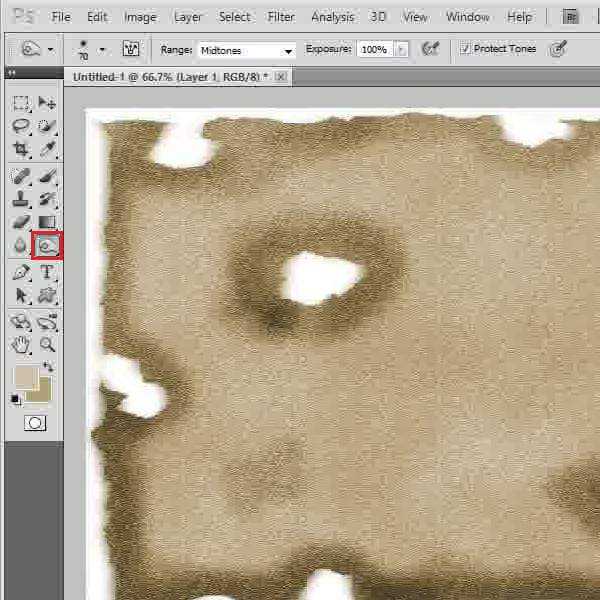
After using the “Eraser” tool, select the “Bun” tool from the menu and apply it on the corners and middle portion to create a burnt paper effect.
Step # 5 – Loading a Map
Once you have done the above and got a nice texture of an old and burned paper, go to the “File” menu and open up an image of a geographical map. After loading the map,drag it over the main working file.
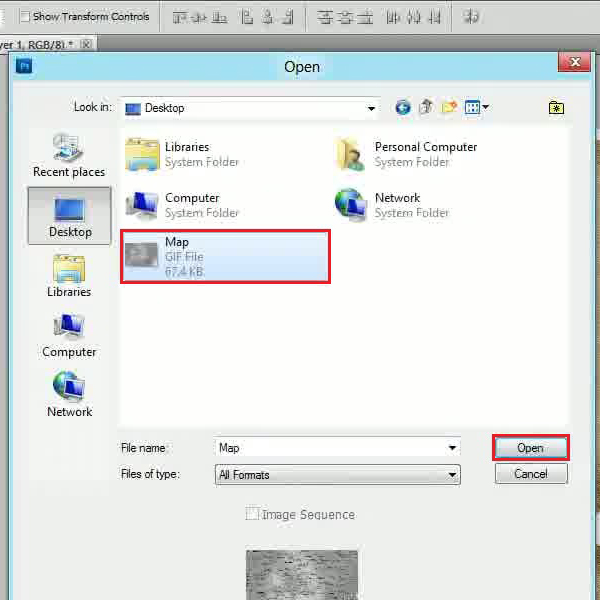
Step # 6 – Changing the Blending Mode
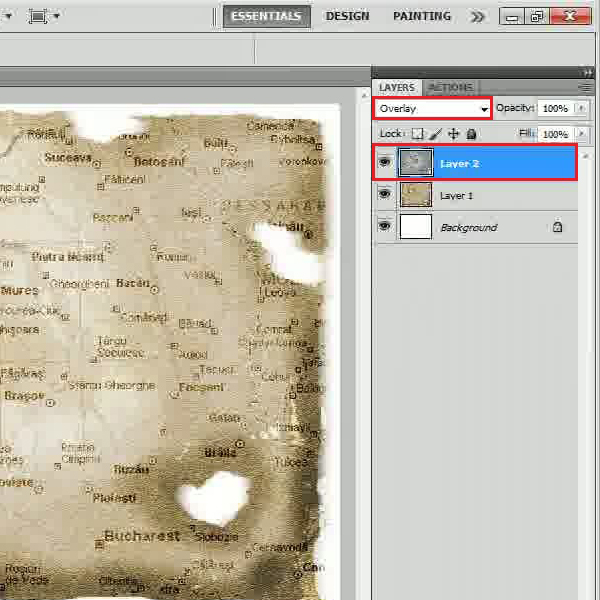
In the final step, adjust the map’s size and placing according to the background. Now chagne the “Blending Mode” of this layer to “Overlay”. This will finally craete an old burnt treasrue map.
 Home
Home