The overwhelming majority find such photos very attractive which are surrounded by borders, giving the overall image a finished look. It adds a value to the images and displays your pictures in the most presentable manner possible. Creating nice and simple borders is not at all a difficult task. By using Photoshop, we can add various kinds of borders and image frames around your favorite photos.
Follow this step by step guide to learn how to create borders around a picture in Photoshop.
Step # 1 – Load an Image
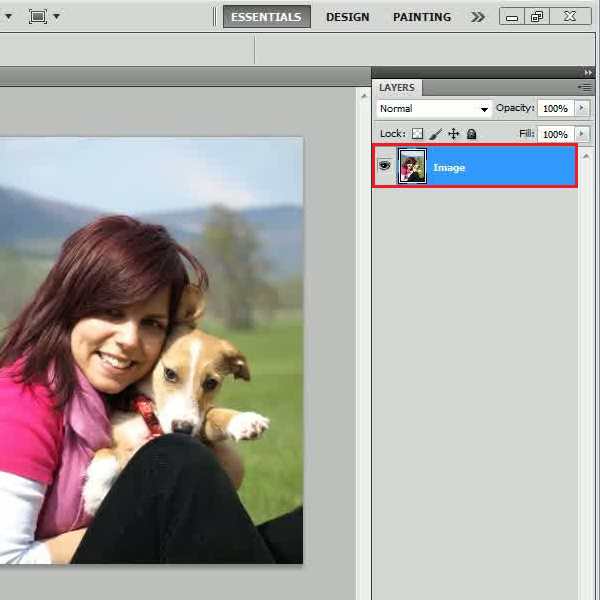
In the first step, launch Adobe Photoshop and load an image on which you want to add a frame.
Step # 2 – Apply a Mosaic Title Filter
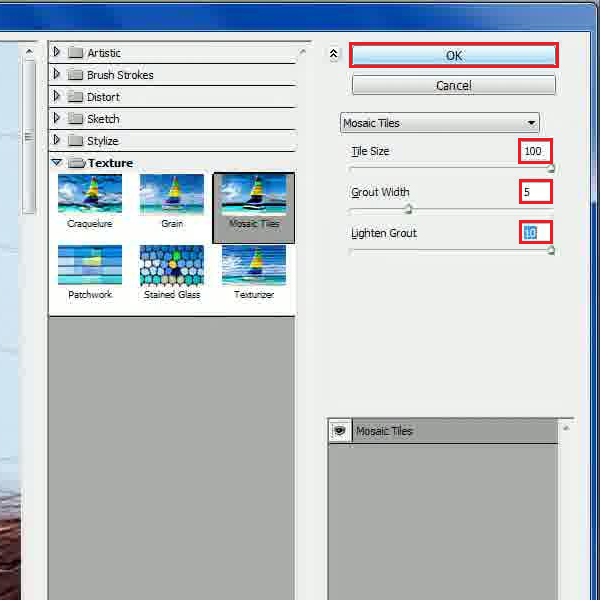
After loading the image, go to the “Filter” menu, select “Texture” and click on the “Mosaic Tiles” option. In the filter’s settings panel, set the “Tile Size” to “100”, “Grout Width” to “5” and “Lighten Grout” to “10”. After changing these values, click on the “OK” button to apply it on the image.
Step # 3 – Create a Frame
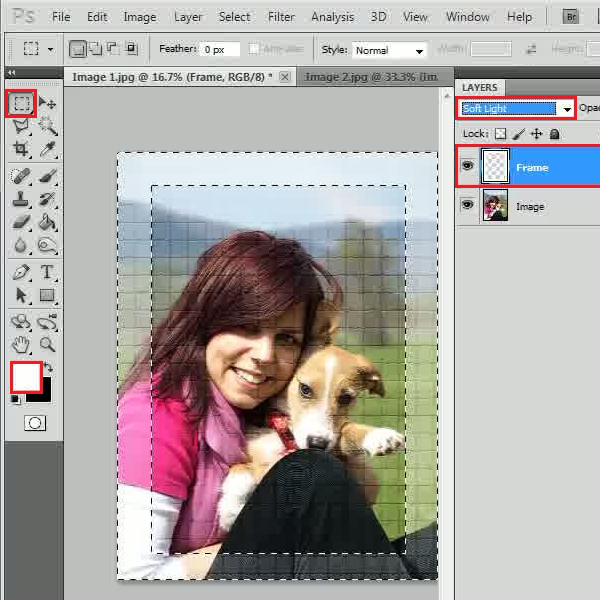
Now add a new layer and change the name of this layer to “Frame”. Select the “Rectangular Marquee” tool from the menu and draw a rectangular shape around the image. After drawing the border, go to the “Select” menu and click on the “Inverse” option. Now select the “Paint Bucket” tool form the menu and fill the selected area with the “White” color. After filling it up, change the “Blending Mode” of this layer to “Soft Light” and you’re done.
Step # 4 – Load another Image
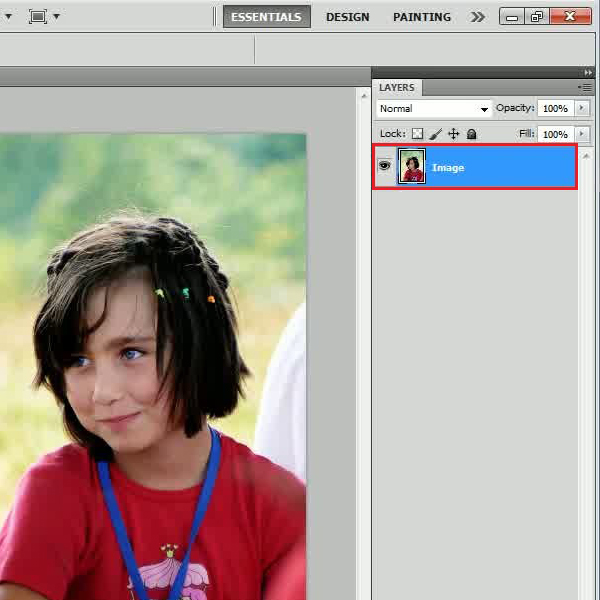
Here we would be loading another image on which we will add a different border.
Step # 5 – Moving in the Quick Mask Mode
Now draw a rectangular box by using the “Rectangular Marquee” tool from the menu and inverse the selection. After inversing it, enter into the “Quick Mask” mode by clicking on its icon or by pressing the “Q” key on the keyboard.
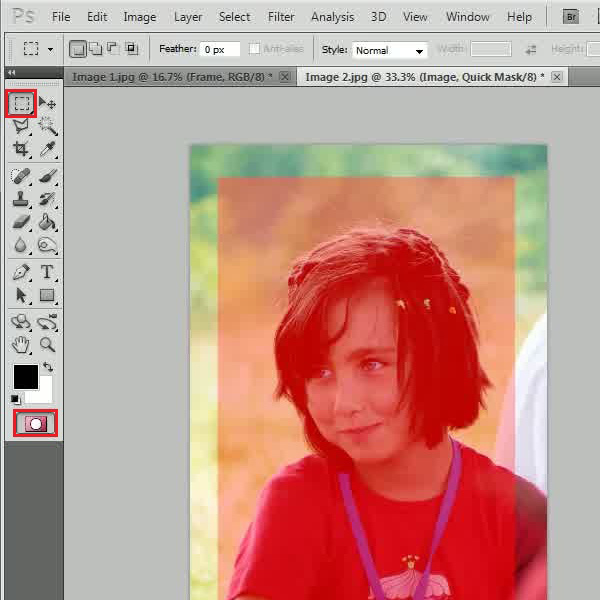
Step # 6 – Applying the Color Halftone Filter
In the next step, go to the “Filter” menu, select “Pixelate” and click on the “Color Halftone” filter from the list. In the filter’s settings window, set the “Max Radius” to “20 pixels”. Leave all other options as it is and click on the “OK” button to apply these changes on the image.
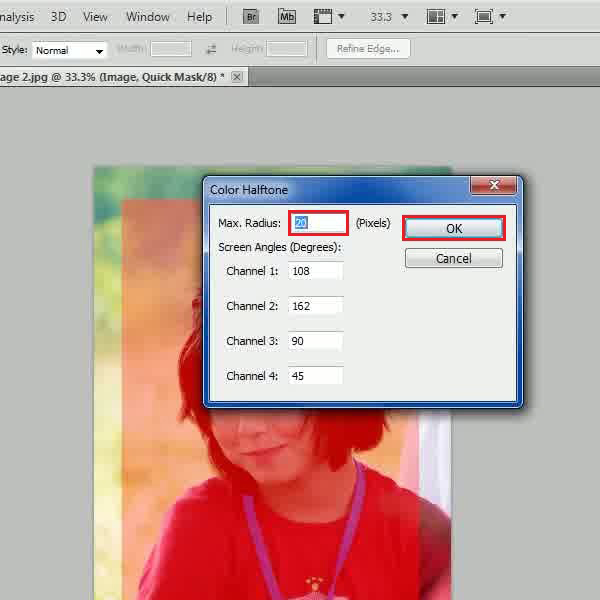
Step # 7 – Exit from the Quick Mask Mode
Now exit from the “Quick Mask” mode and press the “ALT Backspace” key on the keyboard to fill the selection with the foreground color.
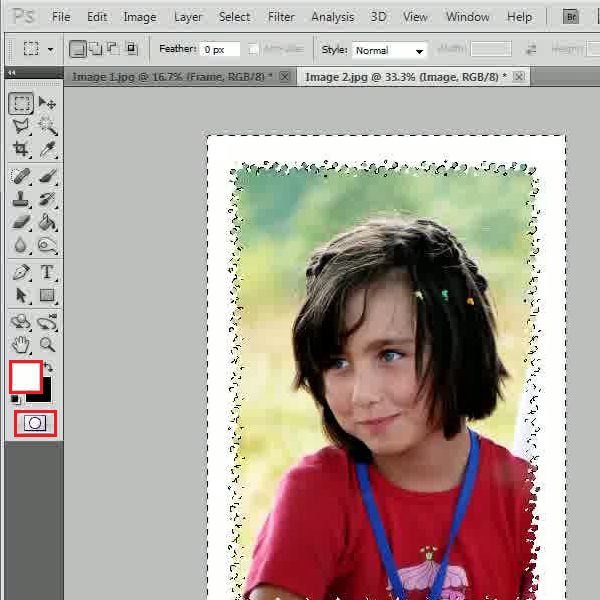
Step # 8 – Apply a Texturizer Filter
In the last step, go to the “Filter” menu, select “Texture” and click on the “Texturizer” filter from the list. In the filter’s settings panel, choose the Brick option for the “Texture”, set the “Scaling” to “100 percent”, “Relief” to “4” and click on the “OK” button to apply it on the image. Now press “CTRL+D” on the keyboard to hide the selection and you’re done.
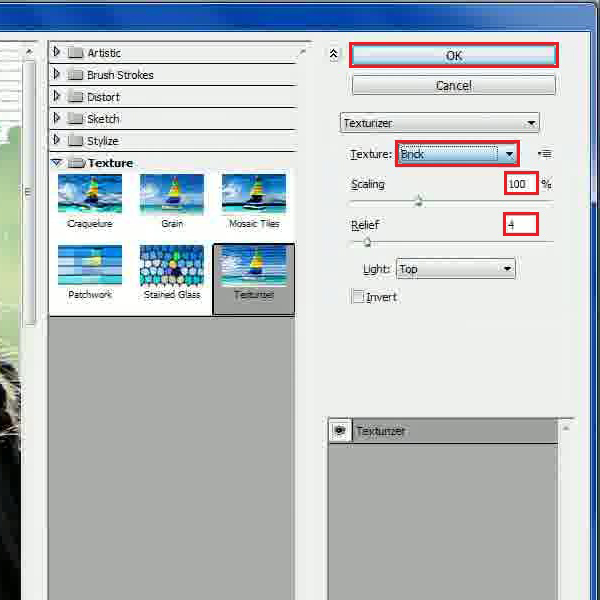
 Home
Home