What makes a website interesting and eye-catching is its display and the way of presentation. Images, colors, fonts and styles are equally important to make a web page interactive. Here we will show you a simple technique to create a nice typography by choosing an appropriate color of fonts according to the theme and display of the page. You will also learn to apply beautiful effects on text by using few gradients and blending options.
Follow this step by step guide to learn how to create elegant typography in Photoshop.
Step # 1 – Applying the Gradient Tool
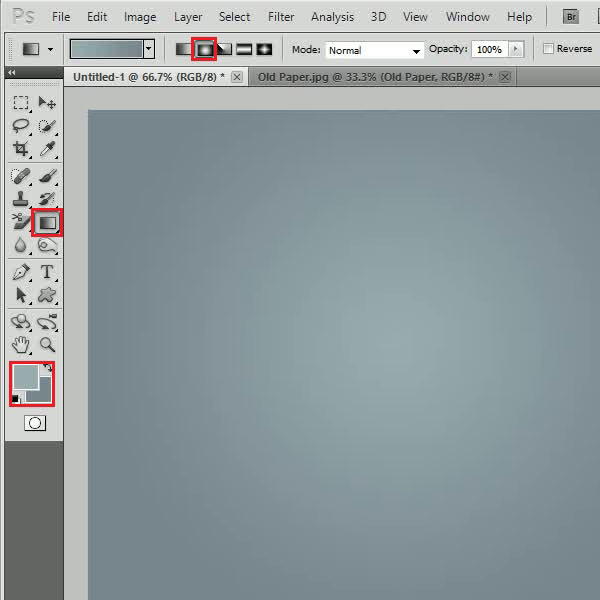
In the first step, launch Adobe Photoshop and open a new document. Now click on the “Foreground” color and set it to “9bacb1”. Similarly click on the “background” color and change it to “788790”. Once done, select the “Gradient” tool from the menu, choose the “Radial” gradient option and apply it on the page.
Step # 2 – Inserting an Old Paper Image
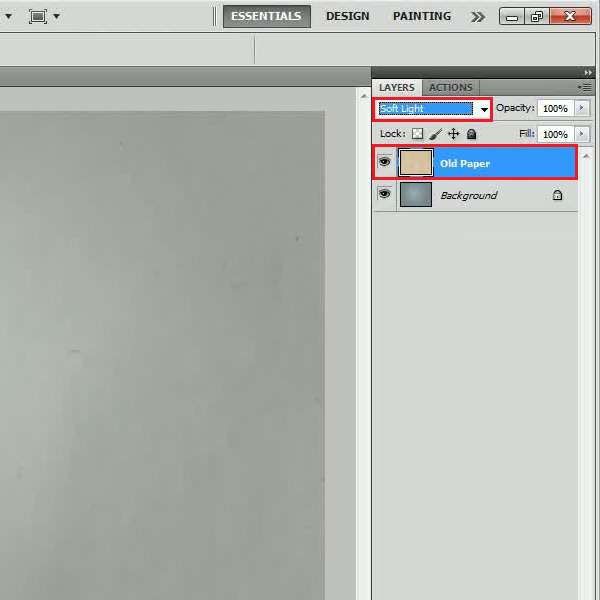
After applying the gradient, drag an image of an old paper. Now click on the “Show Transform Controls” option and adjust its size and placing according to the background. Once done, change the blending mode of this layer to “Soft Light” from the drop down list.
Step # 3 – Adding Noise
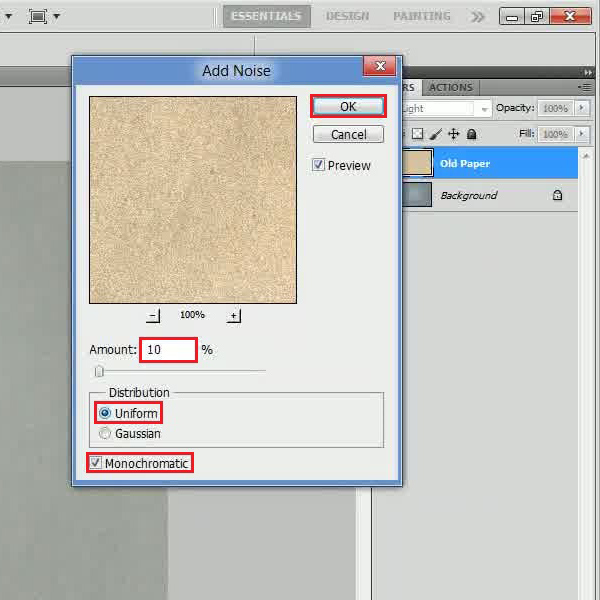
Now move over to the “Filter” menu, select “Noise” and click on the “Add Noise” filter from the list. In the filter settings panel, set the amount to “10 percent”, select the “Uniform” distribution and “Monochromatic” options. After changing these settings, click on the “OK” button to apply it on the layer.
Step # 4 – Inserting the Text
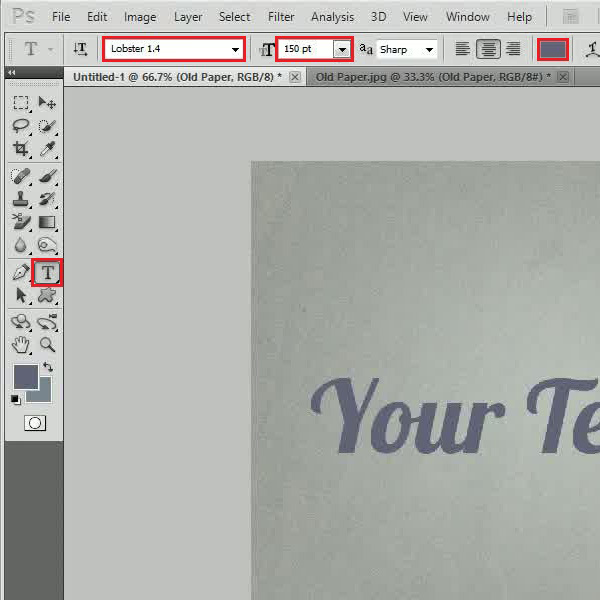
In the next step, select the “Text” tool from the menu and choose the fonts as “Lobster”. Set the font’s size to “150pt” and its color to “616376”. Once done, enter your desired text on the page. After inserting the text, drag and place it at the center of the page.
Step # 5 – Adjusting the Drop Shadow Settings
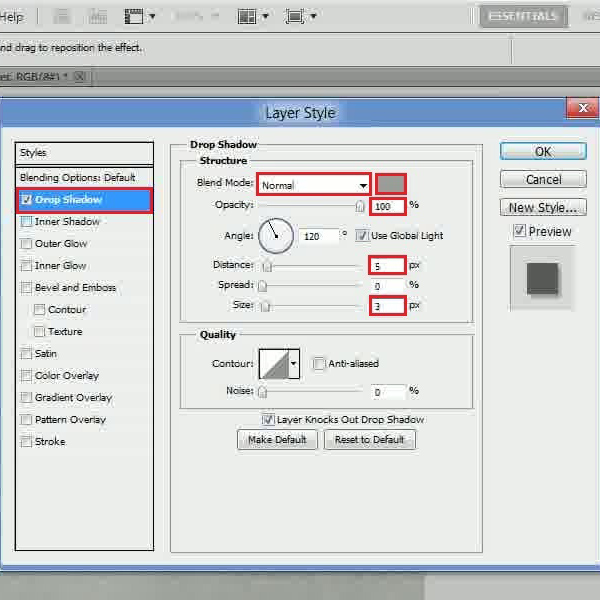
In the final step, double click on the text layer to open up its blending options. Once the settings panel has opened move over the “Drop Shadow” tab. In this tab, change the “Blend mode” to “Normal”, choose the “Color” as “9d9f9d” and increase the “Opacity” to “100 percent”. Now set the “Distance” to “5px” and its “Size” to “3px”.
Step # 6 – Applying the Inner Shadow Settings
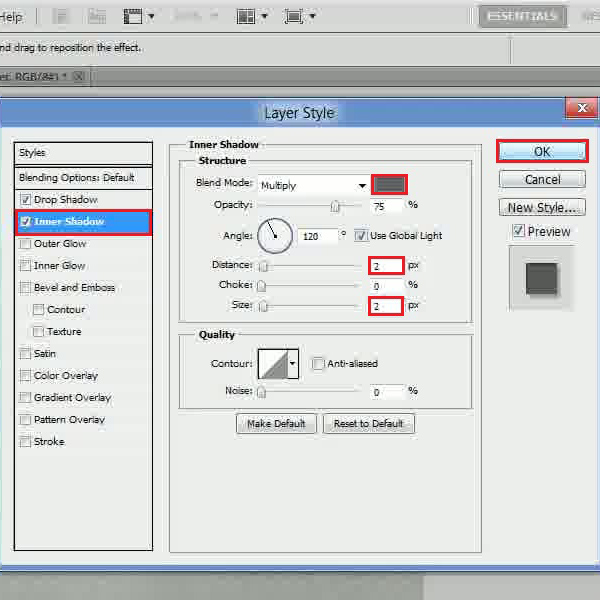
In the next step, move over to the “Inner Shadow” tab and choose its “Color” as “5f5f62”. Now set the “Distance” to “2px” and its “Size” to “2px”. After changing these settings, click on the “OK” button to apply it. Once this is done, a simple and elegant typography will be ready to use.
 Home
Home