For someone who is new to working with Adobe Illustrator, the cs5 tools that the program features can come off as a little tricky. Therefore, it always comes in handy to know a little bit about them or what they can do while you are working with Illustrator. The process of grouping different images together is very helpful when you want to treat different images existing on the page as one.
Follow this step by step guide to learn how to create groups in Illustrator.
Step # 1 – Ungroup the images
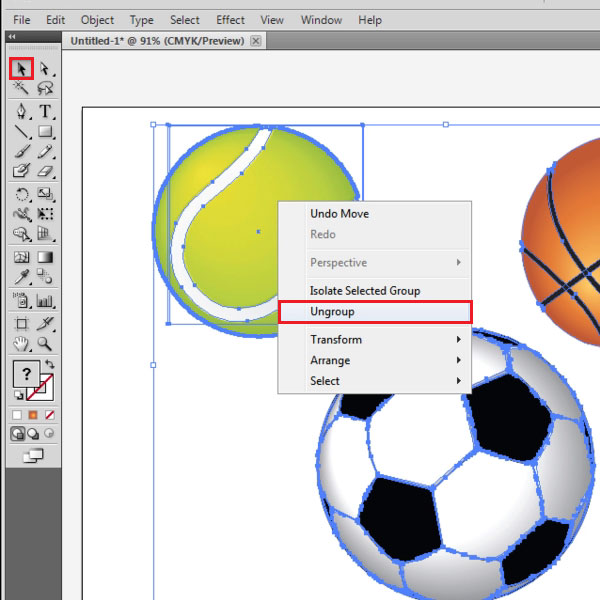
First see if an image is grouped. To do so, choose the selection tool from the tool bar. When you move one illustration, and all of them move together, it is because of the fact that all three of these images are grouped together into one
To ungroup, select the illustration and right click on it. A drop down menu will appear on your screen. Choose the “ungroup” option available on the drop down menu. When you do this, you will see that now all the images are separated. Now it is possible to move around one illustration separately without moving the others.
To further ungroup, repeat the same procedure; right click on the newly separated images and select the “ungroup” option available on the drop down menu.

Step # 2 – Alter the images
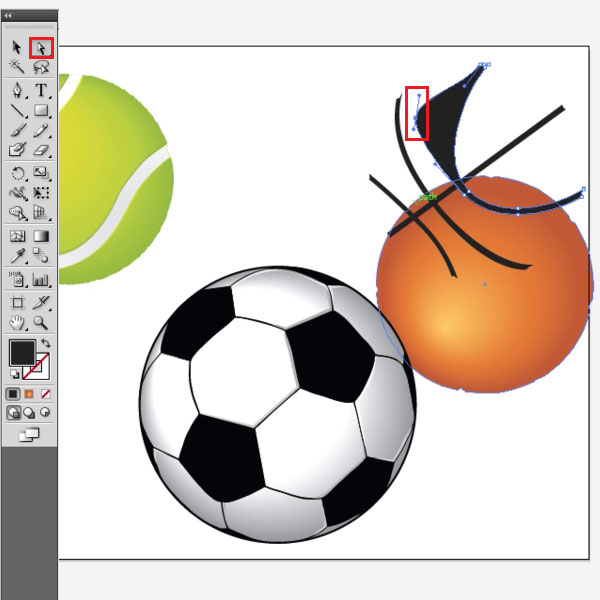
You can use the “direct selection tool” to alter the illustration. In order to do so, drag the anchor points existing on the illustrations in whatever way you want to.
By working with the “direct selection tool”, you can also move different parts of the image separately. With the help of your mouse, you can drag one part without moving the other.

Step # 3 – Re-group the images
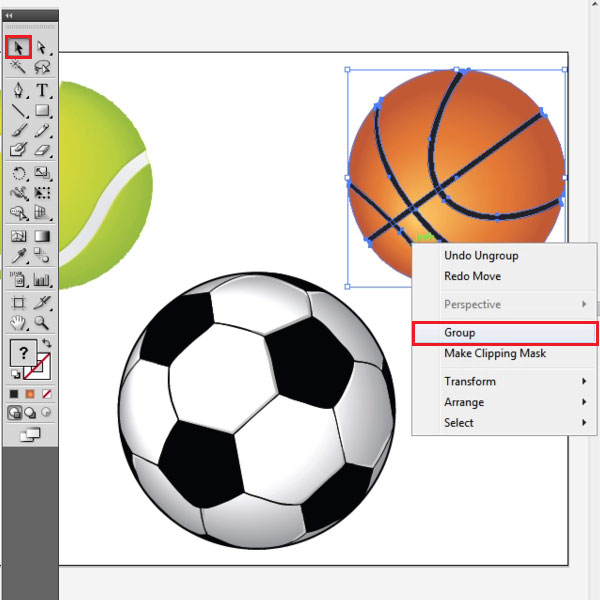
These images can be re-grouped as well. For this, hold the “shift” key down and use the “selection tool” to choose the ones you want to group together. Once you’ve selected the ones you want to group, right click and choose the “Group” option available on the drop down menu that appears.

 Home
Home