Typography is considered as the most powerful way of communication because of its intense visual impact. We can use typography and text effects in websites to bring the attention of viewers. Here we are using Photoshop to design typography by applying a nice metallic pattern over it. By going through this tutorial, you will get an idea about creating a pattern, applying it on text and background, choosing a right gradient and other beautiful effect.
Follow this step by guide to learn how to create textured typography in Photoshop.
Step # 1 – Designing a Pattern
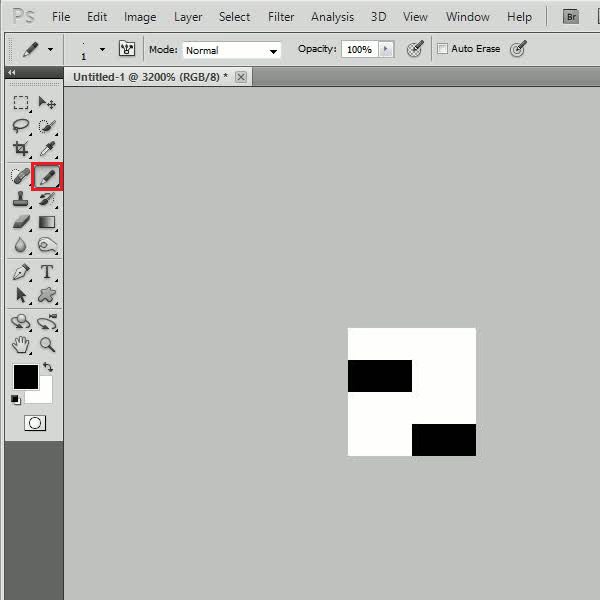
In the first step, launch Adobe Photoshop and open up a new document of 4×4 pixels in dimension and zoom in to have a clear view. Now select the “Pencil” tool and draw two half lines on the page.
Step # 2 – Saving the Pattern
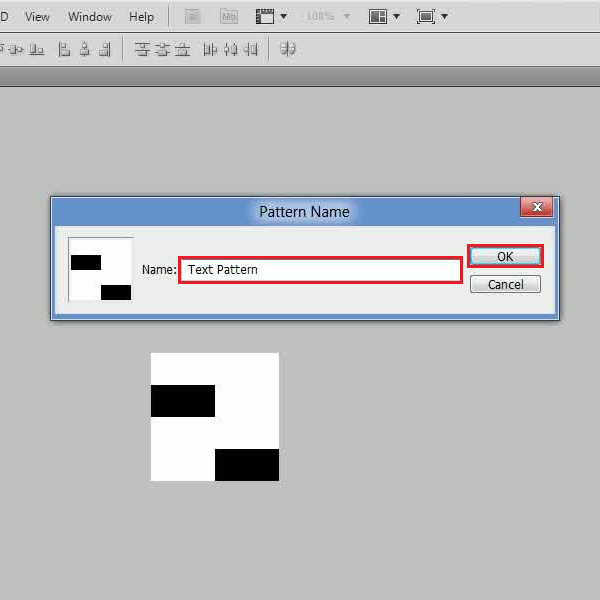
In the next step, go to the “Edit” menu and click on the “Define Pattern” option from the list. Enter its name as “Text Pattern” and click on the “OK” button to save it. Now move over to a new blank page.
Step # 3 – Inserting the Text
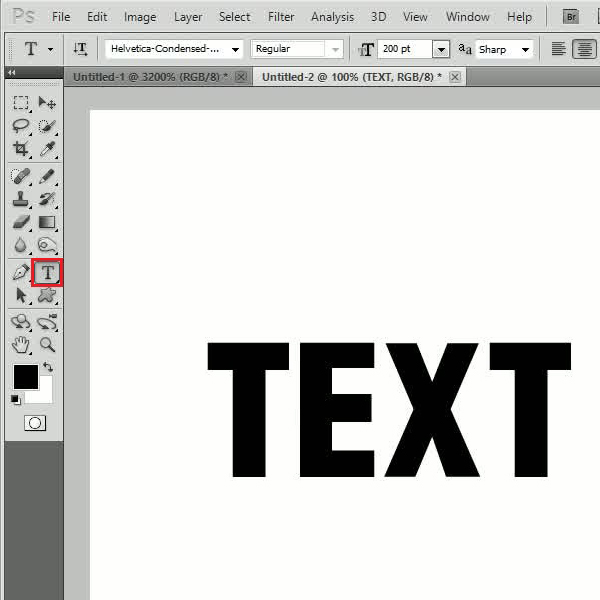
Select the “Text” tool from the menu and insert some text on the page. Once done, align it with the background and open its blending options.
Step # 4 – Adjusting the Gradient Overlay Settings
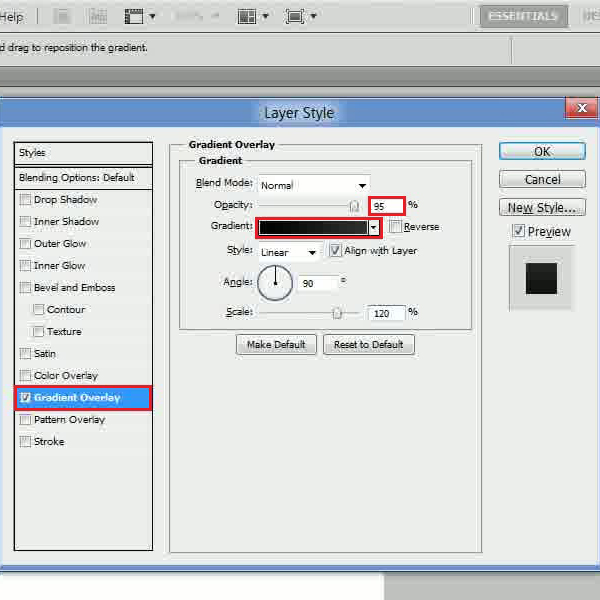
In the blending options panel, move over to the “Gradient Overlay” tab and set its opacity to “95 percent”. Now choose the right gradient as “313131” and set the scale to “120 percent”.
Step # 5 – Adjusting the Pattern Overlay Settings
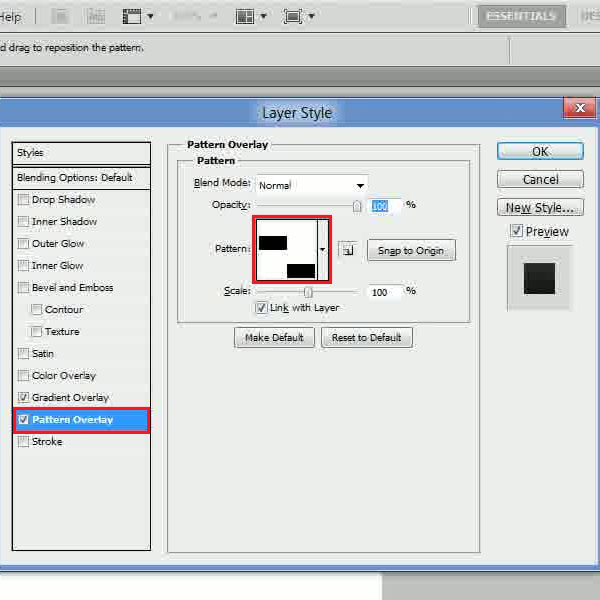
Now move over to the “Pattern Overlay” tab and select the “Text Pattern” from the menu which we have created in the previous step.
Step # 6 – Adjusting the Stroke Settings
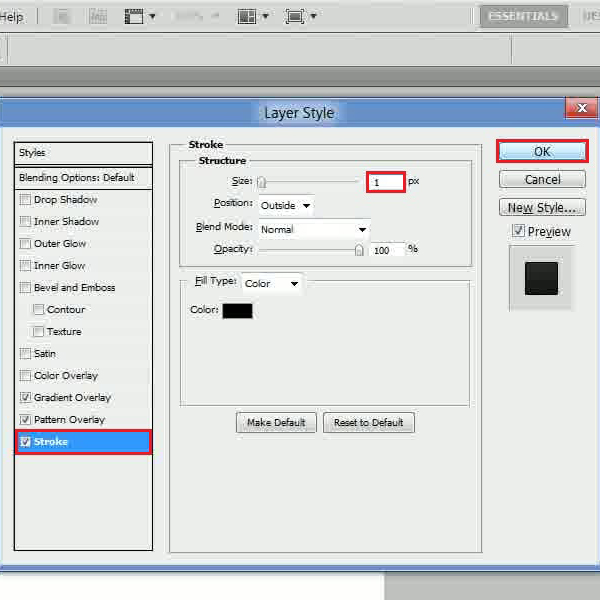
After choosing the pattern, click on the “Stroke” tab, set its size to “1px” and click on the “OK” button to apply it.
Step # 7 – Creating the Text Outline
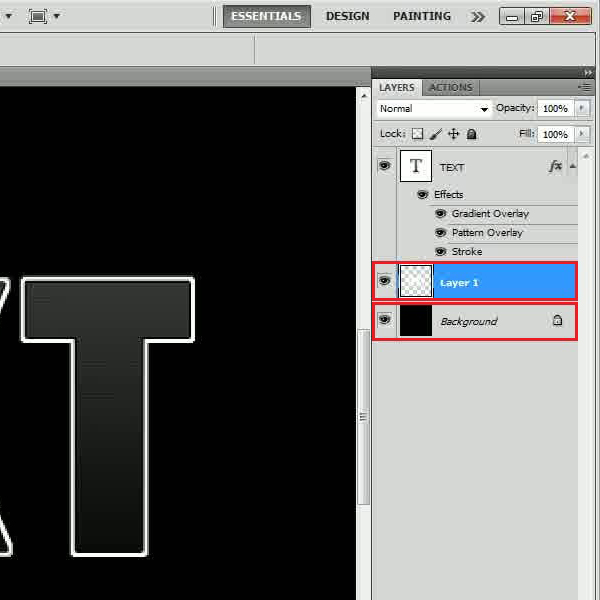
Once done, fill the background layer with black color and click on the “Text” layer by holding down the “Ctrl” key to select its outline. Now insert a new layer, go to the “Select” menu, move over to “Modify” and click on the “Expand” option. Set the expansion by “3 pixels”, fill the selection with white color and you’re done.
 Home
Home