It’s a known fact that text and content plays an important role in enhancing the credibility of a website. Professional web designers spend a lot of time in making the text as eye-catching as they can. You can also design and create your own typography and other text effects in Photoshop. Here we will show you a basic technique to create a character in the style of fire.
Follow this step by step tutorial to learn how to make fire typography in Photoshop.
Step # 1 – Opening a New Document
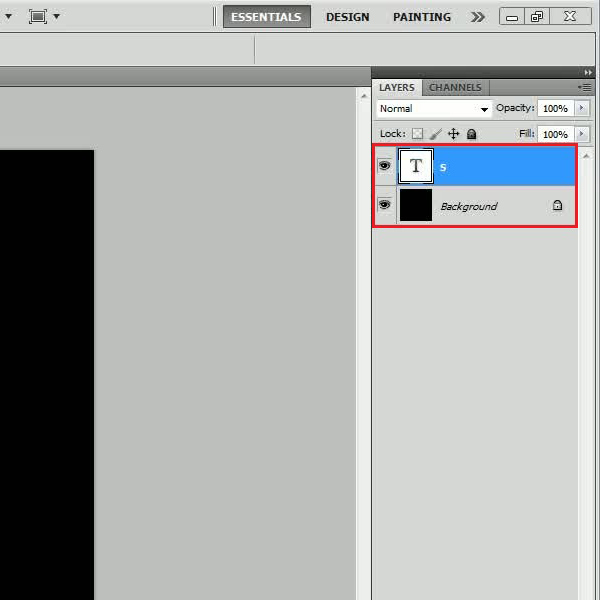
In the first step, launch Adobe Photoshop and load a new document. Fill it with Black color. Now enter any symbol or character of your choice on which you want to create the effect. Here we are using simply a character “S” in white color.
Step # 2 – Adjusting the Outer Glow Settings
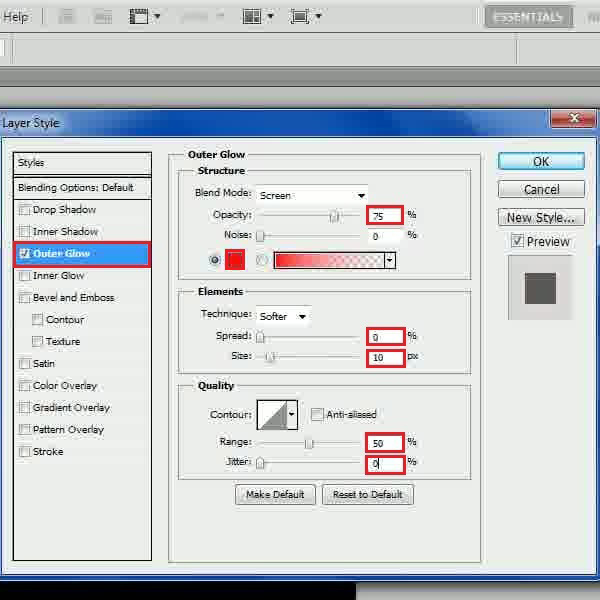
Now right click on the character’s layer and select the “Blending Options” from the menu. In the settings panel, go to the “Outer Glow” tab and choose the “Color” by entering its code as “fe0704”. Change the “Opacity” to “75 percent”, “Spread” to “0 percent”, “Size” to “10 percent”, “Range” to “50 percent” and “Jitter” to “0 percent”.
Step # 3 – Adjusting the Color Overlay Settings
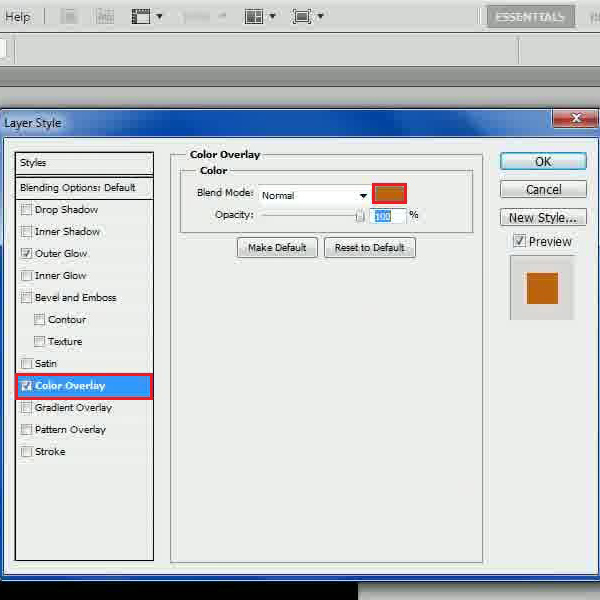
Once done, go to the “Color Overlay” tab and change the “Color” by entering its code as “bc640a”.
Step # 4 – Adjusting the Satin Settings
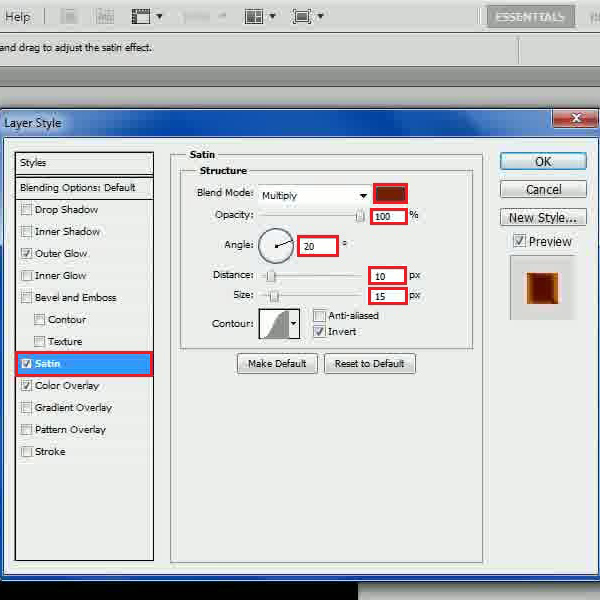
Now move over to the “Satin” tab and choose the “Color” by entering its code as “752003”. Choose the “Opacity” to “100 percent”, set the “Angle” to “20 degrees”, “Distance” to “10 px” and “Size” to “15 px”.
Step # 5 – Adjusting the Inner Glow Settings
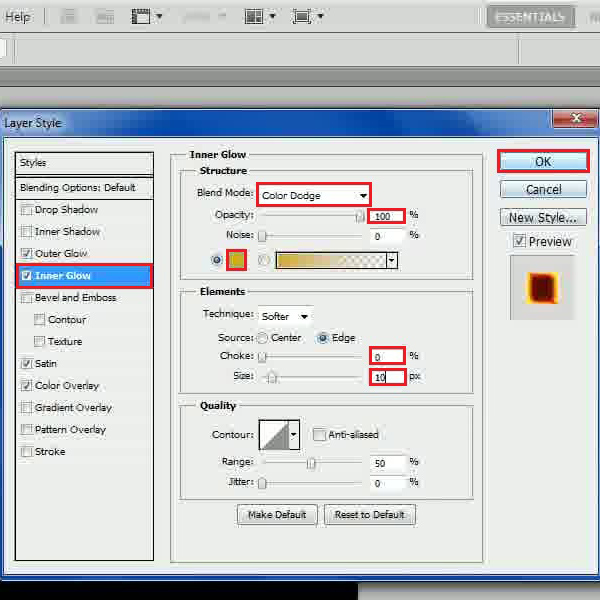
After changing the satin values, go to the “Inner Glow” tab and change the “Color” by entering its code as “d5ad12”. Now choose the “Blending Mode” to “Color Dodge”, “Opacity” to “10 percent”, “Choke” to “0 percent” and “Size” to “10 px”. After changing these settings, click on the “OK” button to apply it on the layer.
Step # 6 – Applying the Eraser Tool
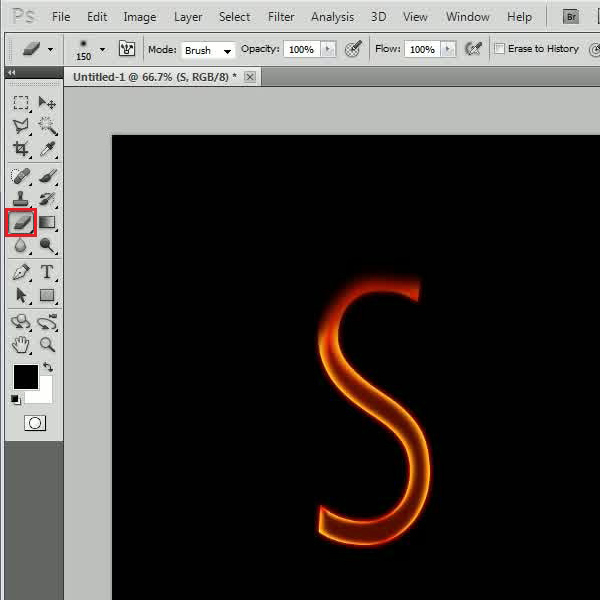
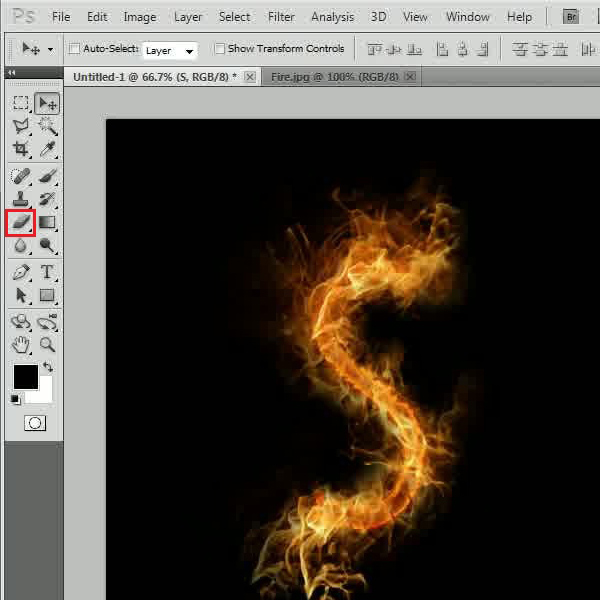
In the next step, go to the “Layer” menu, select “Rasterize” and click on the “Type” option to rasterize the layer. Now select the “Eraser” tool from the menu and change its “Hardness” to “0 percent”. Use the Eraser to slightly remove the top portion of the character. This will give a nice burnt effect.
Step # 7 – Applying a Liquify Filter
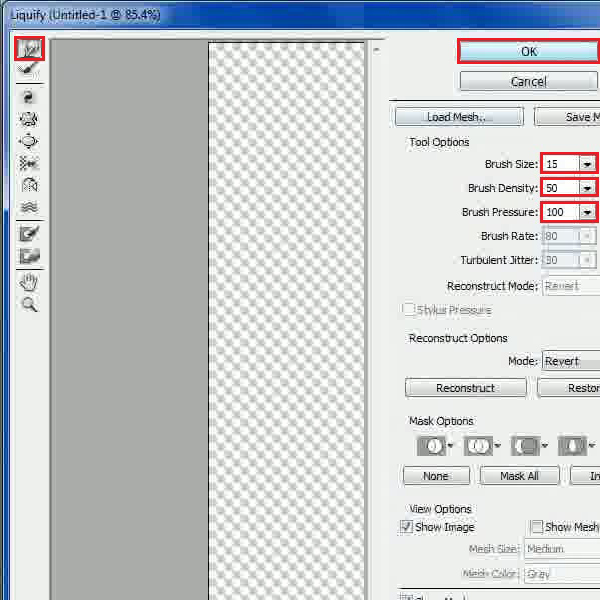
Now go to the “Filter” menu and select the “Liquify” filter from the list. In the filter’s settings panel, select the “Forward Warp” tool from the menu; choose the “Brush Size” to “15”, “Brush Density” to “50” and “Brush Pressure” to “100”. Now carefully make small cuts over the edges of the character.
After completing the forward warping, click on the “OK” button to apply it on the image.
Step # 8 – Copying a Fire Image
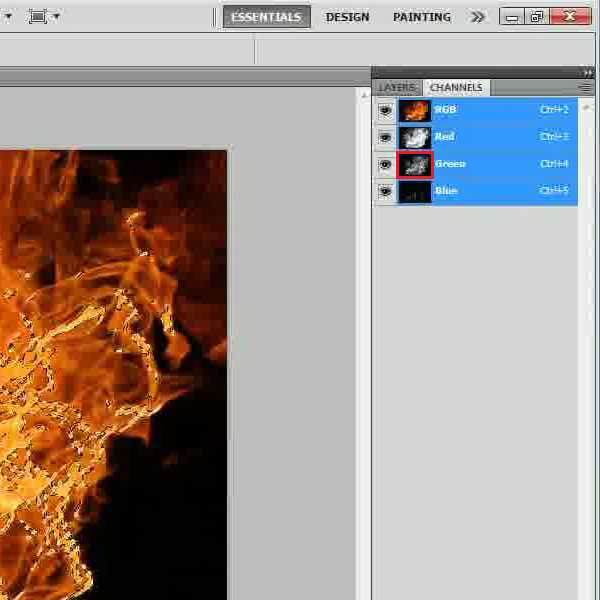
In the next step, go to the “File” menu and open an image of a “Fire”. After loading the image, go to the “Channel” tab and select the “Green” layer by pressing and holding down the “CTRL” key from the keyboard. Now press “CTRL+C” keys from the keyboard to copy the selection.
Step # 9 – Pasting the Fire Image over the Character
Now press “CTRL+V” keys from the keyboard to paste the fire image over the character. Create multiple copies of the “Fire” image and completely cover up the character by using the “Transformation” option. Select the “Eraser” tool from the menu to remove the excess fire from the image.
Step # 10 – Adjusting the Blending Mode
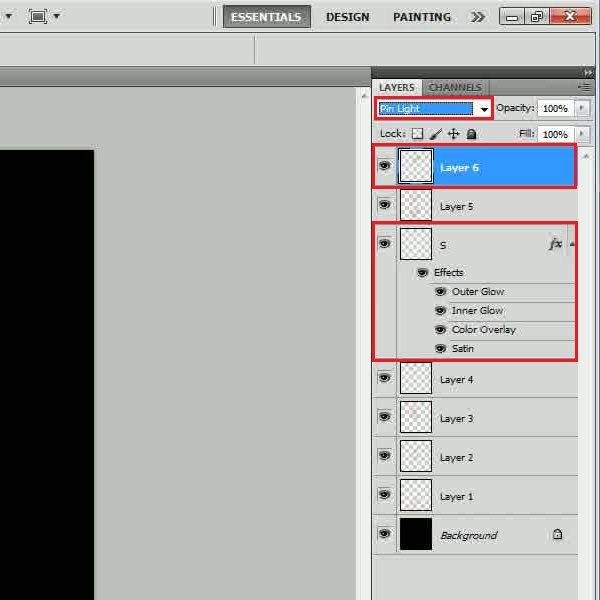
In the last step, move the character layer above some of the fire layers and change the “Blending Mode” of the top fire layer to “Pin Light”.
 Home
Home