To work on Illustrator you need to have vector images. Any normal image that you pick up from the internet or anywhere else is not a vector illustration. Therefore, to make it into one you need to trace an image in Illustrator. Tracing in Illustrator can be done by the help of the pen tool feature. It is an important tool and helps you trace an image very easily. However, it is important to note that tracing a photo in Illustrator can be a tedious task depending on its complexity. In this step by step guide, we will teach you how to trace images in Adobe Illustrator.
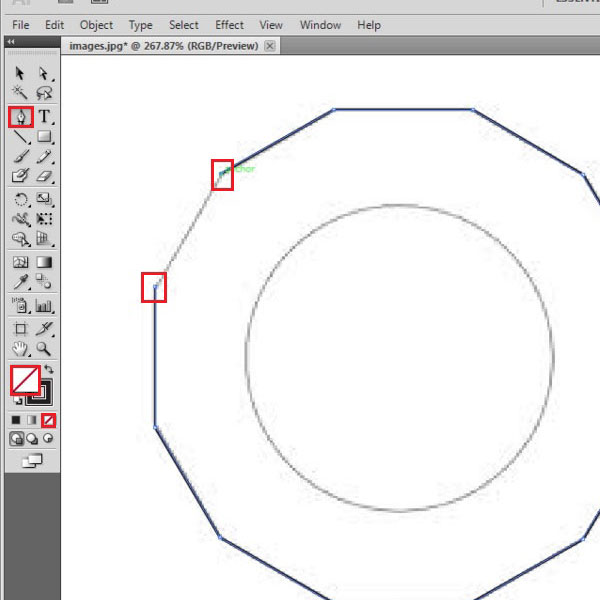
Step # 1 – Trace the linear image
First of all, there will be two paths that need to be drawn. The outside one consists of straight lines. Make sure you choose the option of “no color” so that while tracing the outline border, the inside shape does not get filled with color. Each anchor point will automatically be connected with the other unless you deselect it or close the shape. Add anchor points on every corner and trace the complete shape.

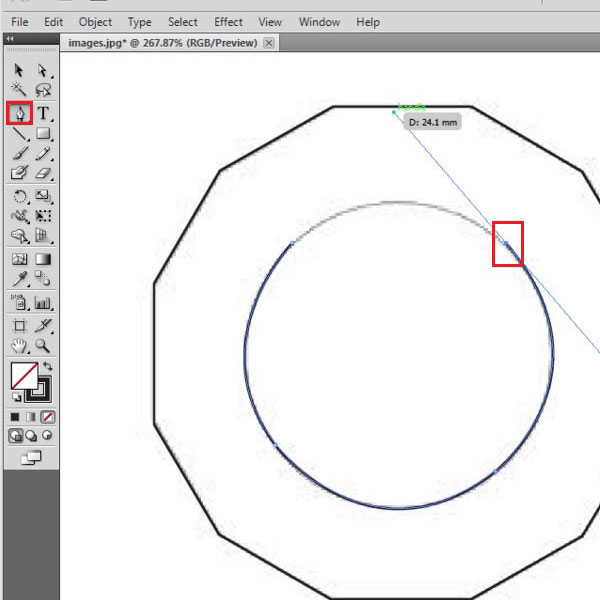
Step # 2 – Trace the circular path
Trace the circular outline to copy the complete shape. Keep pressing down on the anchor point so that the straight line turns in to a curve as shown. Once you make a circular anchor point, you can see that two lines emerge from it. They deduce the type of curve that will be created when you make the next anchor point. When you trace a circular shape, the type of curve keeps changing. Therefore, click again on the anchor point you made, remove one line and you can now make a joining curve, in whatever way you want.

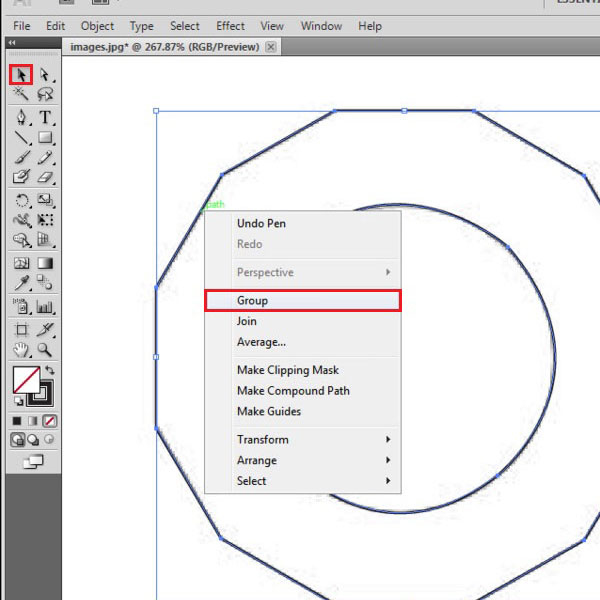
Step # 3 – Group the illustrations
Once you have made these two outlines, select these two figures by pressing the “shift” key on your keyboard and clicking on both. Right click on the selected image and select the “group” option from the drop down menu to group the two as one. This will join both of them into one.

 Home
Home