You can use a number of image manipulation techniques to enhance the image in Photoshop. We will use different stock photos and brush packs to manipulate the image of a simple bottle and add a fresh splash to it along with a number of other effects.
Follow this step by step tutorial and learn how to design a beverage ad in Photoshop.
Step# 1 – Open up a new document and fill the background
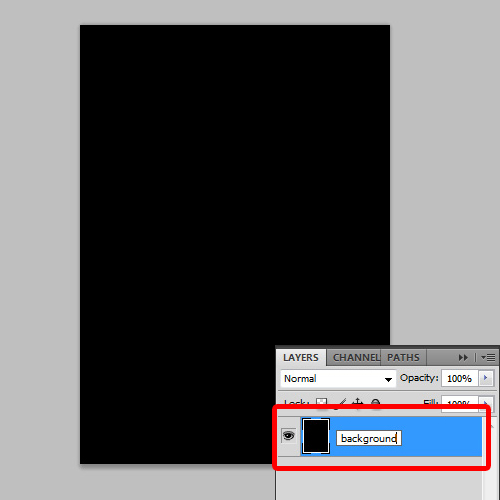
First of all, open up a new document, keeping A4 for the size and a transparent background. With that done, fill the background with black color. After that, you can name the layer “background”.
Step# 2 – Cropping out the bottle from the background
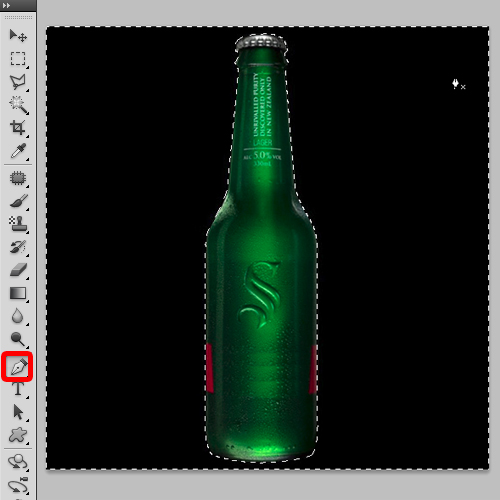
Next, we will open up an image of a bottle. You can easily find such stock photos by searching at sxc.hu. Once the image has been imported, use the pen tool to make a selection around the bottle and separate it from the background. You can use the polygonal lasso tool for this as well, but for this tutorial we will stick with the pen tool. Once the entire selection has been made, there are many ways in which you can separate the bottle from the background. For this tutorial, we will make an inverse selection, by pressing CTRL I, and removing the background.
Now bring the image in the project you are working on, increase the size and position it right at the center of the canvas. Do remember to rename each layer as you progress.
Step# 3 – Making a reflection
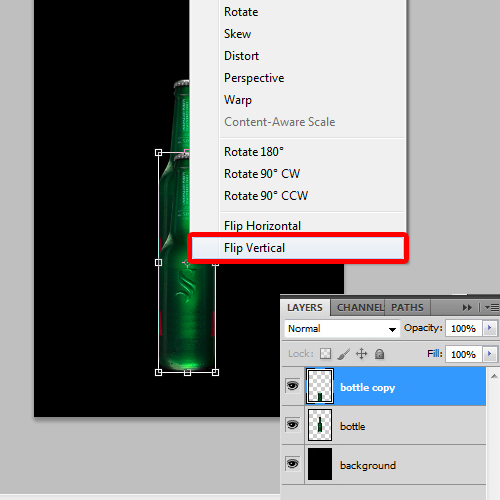
To create a reflection of the bottle, we will duplicate the original image, press “Ctrl+T” to transform the image, right click and select the “flip vertically” option from the menu. With that done, we will position the image right at the bottom.
Step# 4 – Remove the extra area around the bottle
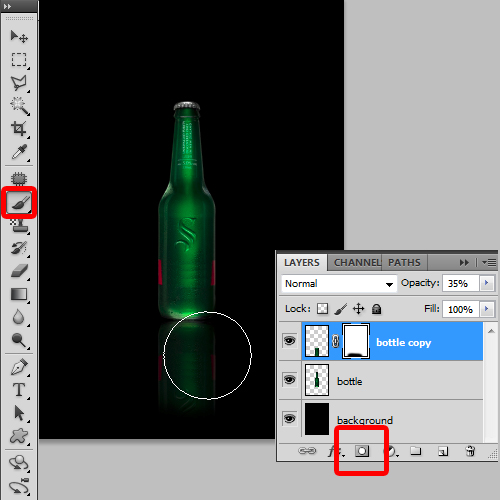
Next, we will decrease the opacity of the layer to 35% and create a layer mask. With that done, pick up the brush tool, and over here, notice that we have black color selected for the fill, which is the same color as that of the background. Now carefully remove parts of the bottle at the bottom. You can even change the opacity of the brush tool and apply a bit over the image, to blend it with the background and make it look like a reflection.
Step# 5 – Add Splash Stock Photos
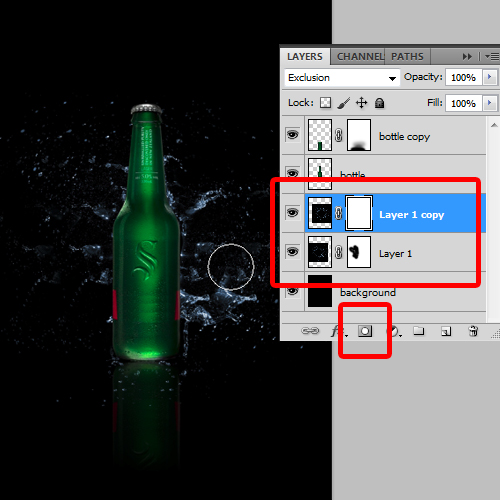
Once the reflection is created, we will add splash images to the background. All of these images that we will import are stock photos and can be downloaded from the same website, that is, sxc.hu. So open up the first splash image and bring it on to the canvas. Now position the layer below the bottle layer and change the Blend mode to “Exclusion”. With that done, transform the splash image, increasing its size and positioning it behind the bottle. You can play around with the stock photos and add effects in a number of ways.
Now add a layer mask to each of the splash image layer, pick up the brush tool, having the same color as the background, and apply the brush on the image . We will use different sizes for strokes and opacity levels to make the effect more realistic.
Step# 6 – Using the brush tool
Keep adding more images, and play around with the concept a bit till you are satisfied with the results. We have used multiple splash images for this tutorial.
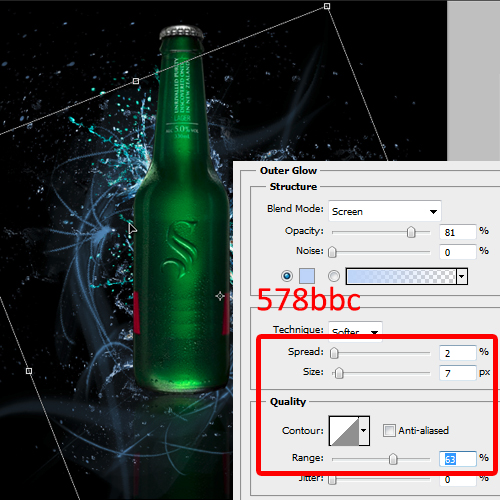
Next, we will work with the brush tool. For this tutorial, we will use the Light storm brush pack and apply it on the image. You can download this free brush pack from brushlovers.com. For this tutorial, we will choose “578bbc” for the color fill and apply the brush towards the bottom of the bottle using strokes of different sizes. The idea is to follow the pattern of the splashes.
Next duplicate the layer and invert the image. Now add a layer mask and remove the excess strokes from top to bottom.
With that done, go to the blending options and select the outer glow option. Over here, change the color to “578bbc”. With that done, increase the size to 7 pixels and range to 63 %.
Step# 7 – Adjust the color
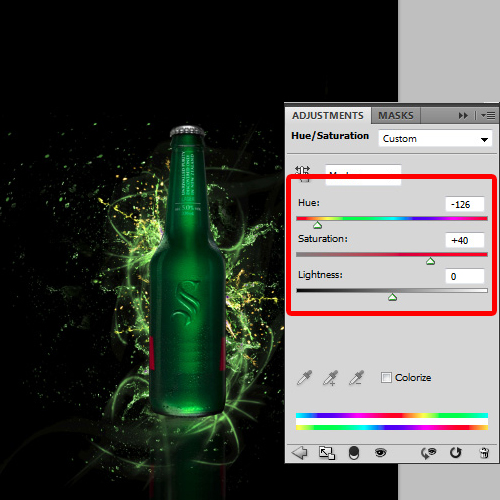
Now add a Hue/Saturation layer and adjust the level of hue so that the overall look becomes green, following the color of the bottle. At the end, increase the level of saturation to enhance the brightness. You can test different values to see what looks good on your image.
Step# 8 – Using the pen tool
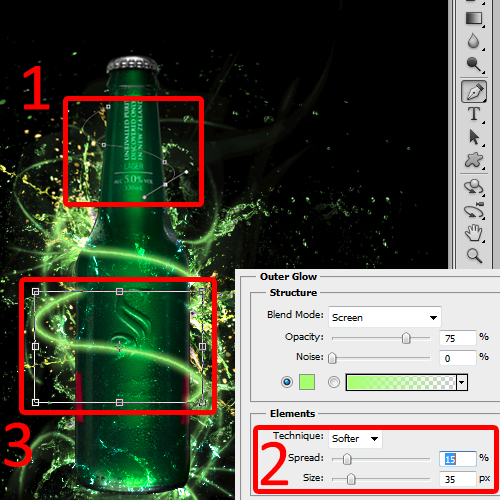
Lastly, we will use the pen tool to create waves around the bottle. Once we have made a selection, we will go to the blending options and add the outer glow effect. Over here change the color to “c1f258”. With that done, we will increase its spread to 15 % and size to 35 pixels.
After that, duplicate it and transform it multiple times to cover the rest of the bottle.
Step# 9 – Insert the text
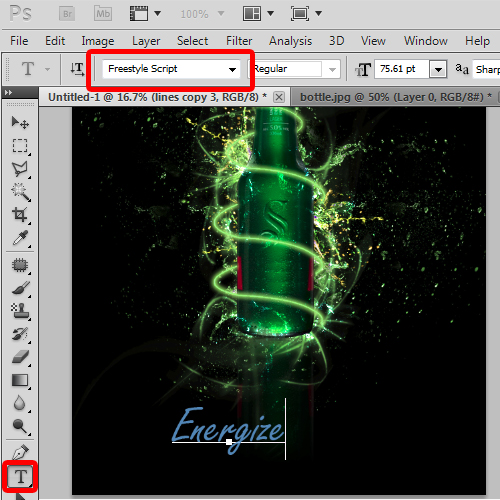
At the bottom of the bottle, we will use the type tool to insert the tagline. For this tutorial, we have used “Freestyle Script” for the font, using white for the font color.
And that’s it. Our beverage ad is complete.
Resources:
Splash 1 (used to be on sxc.hu)
Splash 2
Phobia Brush Pack
 Home
Home