One of the most useful tools in Photoshop is the brush tool which can be used to create interesting textures and patterns. Sometimes, brushes are not of the quality or the look we want to use. Fortunately, we can create our own brushes in Photoshop. To create a brush, we have to define a brush preset first. You can create brushes using different shapes or images and later, can add options to the brush to create a dynamic effect.
Check out the simple steps to learn how to define brush presets in Adobe Photoshop.
Step 1 – Create a brush
First of all, let’s pick up the custom shape tool and select a shape from the panel over here. In order to define a brush preset in Adobe Photoshop, we need to draw a shape that we want as the brush. The shape must be made on a blank document with no background. So first of all, let’s pick up the custom shape tool and select a shape from the panel over here.
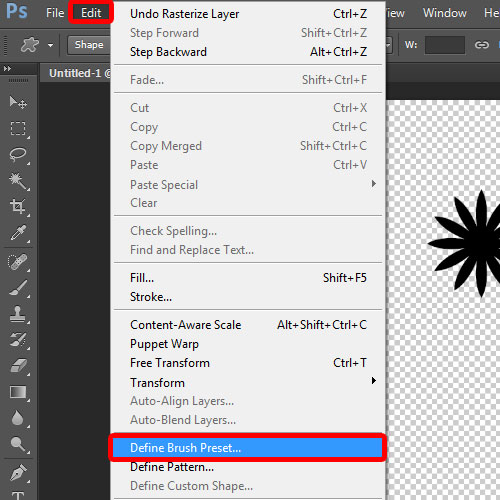
We will basically use this object to define brush patterns. For that, we would have to first rasterize the layer.
After that, we will move to the edit option and select the “define brush preset” option from the list.
Step 2 – Name the brush
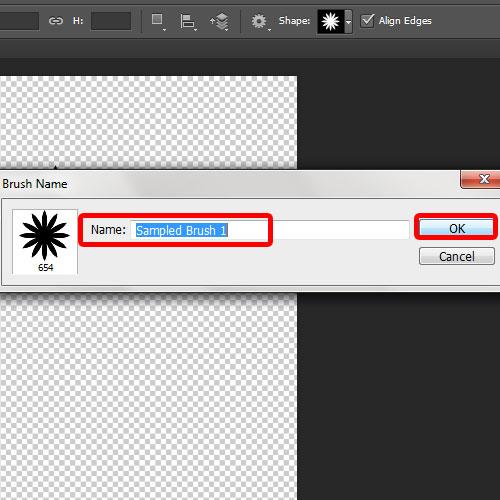
Now you can name the preset and click on the OK button to move on with the process.
Step 3 – Apply the brush
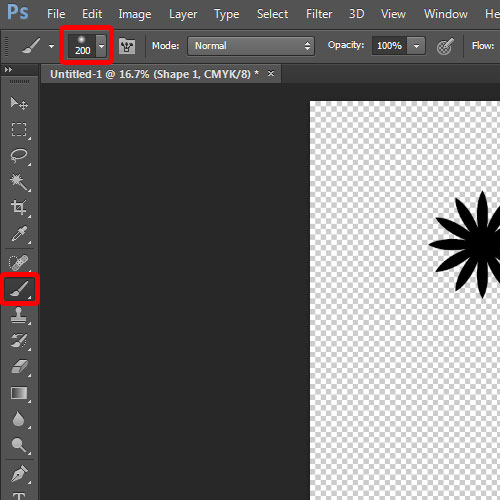
With that done, the shape will turn into a brush. You can pick up the brush tool and select the recently added brush from the panel on top. Now you can apply the brush on the canvas using different sizes.
Step 4 – Add more options to the brush
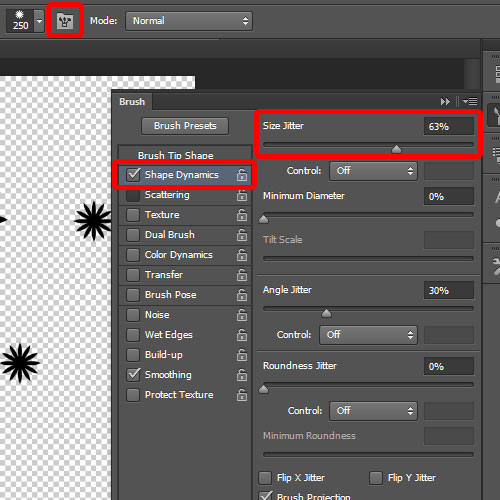
Furthermore, we can add a few more options to the new brush. For that, we will go to the brush preset window which can be accessed by clicking on this icon over here. Now we will select the “Shape Dynamics” option and over here, we will set the “size jilter” to 63%.
Step 5 – Add scattering option to the brush
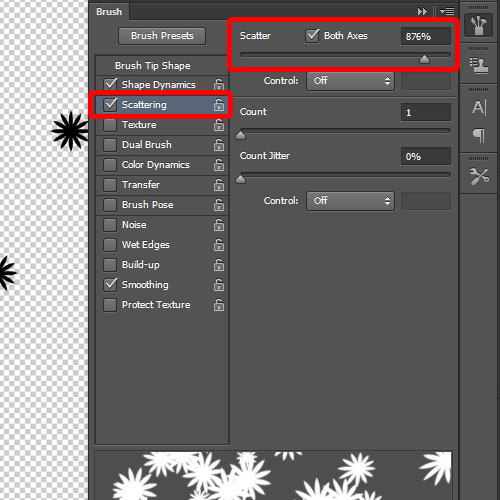
You can basically edit how the brush would be applied through the many options over here. For example if you want the brush to scatter once applied on the canvas, then activate the “Scattering” option over here and adjust the scatter bar according to your requirement.
Step 6 – Add different level of opacity
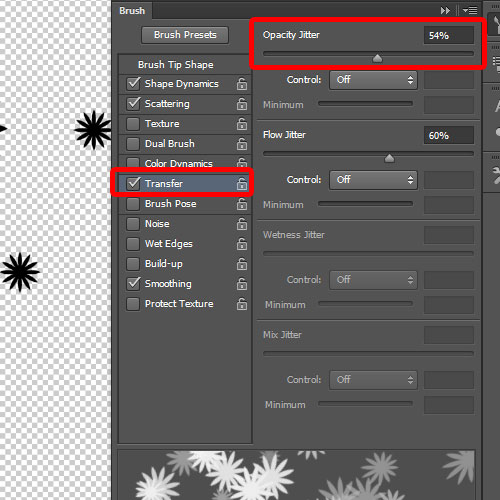
Last of all, we will go to the “transfer” option and set the opacity jitter to 54%. This is so that once the brush is applied, the objects would be scattered all over the canvas, but each object would have a different level of opacity. This would give more dynamics to your artwork.
Step 7 –Apply the brush in different color and size
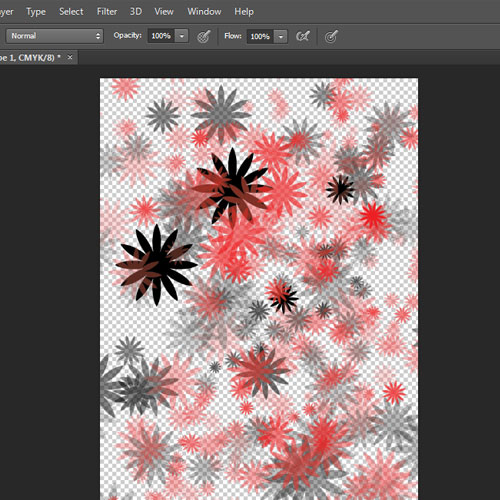
Now you can use the brush by simply moving the mouse and clicking on the canvas where you want the brush to be applied. You can also increase or decrease the size of the brush and change its color as well.
And that’s basically how you can define brush patterns in Adobe Photoshop.
 Home
Home