Illustrator pathfinder provides a set of options, through which you can bring changes to your shapes. These shapes can be created by the pen tool or the shape tool. In cs5 Illustrator the pathfinder options can be used to alter the existing paths of shapes according to your own requirement. Therefore, while using Illustrator, knowing how to use pathfinder options in Adobe Illustrator can work to your advantage.
Step # 1 – Opening the pathfinder options
To open the path finder options, go to “window” on the menu panel. Scroll down and click on the option titled “pathfinder”. A pop up panel appears on the screen. Over here, you have six pathfinder options.
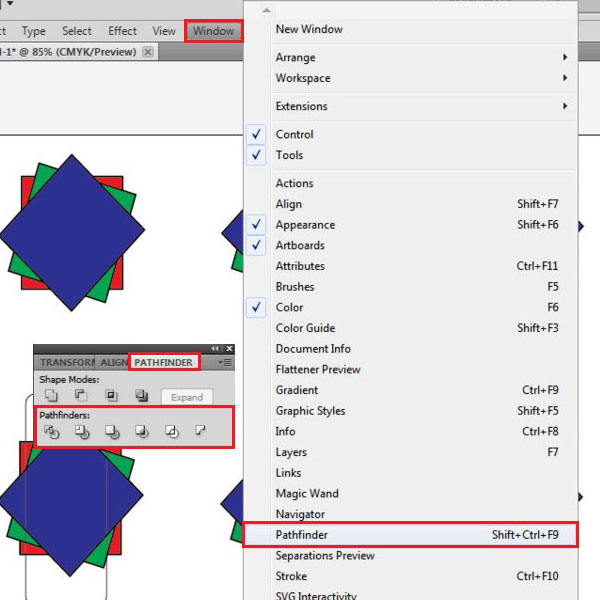
Step # 2 – Selecting the “divide” option
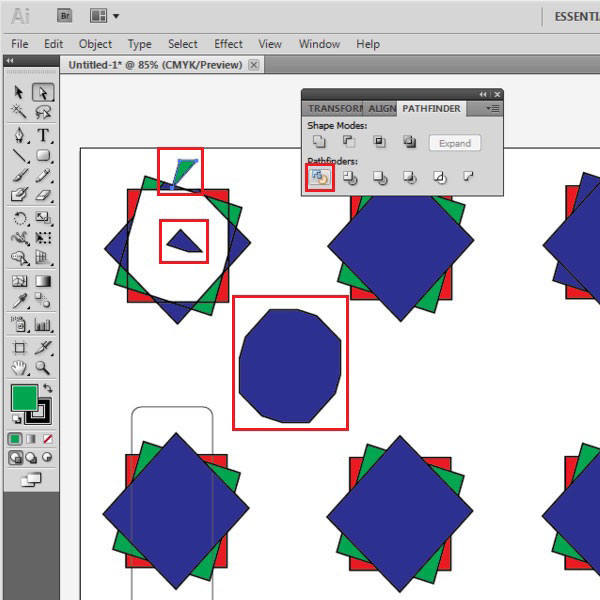
The first option is titled “divide”. To apply this, select the first illustration. Go to the tool panel and choose the “direct selection tool”. When you select this object, you can see that each part of it is divided or separated. You can move them separately. Press undo, that is “ctrl + z”, to bring it back to its original position.
Step # 3 – Choosing the “trim” option
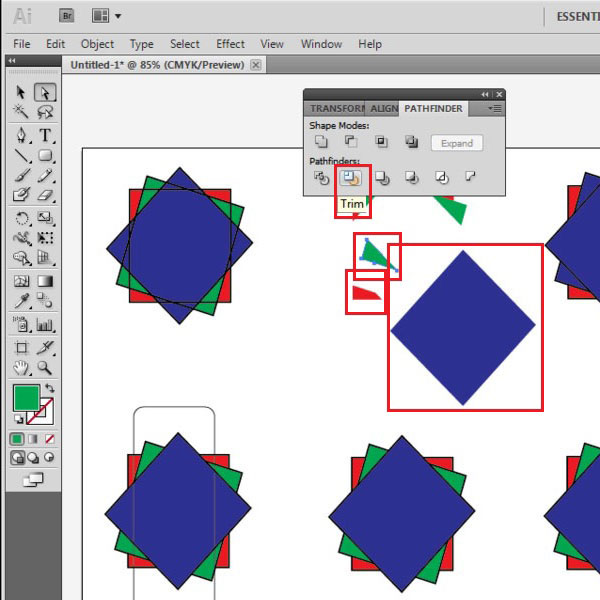
Now, select the second object to apply the other pathfinder option to, titled “trim”. This removes the strokes on the shape. When you move it, you will realize that it has trimmed the object where it was overlapping. The shape on top is the only one that remains completely intact.
Step # 4 – Selecting “merge”
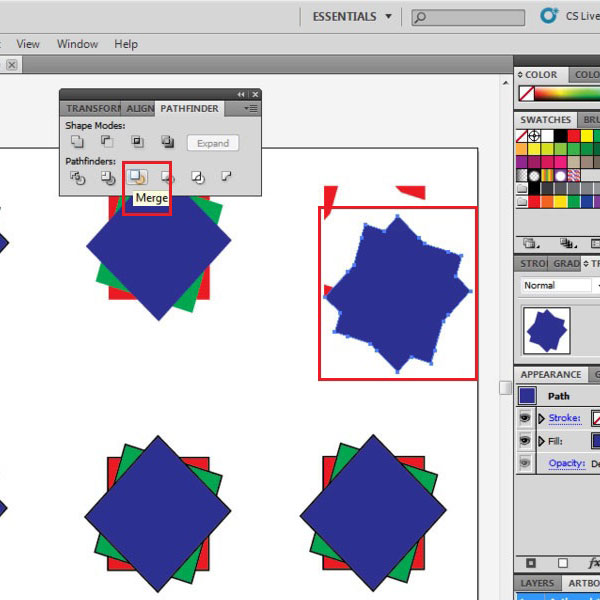
The third option is titled “merge”. This basically does the same thing as “trim”, with an additional feature. After you apply it on the object, it gets rid of the stroke, trims the overlapping shapes, but also merges the shapes with the same color. Now, if you move it with the “direct selection tool”, you can see that the ones with the same color will now be one whole shape.
Step # 5 – Cropping the illustration
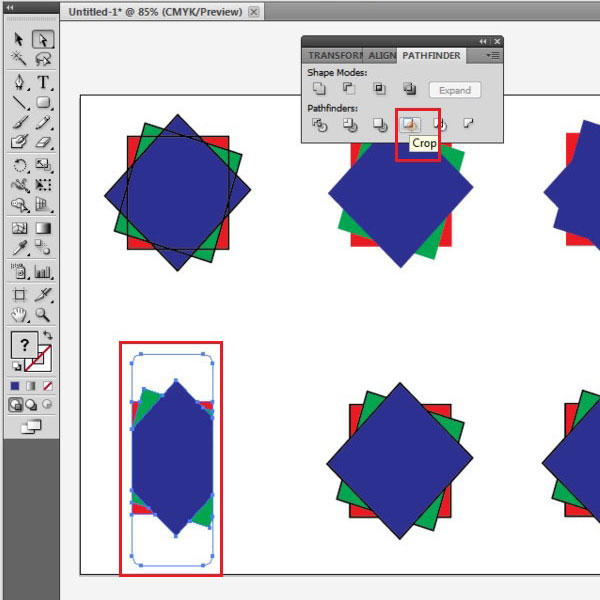
The “crop” pathfinder option can be used to cut and work on only a certain portion of any illustration. See this image. Select it, and press the “crop” option. This removes those parts of the image, that fall outside the one on the top. Anything outside the rounded rectangle will be cropped out.
Step # 6 – Creating an outline of the illustration
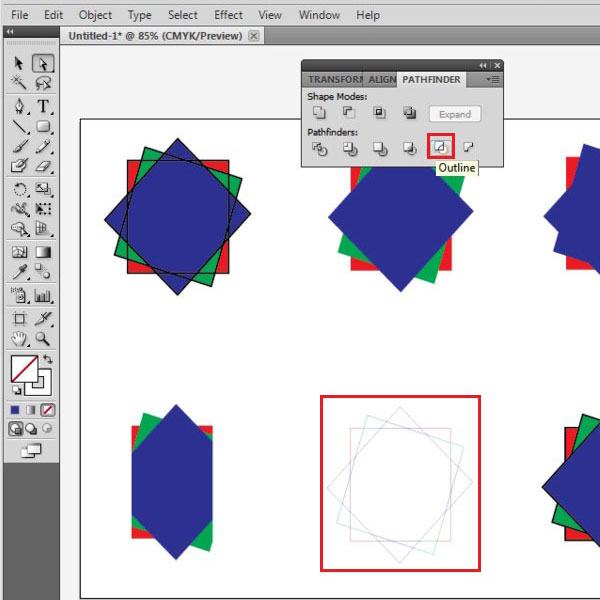
Another pathfinder option is “outline”. Apply it on this illustration. This removes the inside fill in the object, and the stroke that now emerges is of the color fill that was in the image.
Step # 7 – Selecting the “minus back” option
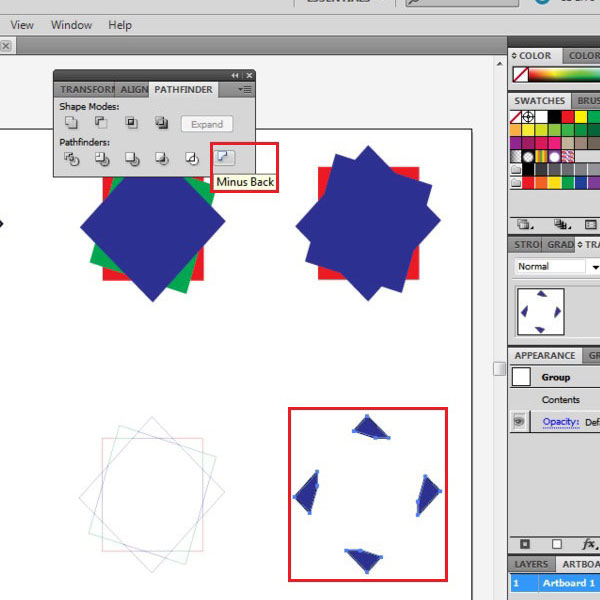
The “Minus Back” option can be used to get rid of the parts of the object that are at the back. To get a better understanding of how this works, select the illustration and press this option. As you can see, the portions of the image that were at the back get removed. Even those portions of the front image that were overlapping with the back ones disappear. This over here includes the major body of the front rectangle. Press undo, to bring it to its original spot.
 Home
Home