Knowing how to use the shape builder tool in Adobe Illustrator can be very helpful while creating images. In Illustrator cs5 the shape builder tool can also act as a shortcut while making drawings. Understand how to join illustrator shapes using this tool by following the steps given below.
Step # 1 – Bringing illustrations next to each other
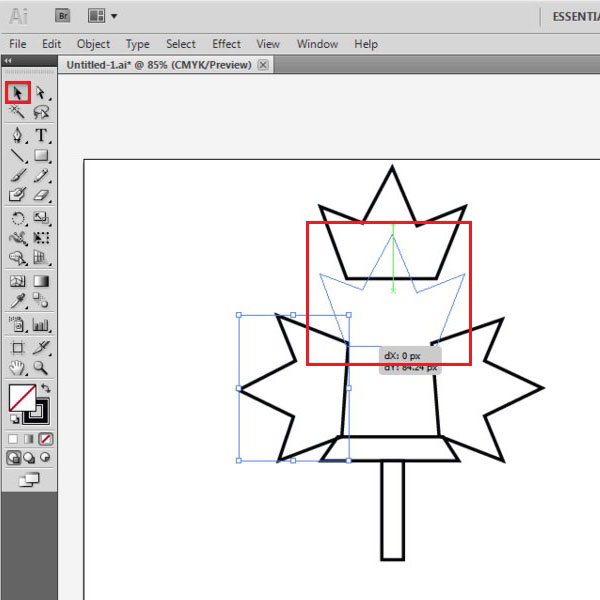
Now use the selection tool. First drag these images closer so that the different regions are next to each other. Make sure, your place them in such a way, that a certain part of each overlaps the other. Otherwise, this tool will not join them.
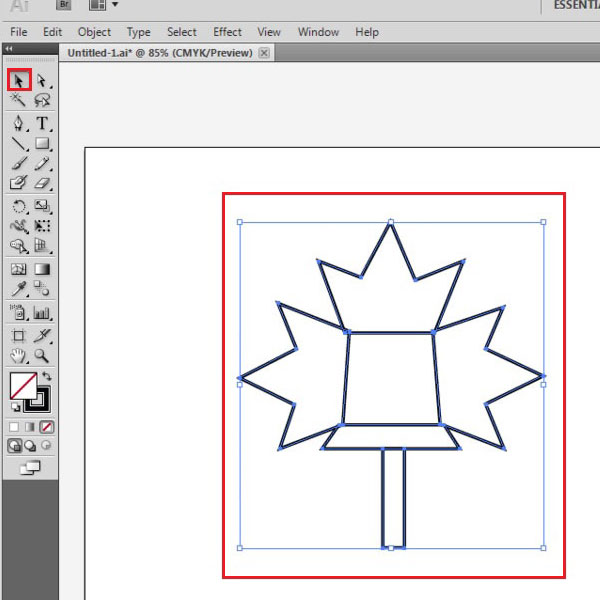
Step # 2 – Selecting all illustrations
Choose the illustrations you intend to work upon. To select multiple illustrations, keep pressing the “shift” button, and click on the images that you wish to select. In this case, we will choose all the images.
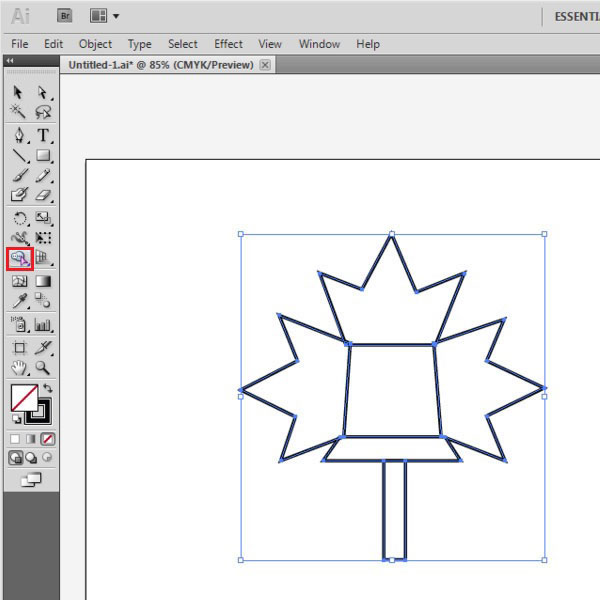
Step # 3 – Choosing the shape builder tool
Once the previous steps have been completed, click on the shape builder icon. See how a positive sign appears under the arrow now. Bring it on any region, and you can see that it acknowledges these different regions now.
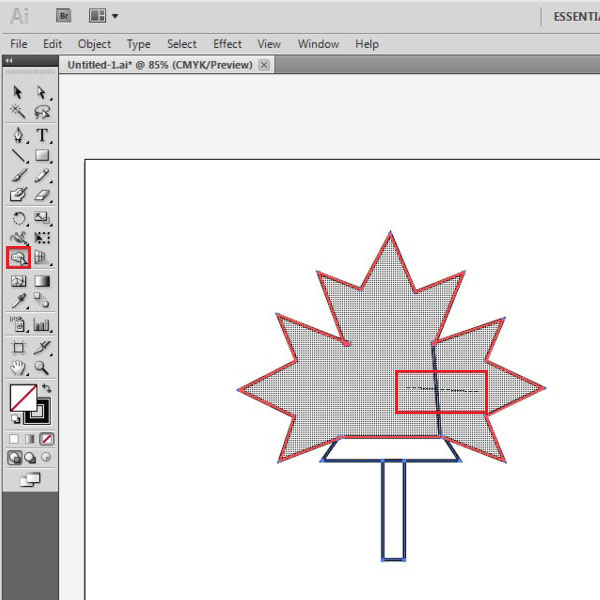
Step # 4 – Merging the shapes
Keep pressing the arrow and drag it across the shapes that you wish to join.
This line that is produced is a straight line. It cannot be changed into a curved one. Hence, you cannot make a circular merger; and you have to do it by the means of several straight lines. If you try to join these diagonal images, you will be unable to do so. This is because, it only does so if there are borders overlapping or the shapes are intersecting. You must merge all the shapes to form a single one.
Step # 5 – Opening the shape builder tool options
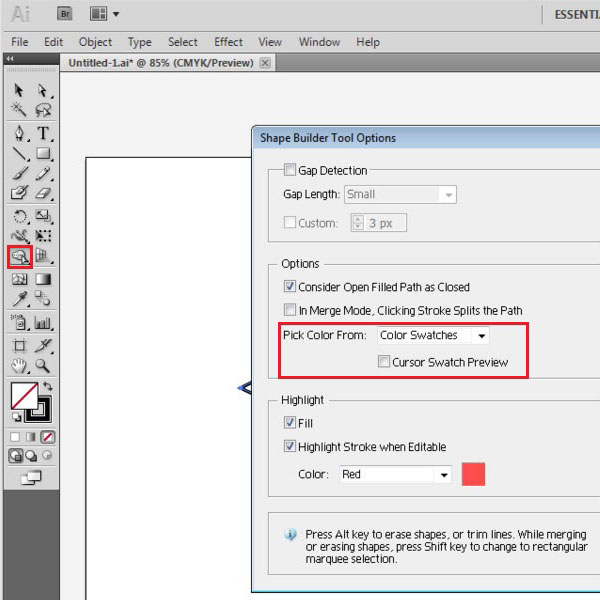
There are also other options present in the shape builder tool that you can choose from. Double click on its icon in the tool bar and an option menu will pop up. You can switch on the gap detection option, which allows it to join objects that are not even touching each other.
Another option below allows you to pick color, from either the art work or the color swatches. Click color swatches and check the box to preview them.
Step # 6 – Using the color swatches
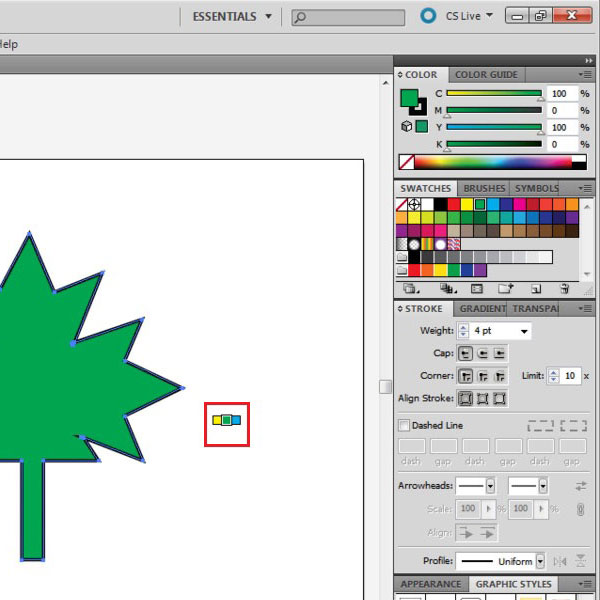
On your cursor you can see three boxes on top of your arrow. These are the color swatches. Pressing the right key on your keyboard will keep shifting the colors in the order which is on the color swatch panel on the right. Clicking on the image will fill it with the color of the middle box on top of the arrow.
Step # 7 –Removing the image
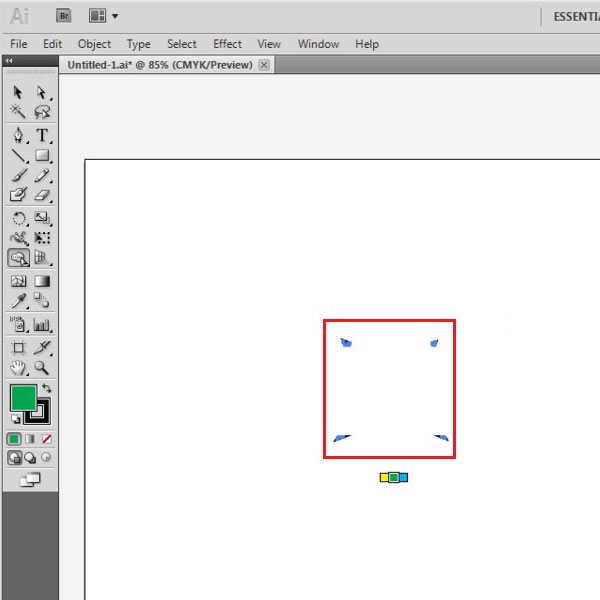
An image can also be removed once it has already been merged. To do this, keep pressing the “alt” function on your keyboard. When you do so, you will see that a negative sign appears below the arrow. Clicking on the image now removes it. As all of the shapes have been merged together, the whole illustration disappears. Undo this by pressing “ctrl + z” to make it return to its original place.
 Home
Home