Photoshop can be used to make different emoticon and smileys from nothing by just using various tools. Working in this software seems difficult at first but once you know your way around its tools you can end up producing amazing results and effects. Various illustrations of emoticons and smilies can be created for your designs in Photoshop.
In this tutorial, we will teach you how to make a smiley from scratch in Photoshop.
Step 1 – Make a shape
First of all, pick up the ellipse shape tool and draw a circle on the canvas. Once done, align the circle to the center of the canvas.
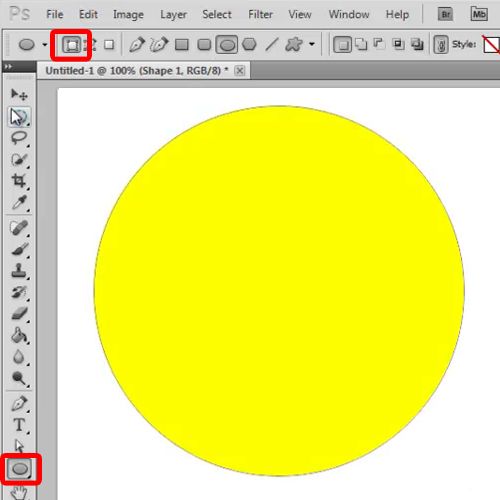
Step 2 – Alter the layer style
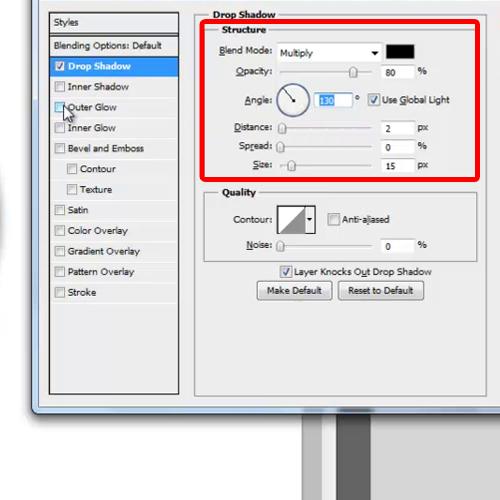
Now open up the Layer Style options of the shape layer and move over to the Drop Shadow tab. Change the opacity to 80%, angle to 130 degrees and size to 15 pixels.
Step 3 – Add the Inner glow effect
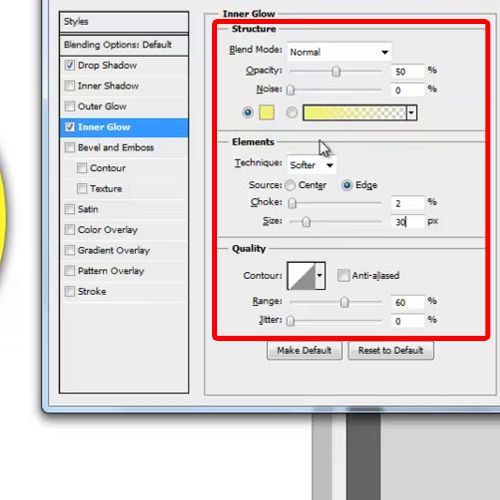
Next, move over to the Inner Glow tab and choose “f2f26d” for the color fill. Change the Blend Mode to Normal, change the opacity to 50 percent, choke to 2, size to anywhere between 25 and 30 pixels and range to 60 percent.
Step 4 – Apply the “bevel and emboss” effect
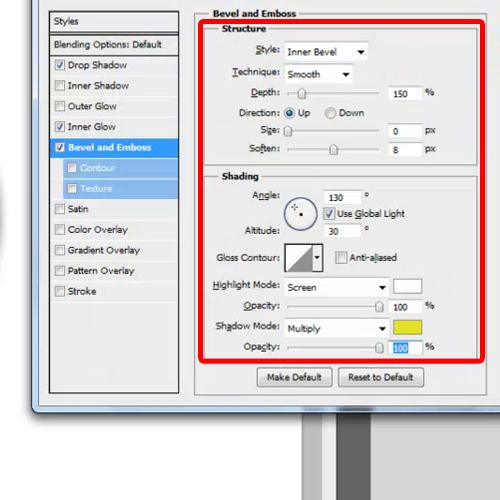
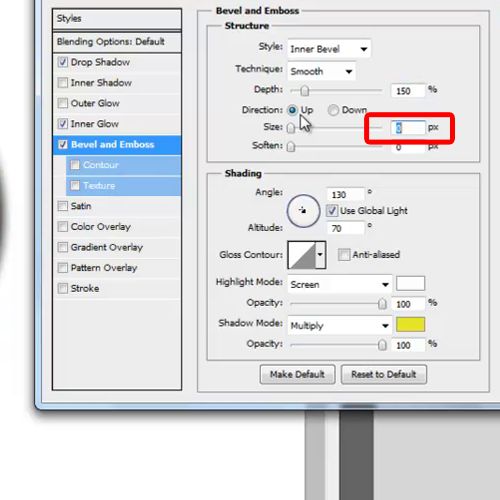
Next, move over to the Bevel and Emboss tab, increase the depth to 150%, size to 0 pixels and soften to 8 pixels. Increase the opacity of both the Highlight mode and the Shadow mode and choose “e5e526” for the color of the shadow mode.
Step 5 – Alter the “bevel and emboss” properties
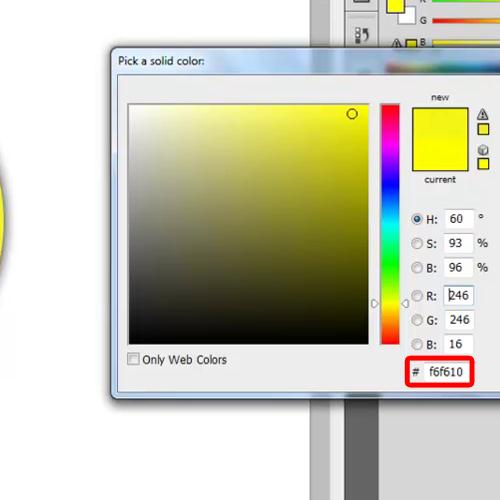
Now change the color of the shape to “f6f610” and go back to the Bevel and Emboss tab in the Layer Style window. Here, change the altitude to 70 degrees and change the size and softness according to your image, until that fine white line appears on the shape.
Step 6 – Make the eyes
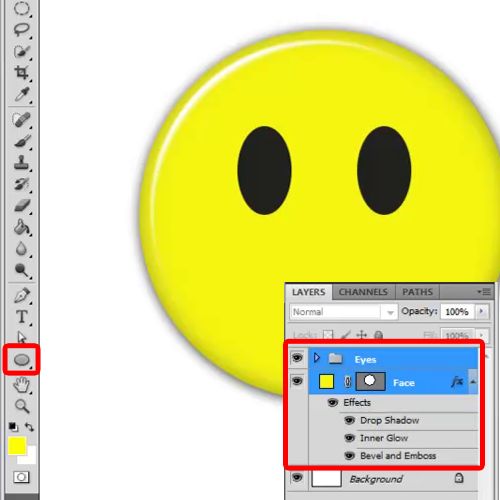
Next, we are going to work on the eyes. Grab the ellipse tool and make two circles on the shape. Choose “222220” for the color fill and duplicate this shape. Duplicate this layer and give proper names to your layers, for example in this case I’ll rename “Shape 2” to “Left” since it represents the left eye and so on. Now group both the shape layers and rename the group “Eyes”. Rename this base layer “Face” and align all the layers properly.
Step 7 – Work with the path
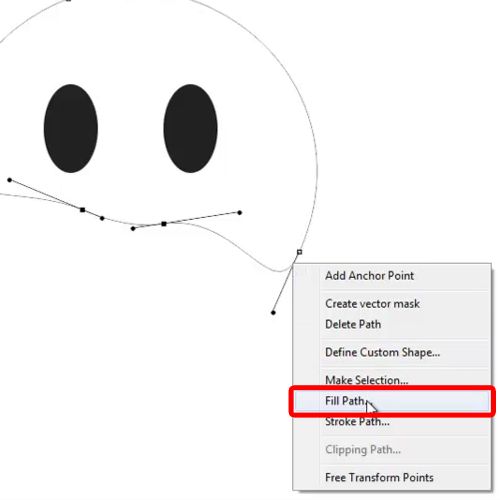
Now press the CTRL key and click on the shape layer to load its selection. Create a new layer and move over to the paths tab to make a work path from the selection. Once done, pick up the free transform tool, click on the anchor points below and move them upwards. Right click on the path and choose the “Fill Path” option.
Step 8 – Alter the face layer
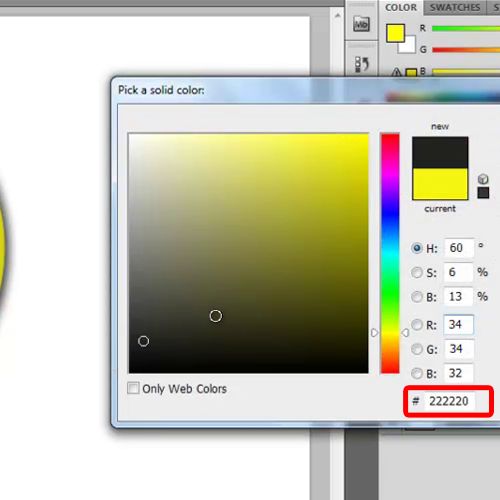
Copy the layer style of the face layer and paste it on the new layer. With that done, you can change the color of the face layer to “222220”, delete the work path and resize the face layer according to the image.
Step 9 – Alter the layer style options of the face layer
Next, open up the Layer Style options of the Face layer, open up the Bevel and Emboss tab and reduce the size to 0 and depth to 1.
Step 10 – Make the eyebrows
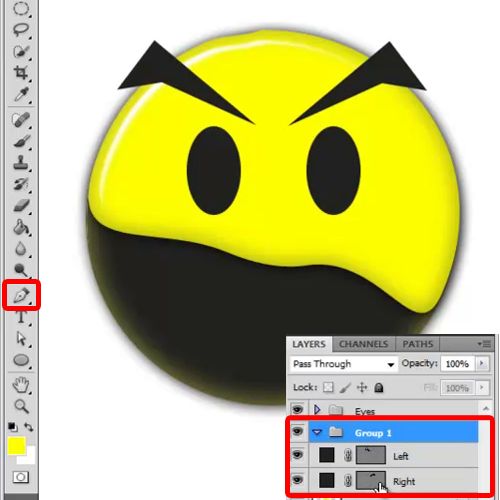
Next, we would be working on the eyebrows. Pick up the pen tool and use the anchor points to make the shape of a basic eyebrow. Once done, duplicate the layer, rotate it 90 degree counter clock wise and position it on the left eye.
Step 11 – Make the background
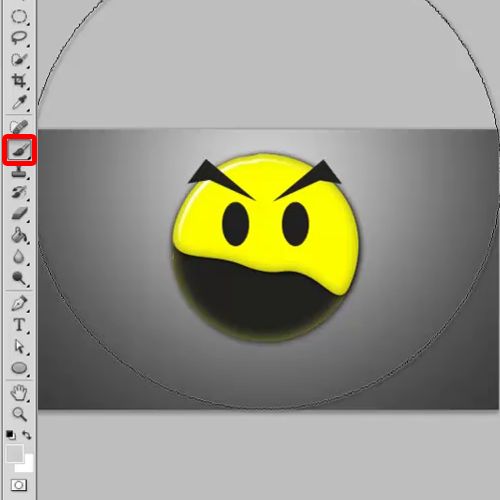
Now choose “303030” for the color and apply it on the background. Create a new layer, choose “cdcdcd” for the color fill, pick up the brush tool, choose a soft brush, increase the size of the brush and apply it on the canvas.
Step 12 – Add text
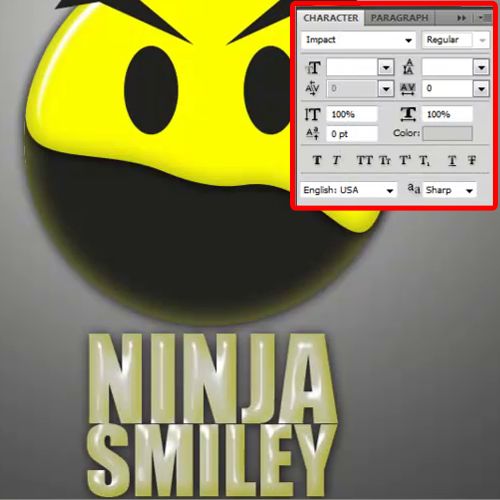
While making various emoticon and smileys or any other illustration, it is useful to know adding text always enhances the image. Hence, last of all we will insert text into our illustration. Pick up the text tool, use Impact for the font and type your text. Increase the size and position the text below the smiley face. Now select the face layer, copy the layer style and paste it on the text layer. Choose black for the color of the text and open up the Layer Style options.
Step 13 – Apply different effects
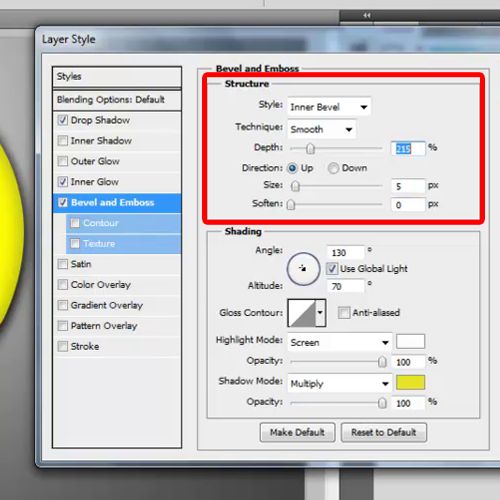
In the inner glow tab, choose black for the color fill and move over to the Bevel and Emboss tab. Here, change the size to 5 pixels and change the depth to 215%.
Step 14 – Alter the stroke
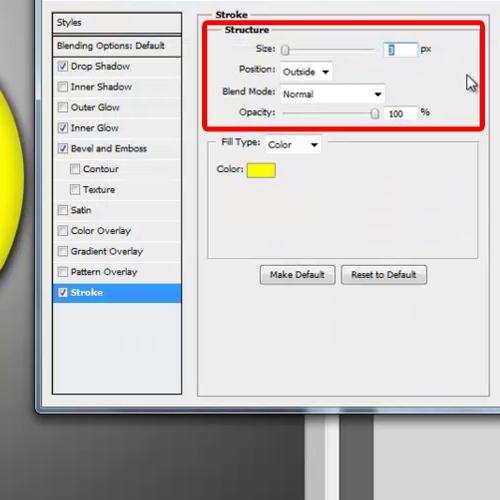
Now move over to the Stroke tab, choose “fff00” for the color of the stroke and change the size to 5 pixels. Using this method you can create various emoticons and smilies in Photoshop.
 Home
Home