It is very easy to create architectural buildings and place them in a scene while creating a SketchUp model. The “smoove” tool present in the “sandbox” panel in Google SketchUp, can be used to create terrains for such a 3d design scene.
To understand how to use the smoove tool in Google SketchUp follow the steps given below.
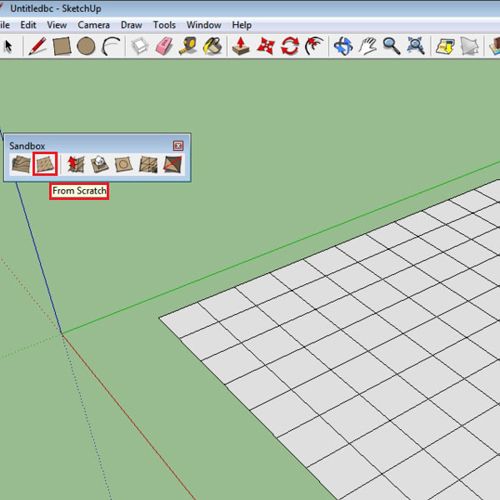
Step # 1 – Use the “from scratch” option
The “smoove” tool in the “sandbox” panel can be used to create terrains for a scene.
To see how the “smoove” tool works, create a grid pattern by using the “from scratch” option on the sandbox panel. The greater the mesh, more curved the created terrain will be.
Step # 2 – Select the “smoove” tool
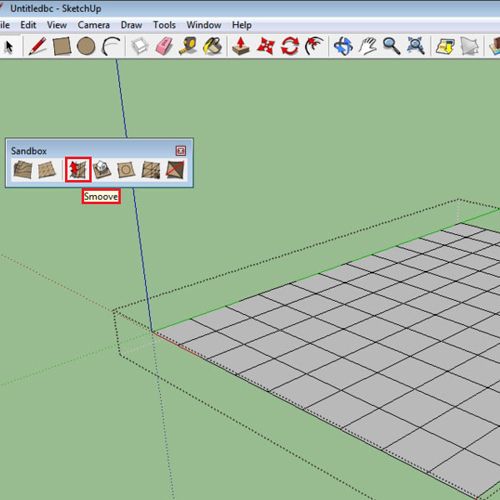
Once you have created the mesh, unlock it by double clicking on it from the “select” tool. Then select the “smoove” tool from the “sandbox” panel.
Step # 3 – Use the “smoove” tool
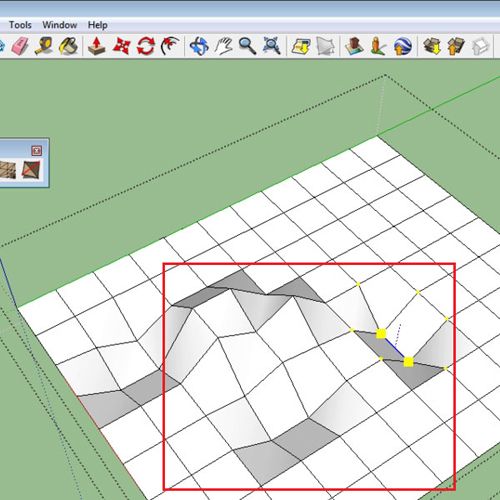
Use the tool on the mesh to either push it down or pull it up and make different types of topography on your SketchUp model. You can keep the depth and height of these structures as per your wish.
Step # 4 – Alter the radius
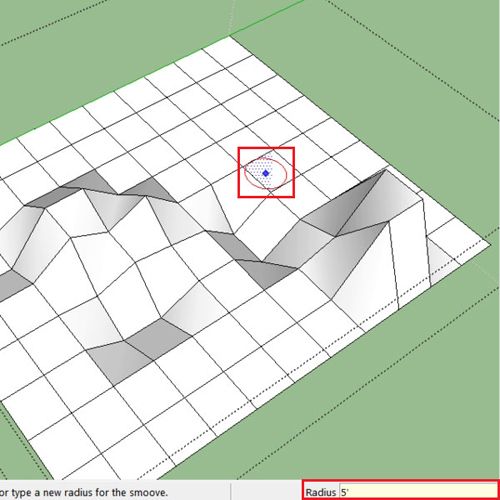
The radius of the smooth tool can also be altered according to your requirement. To change the radius, after selecting the tool simply type in the new radius, as you decrease it the red circle around the smoove tool also decreases.
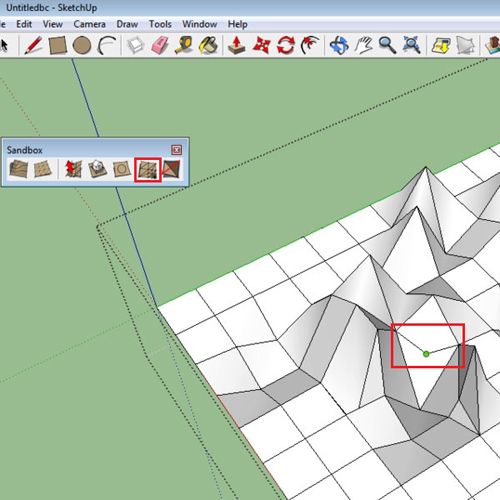
Step # 5 – Add detail
More detail can also be added to your 3d design by means of the “add detail” tool. Select it from the panel and simply add more details where you need them.
 Home
Home