In Google SketchUp the understanding of proper navigation and viewing from different camera views becomes very essential. SketchUp camera views come really handy as they allow you to see your drawing from every angle.
Using different camera views is therefore very necessary to learn especially when making 3d SketchUp architectural drawings.
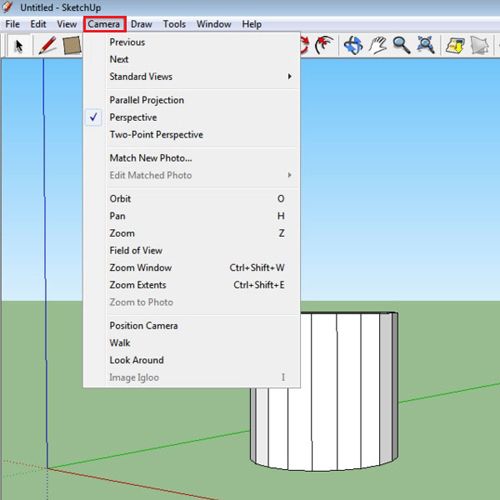
Step # 1 – Open the “camera” menu
SketchUp has a wide variety of camera views that you can take help from while working. To see these go to the “camera” menu at the top.
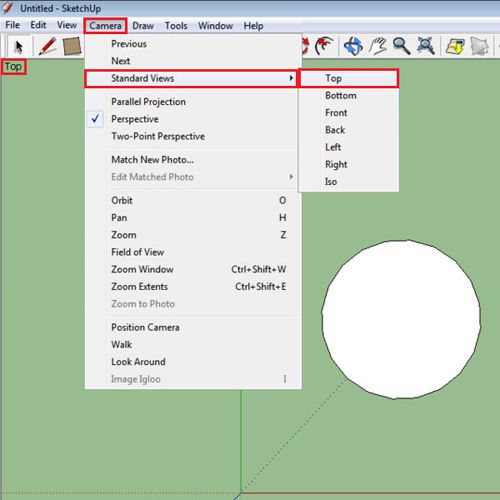
Step # 2 – Go to the “standard views” option
When you open the “camera” menu go to the “standard views” option. From here you can view your illustration from regular views like top, bottom and from different sides. Whichever one you are viewing, SketchUp labels it at the top left hand corner.
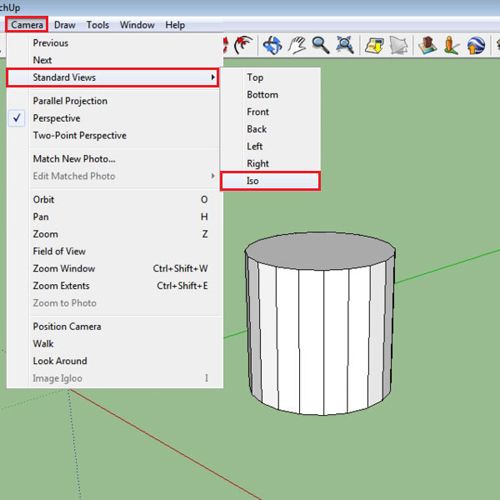
Step # 3 – Select the isometric view
You can even view from an isometric perspective from here by clicking on the “iso” option.
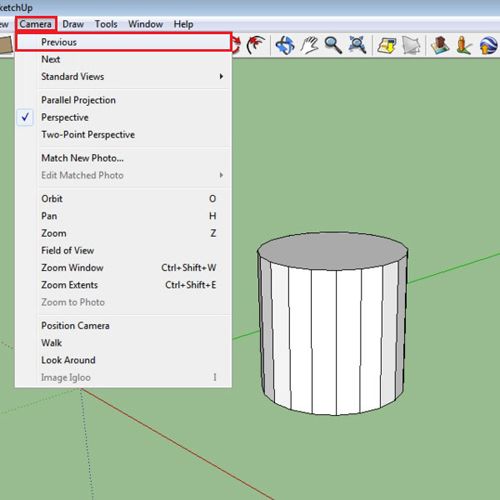
Step # 4 – Move back and forth between scenes
You can go back to the “previous” and “next” scene from this menu which takes you back to the last and the next view point that you previewed.
Step # 5 – Select the “perspective” view
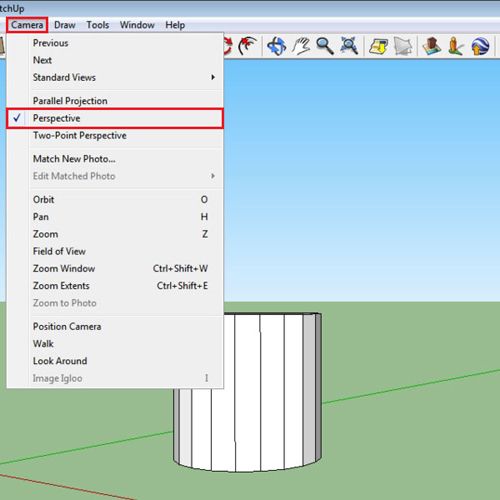
There are also three different perspectives that you can view your drawing from. The default one is the “perspective” option. Select it by going to the “camera” menu and selecting the “perspective” option.
Step # 6 – Choose the “parallel perspective” option
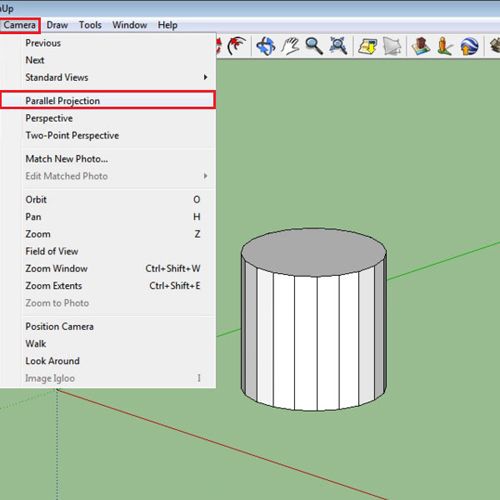
The “parallel perspective” option removes the angle from your drawing with its outlines being parallel to the axes.
Step # 7 – Select the “two point perspective” option
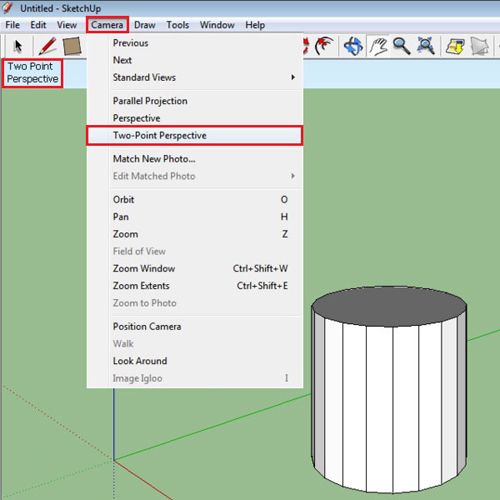
The “two point perspective” option present in the “camera” menu removes the 3d SketchUp view. When you click the “two point perspective” option the cursor automatically switches into the “pan” tool and the moment you switch to the orbit tool the 2D perspective changes which you can see from the fact that the label disappears from the top left corner.
Step # 8 – Make a zoom window
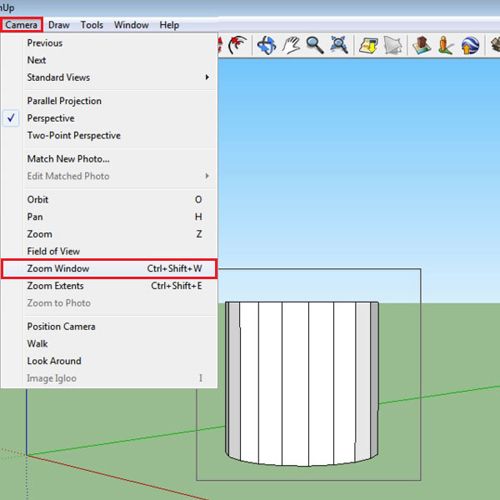
You can even create a window where exactly you want to zoom in by selecting the “zoom window” option.
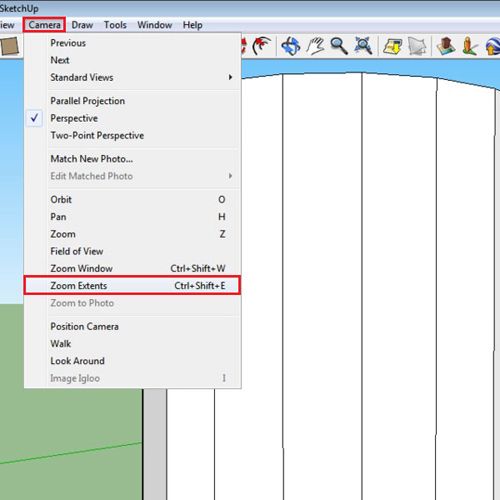
Step # 9 – Zoom extents
All of your drawing can collectively be zoomed in by clicking on the “zoom extents” option.
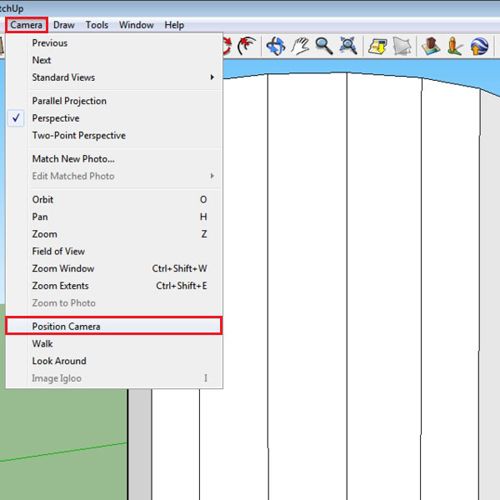
Step # 10 – Position the camera
The camera that is your viewing point can also be set according to your requirement. Choose the “position camera” option, click on any point on your SketchUp sheet and you can view your object from that place.
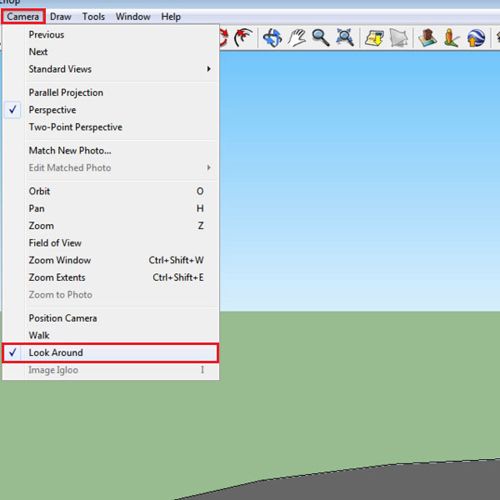
Step # 11 – Look around from your camera view
Once you do, the cursor turns into two eyes from which you can view your drawing. This option can also be selected from the “camera” menu by clicking the “look around” option.
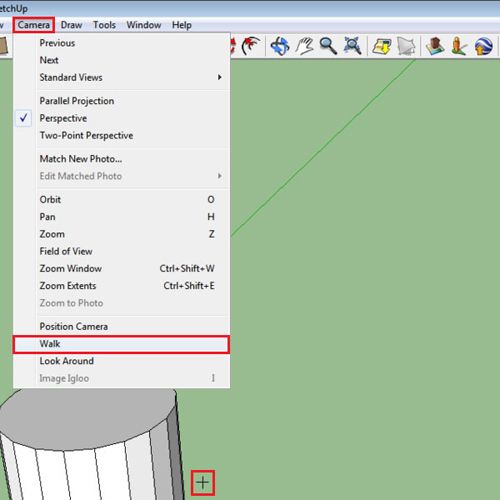
Step # 12 – Select the “walk around” option
Last but not the least; you can even go around your drawing by selecting the “walk around” option. Keep clicking and move around your mouse this enables you to walk around the model.
 Home
Home