This tutorial will be focusing on what the application bar is in Photoshop CS5, how to work with it and what tools does it consist of. This bar is the horizontal strip present at the top of the Photoshop window. It consists of some options you may end up frequently using.
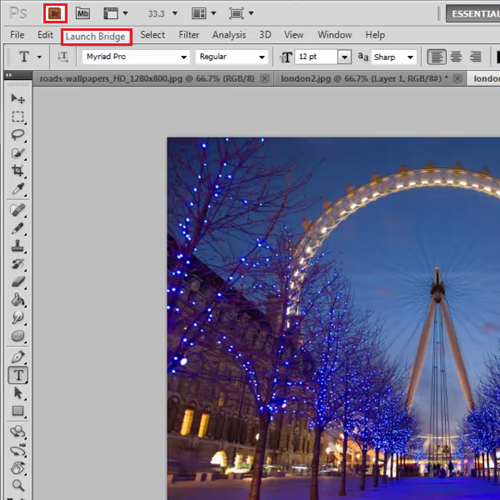
Step # 1 – Select the “Launch Bridge” option
The launch bridge button opens up Adobe Bridge and shows you the latest images you have saved on your computer. It shows all the images together, you do not have to open different folders to look for the pictures. This option is convenient but it still requires you to open a different program separately.
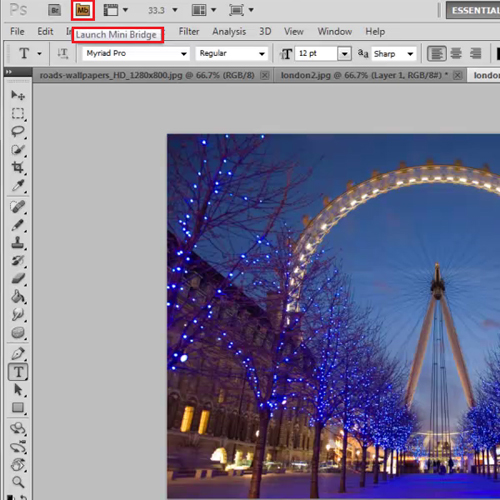
Step # 2 – Open the “Mini-Bridge” option
Photoshop CS5 has a new option that is “Mini-Bridge”. Earlier we had to open up Bridge separately but with Mini-Bridge you do not have to do that. This is a new panel which acts as a window between Photoshop and Bridge.” Mini-Bridge” allows you to access and view the images you have in Bridge without leaving Photoshop.
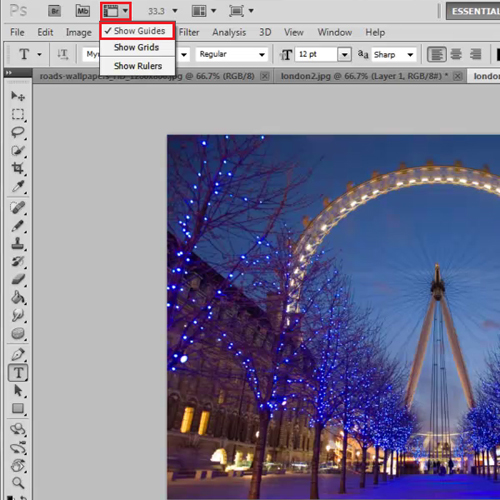
Step # 3 – View the “Extras” panel
The options that are used more frequently are give more preference in Photoshop CS5. The options present in this panel are the ones that are used a lot hence it makes working in this software more efficient.
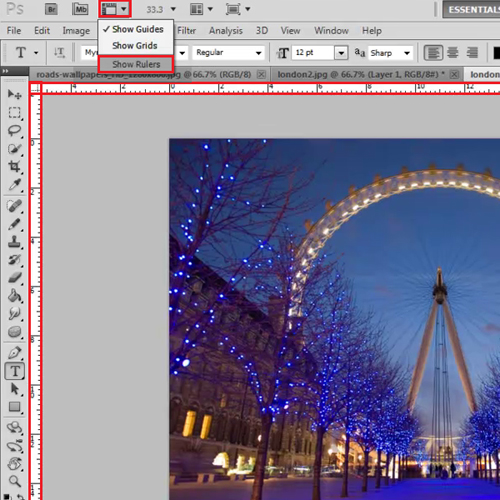
The first option in the “Extras” panel is “Show Guides”. This makes guides appear on the screen. You can switch them off from here as well.
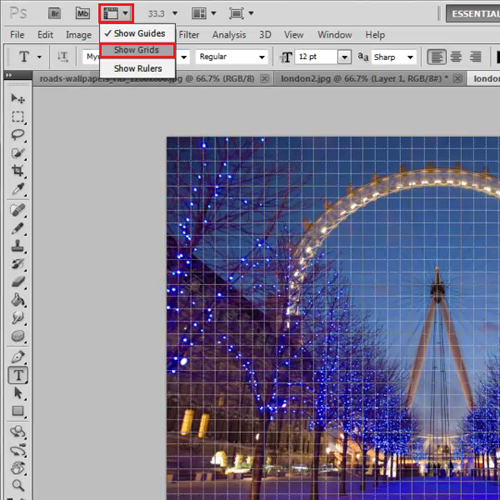
Step # 4 – Apply the “Show Grids” option
The second option in the “Extras” panel allows you to work on a grid in Photoshop. You click it and a grid automatically appears. It allows your work to be accurate. The grid can be switched off from here as well.
Step # 5 – Switch on “Rulers”
The last option in this panel allows you to switch on the “Rulers” on your workspace. Through these you can measure the distance of different illustrations and pictures on your sheet and you can arrange them at the exact distance they are needed.
Step # 6 – Adjust the Zoom Level
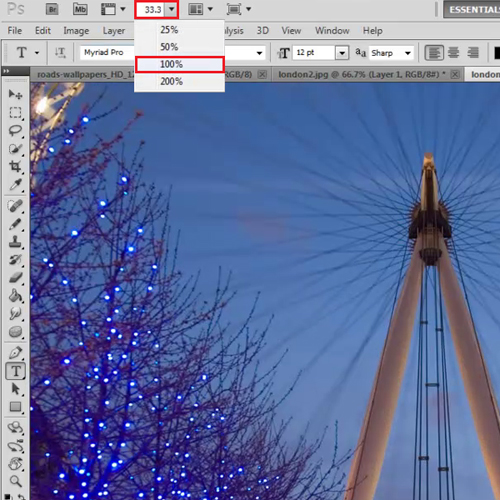
With the different zoom levels you can zoom in and out of your image according to your requirement. You can either go with the present zoom options which are 25%, 50%, 100% and 200% or you can enter any percentage in the bar at the top and Photoshop will zoom that much for you.
Step # 7 – Arrange Documents
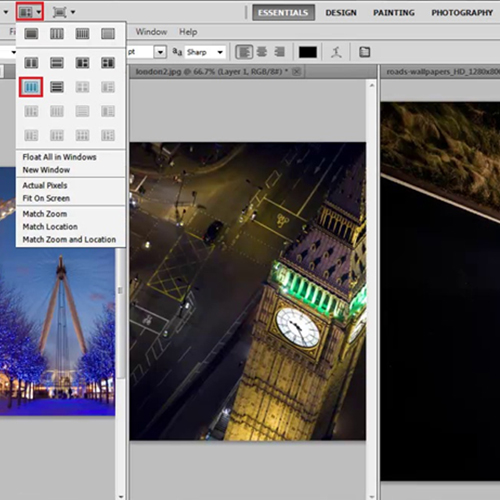
Then we have the arrange documents button which only comes in handy when u have more than one document opened up in Photoshop cs5 and are working on them side by side. They can be viewed together horizontally, vertically, etc. You can even match the zoom and location of different pictures together. This panel gives you a lot of options that you can make the most of.
This option can arrange up to more than six documents at one time. Click on the different options to explore how you can arrange your documents in a single workspace.
Step # 8 – Adjust the “Screen Mode”
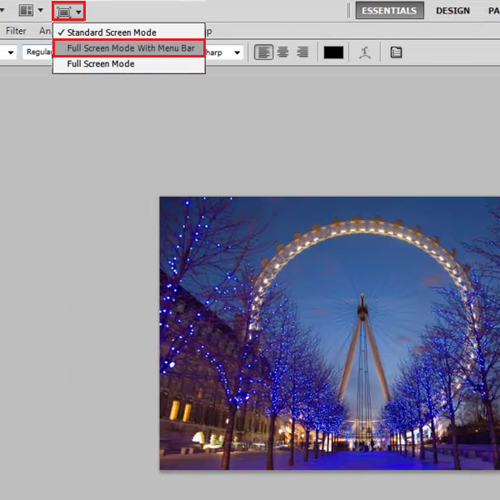
The last button on the application bar is “screen mode”. This has a total of 3 options. The default is the “Standard Screen Mode” option that Photoshop automatically opens in. The other is the “Full Screen Mode with Menu Bar”. This provides you with a full screen image with just the basic panels present on your workspace.
The last mode is the “Full Screen Mode” that has no menu bars and the panels are hidden as well. They can be accessed on the sides of the screen by pressing ‘tab’. While in full screen mode you can return to the standard mode by either pressing ‘F’ or hitting the escape button.
 Home
Home