To crop in Photoshop is a very important and frequent task that you will be performing a lot while using this software. A typical crop allows you to delete all parts of the image that you want to let go of. However, in this tutorial you will be learning how to crop, hide the unwanted pixels or composition instead of deleting it right away and then how to reveal it all again in Photoshop CS5.
Step # 1 – Select the “Crop” option
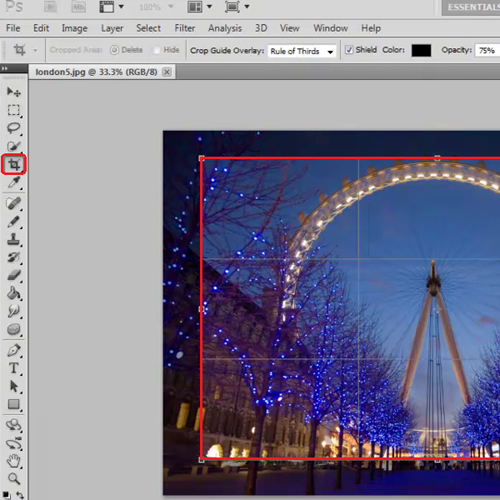
The first thing that you need to do after opening the image is to select the crop option. To do this, either press the “c” key or choose the “crop tool” from the toolbar on your left. Create the window around the part of the image that needs to be cropped. If you are not satisfied with the crop you can adjust the boundaries as per your need.
Once you’re done with adjusting the crop frame simply press “enter” or double click in it to delete the unwanted pixels. If you want to cancel the crop anytime you can press the “esc” key.
Step # 2 – Manually set the crop frame size
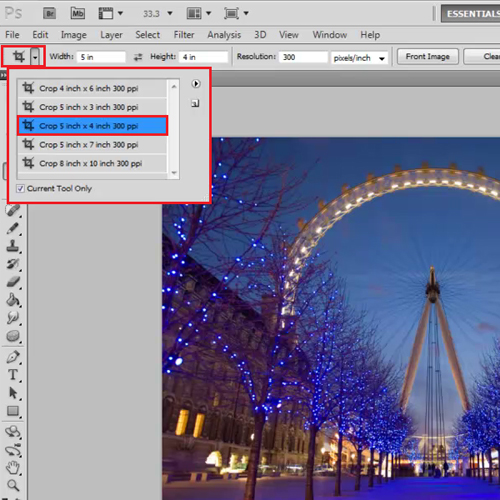
There are times when you want the image to be cropped to a specific size like 4×6 inches, etc. Photoshop allows you to do this easily.
One way to do it is by entering the width and the height of the image you want manually. Do this by going on the options bar at the top for crop tool.
Another way is to select the “Crop tool” next to this option bar. This opens a drop down menu consisting of the most commonly used measurements. You can select anyone of them to apply these dimensions to your crop frame.
Step # 3 – Produce a new layer
This option is used when after cropping you do not want to delete the pixels outside the crop frame. This is due to precaution as might need the portion outside the frame later on.
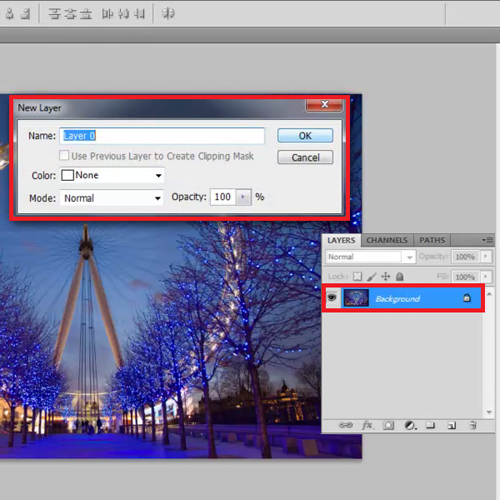
To do this, you first need to create a transparency layer since the background layer cannot be deleted. For this, double click on the background layer to produce a layer that supports transparency.
Step # 4 – Hide portion outside the frame
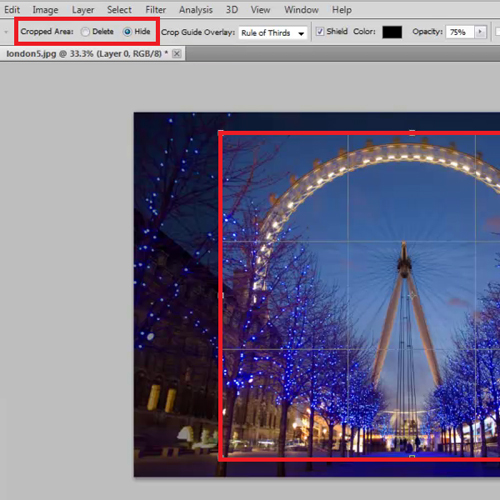
Now select the crop tool and make a frame. Before you press “enter”, go to the crop options bar at the top and click on the hide option. It hides the rest of the image behind the layer.
You can still move the image around using the “move tool” that you can select by pressing “v”. This allows you to change the portion of the image visible in the frame.
However, is not possible to hide your crop in Photoshop if you are working on the default ‘background’ layer which does not support transparency.
Step # 5 – Bring the complete image back
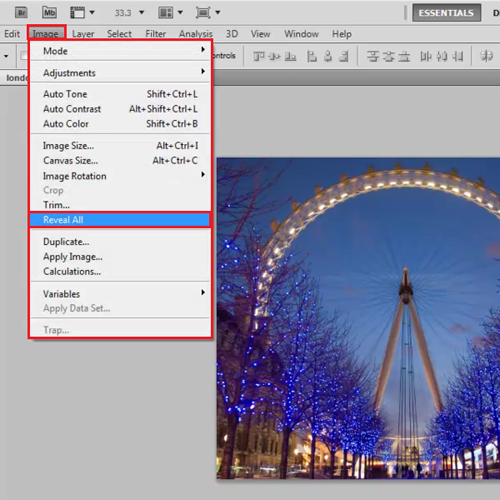
To bring the complete image back go to the “Image” menu, drop down and choose the “Reveal All” option.
This automatically brings back your whole image that you were about to cropped and hid before.
 Home
Home