In this tutorial for Photoshop CS5 we will be learning how to work with the brush tool and to create layer masks. We will be cutting a bag from its image and will paste it on another document. In the end we will add effects to the bag and will enhance the color.
Step # 1 – Make a selection
Choose the ‘quick selection tool’ from the tool menu on the left and then start outlining the bag to make a selection. You have to be a little careful with the selection as you might end up adding extra pixels in it. To remove the gaps between the straps hold on to the ‘Alt’ key. A minus sign appears which allows you to deselect some of the pixels. You do not have to be perfect with the selection as this can be fixed later on.
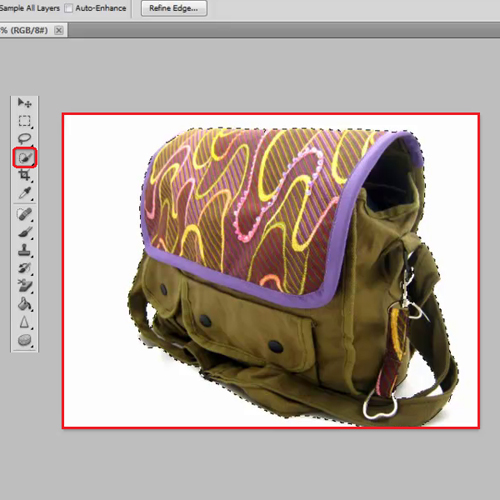
Step # 2 – Create a mask
Convert the selection into a layer mask by clicking on the ‘mask’ panel on the right and then selecting the ‘add a pixel mask’ button.
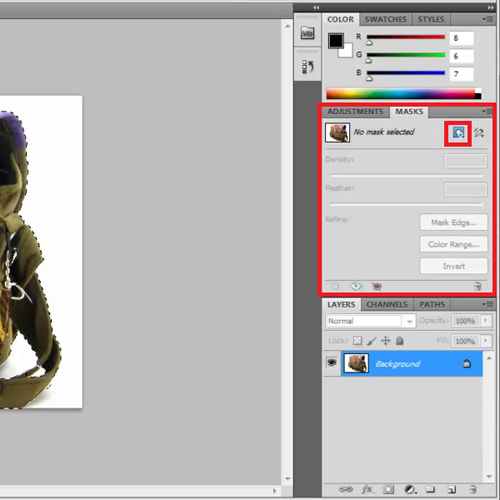
Step # 3 – View the layer
You can see in the layer panel that this layer supports transparency so everything that is black is hidden and whatever is white you have revealed that part of the image.
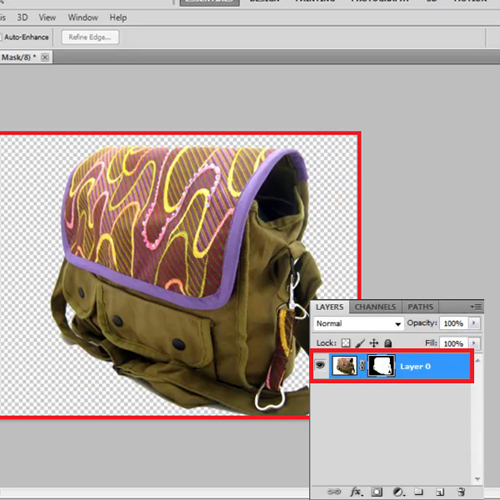
Step # 4 – Add a new layer
Now add a new layer to the image and what is this layer to go below the previous layer so hold the ‘ctrl’ key and click the new layer button. Color the background white, for that go to the “Edit” menu, choose ‘Fill’ and then choose white.
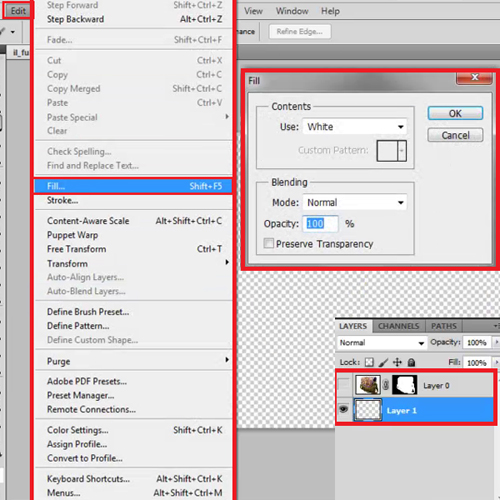
Step # 5 – Select the mask thumbnail
Go on the layer mask now and select the thumbnail. Get the zoom tool by pressing ‘Z’ and zoom in where you think there are a lot of grey areas. You can move around the document by holding ‘spacebar’ and dragging around the screen till you get to the part of the image you want to focus on.
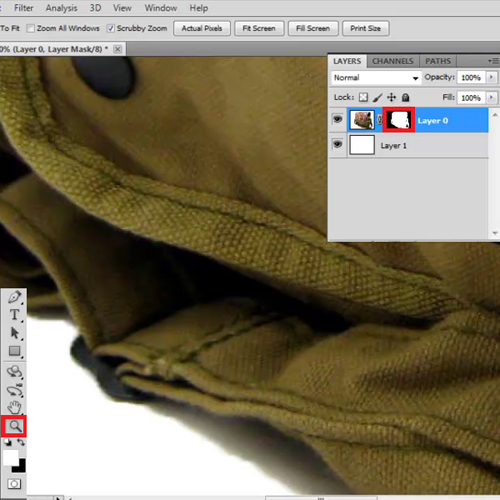
Step # 6 – Add and subtract to the layer mask
Switch to the brush tool by pressing ‘B’. You can see that the current brush tool selected is big so decrease its size by pressing the left bracket. Right bracket will make the size of the brush bigger. Now you will be painting with either white or black on the layer mask. Black will add to the mask and white will subtract from it. To get rid of these gray areas paint start painting them with white. You need to be pretty careful while doing this.
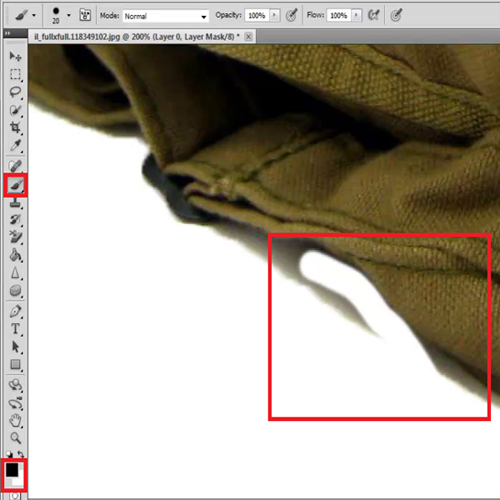
Step # 7 – Correct the mistake
If by mistake you painted over a portion of the bag, you can fix it by simply pressing X to change your foreground and background color and then paint on the bag where needed.
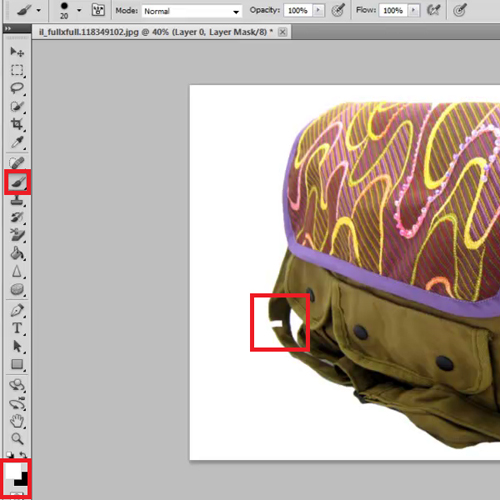
Step # 8 – Select the ‘Drop Shadow’ effect
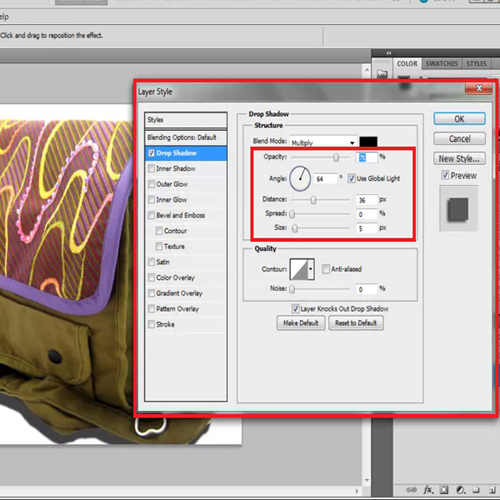
Effects can also be added to layers masks in Photoshop. To apply an effect here, first fit the image on the screen by pressing ‘ctrl + 0’ or doing it manually. Click on the layer itself and add a ‘Drop Shadow’ effect to the image by clicking on the ‘fx’ button present at the bottom of the ‘layers’ panel. From the options that emerge select the ‘Drop Shadow’ effect.
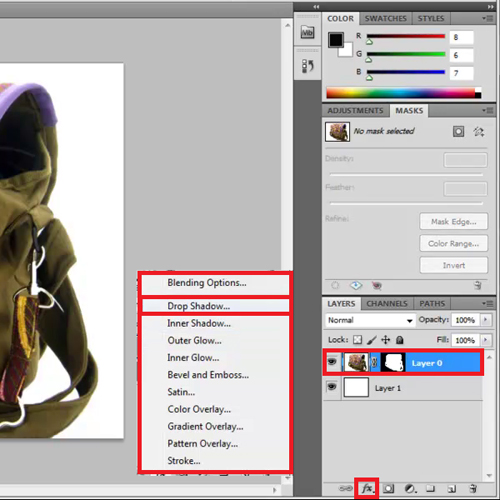
Step # 9 – Adjust the ‘Drop Shadow’ settings
You can easily drag the shadow to wherever you are comfortable with. Also increase or decrease the opacity as per your requirement. You can also adjust other ‘Drop Shadow’ settings from here if need be.
Step # 10 – Adjust the ‘Vibrance’
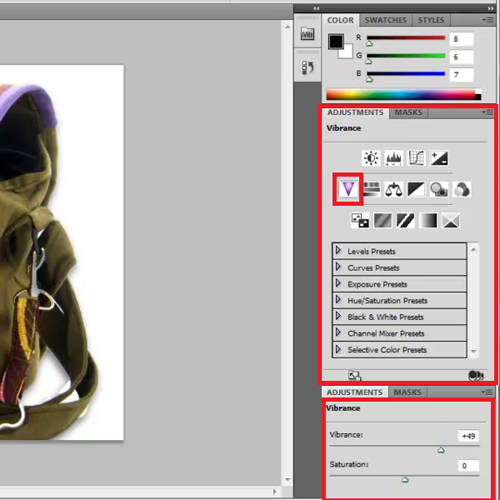
Over here the bag is looking too dull. To fix that, go on the ‘Adjustment’ panel, click on ‘Vibrance’ and increase it as per the need of the picture.
 Home
Home