In this tutorial on Photoshop, you will be learning about Photoshop CS6. This Tutorial will also be covering the changes when you are shifting from CS5 to CS6. The Content aware patch tool in CS6 now gives us greater control over repairing images. It gives us the option to select a sample area to create the patch and then it modifies the patch applied. With the content aware tool we can select a sample area and extend the image by adding that selection.
Step # 1 – Make selection
Photoshop CS6 Content Aware tools consist of 3 tools which make your work so much better. These are the patch tool, move tool and extend tool.
Here we have this image in which we want to move the person on the left with the man in the center. To do this, select the ‘quick selection lasso tool’ from the toolbar on the left and then make a quick selection around him.
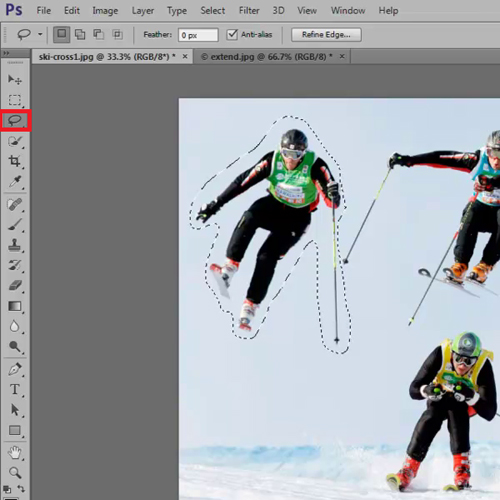
Step # 2 – Work with the ‘Content-Aware Move Tool’
Now select the ‘Content Aware Move Tool’ from the toolbar, drag the image and place it wherever you want it. Photoshop will replace all the pixels in your selection with the ones in the background.
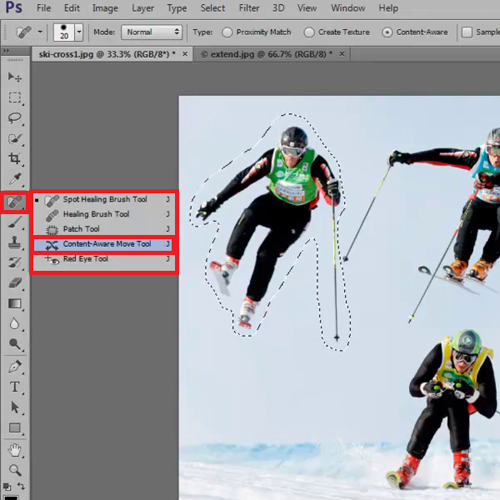
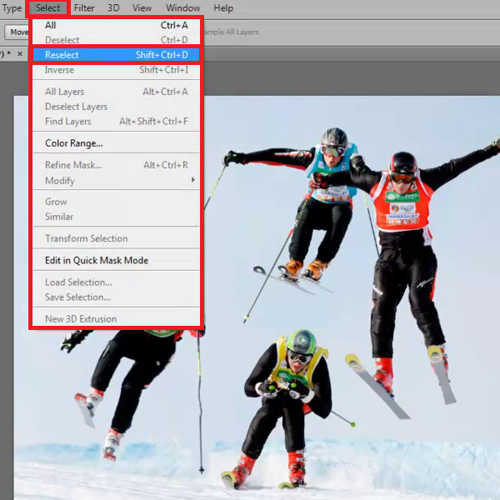
Step # 3 – Reselect the Selection
The second feature of this tutorial is the ‘Content Aware Patch tool’ which will help you remove the person that you just moved to the center of the image. For that choose the selection back by going to the ‘Select’ menu and then clicking on ‘Reselect’.
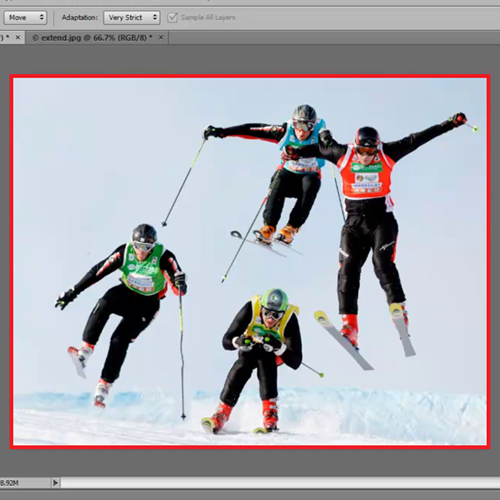
Step # 4 – Work with the ‘Patch Tool’
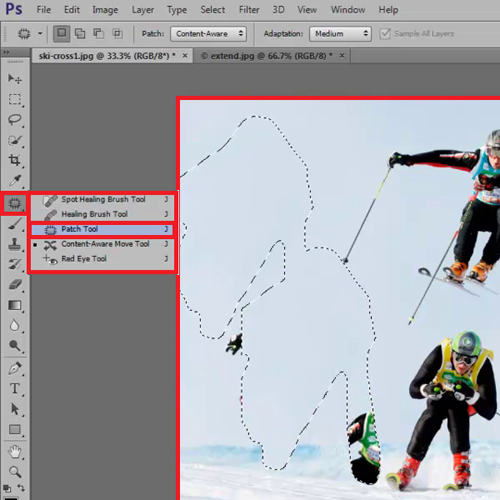
Select the ‘Patch Tool’ from the toolbar and then drag the selection in a clean area where you will get maximum clear background.
Step # 5 – Use the ‘Spot Healing Brush Tool’
You might have to repeat this procedure in order to get the perfect background. This is because it is possible that some areas of the portion you just erased are left behind but the picture here seems perfect.
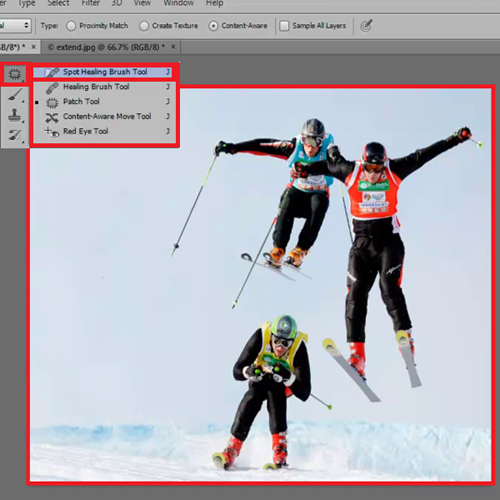
So now select the ‘Spot Healing Brush Tool’ and with it paint over to remove and fix the area where the image of the man was.
Step # 6 – Make selection
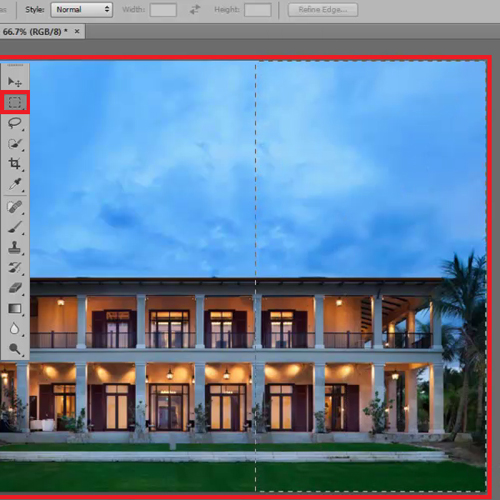
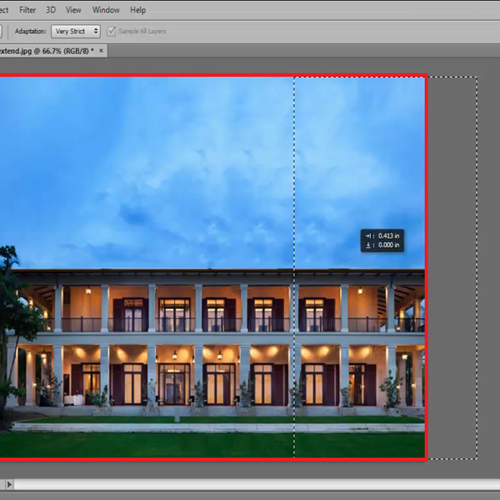
The third feature we will be covering in this tutorial for Photoshop CS6 is the ‘Extend Tool’. For that go on another document and select the ‘Rectangular Marquee Tool’. Make an exact selection of the part of the image that you want to extend the image with.
Step # 7 – Select the ‘Content Aware Tool’
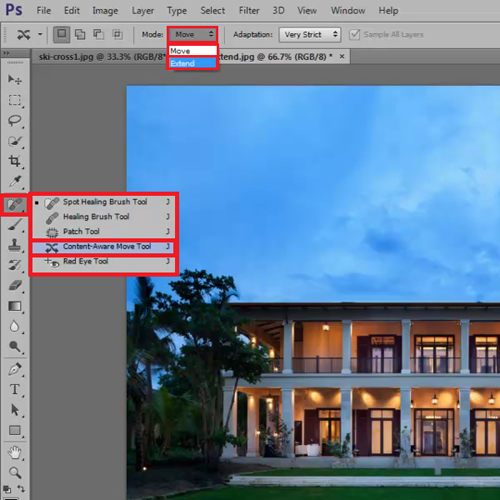
Now select the ‘ Content Aware Tool’ and then instead of going ahead with its default mode that is the ‘Move’ option, change it to ‘Extend’.
Step # 8 – Add the extended portion
Carefully drag the extended image so that you align it such that it fits perfectly with the original image.
Step # 9 – Repeat the process on the left side
Repeat the same process on the left side of the image as well so that it looks equal on both sides. Here is the extended version of the image we had before.
 Home
Home