Photoshop CS6 helps you to in-focus and blur areas of an image. The ‘blur tools’ in this version of Photoshop are designed to specifically to produce a selective focus effect. The Blur Gallery consists of three filters; Field Blur, Iris Blur and Tilt-Shift. In addition there is a set of separate Blur Effects Panel that lets you create spectacular highlights mimicking the circular bokeh effect produced by lenses.
Step # 1 – Select the ‘Field Blur’ option
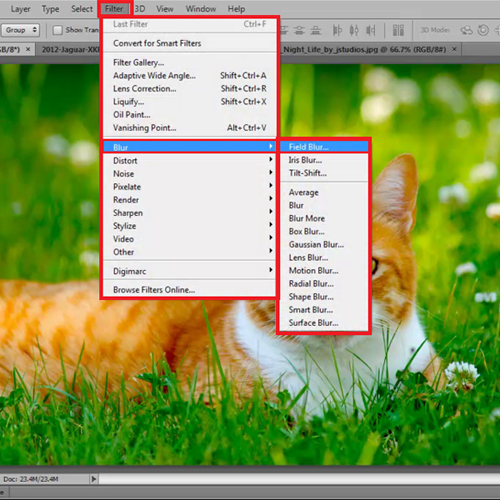
Here is a picture which has a few blur effects. However, we will add more such effects. To do that, go to the ‘Filter’ menu; drop down to ‘Blur’ and select the ‘Field Blur’ option.
Step # 2 – Blur the image
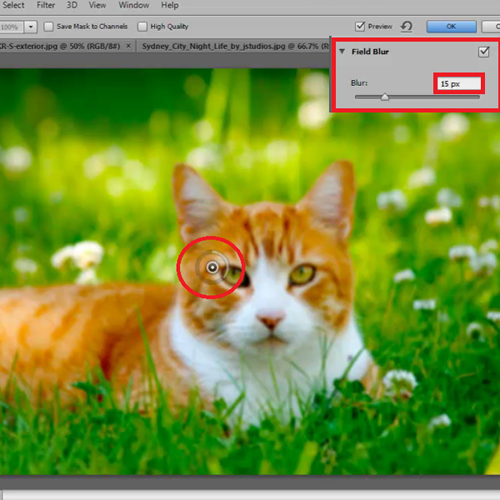
Photoshop turns the mode to full screen automatically. Now you can see there is a pin as your mouse and you have an adjustment ring around it which placed already on the screen. You can move it wherever you want to add the blur and then increase the blur as per your wish. You can also enter the blur value on the Field Blur Sidebar.
A blur value of 0 prevents any blur from taking place. It protects or masks out that area of the image. What we want to do is keep the face of the cat blur-free and the rest of the image blurry.
Step # 3 – Insert additional blur pins
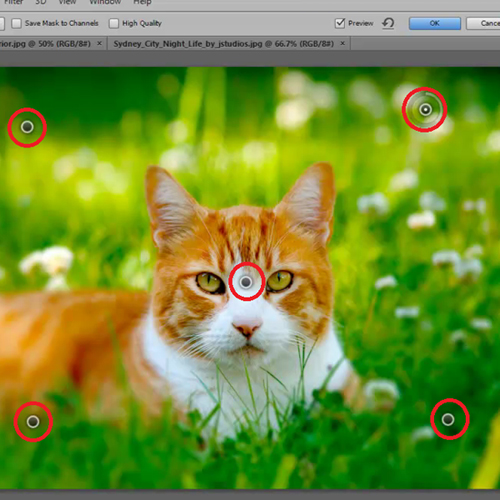
If you click on the image then you can get additional pins and then set their blur values according to your requirement.
Step # 4 – Check the blur effect
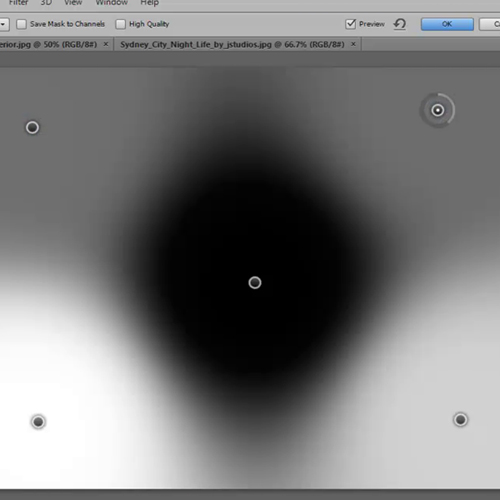
To check how your blur effects look press and hold the ‘m’ key, the white area shows the blur effect and the black area shows the protected area.
Press ‘Ok’ after you have finished adding the blur effect.
Step # 5 – Select ‘Iris Blur’
For the Iris Blur go to the ‘Filter’ menu, drop down to ‘Blur’ and select the ‘Iris Blur’ option.
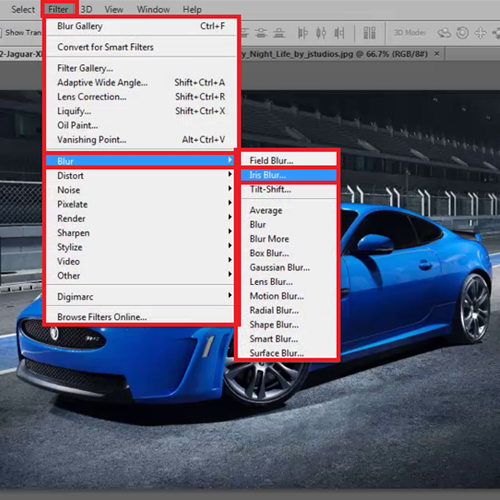
Step # 6 – Enter blur value
This particular blur brings up an eclipsed shaped blur filter. It has a center point which works just like the one we saw in field blur. You can enter the blur value as per your requirement.
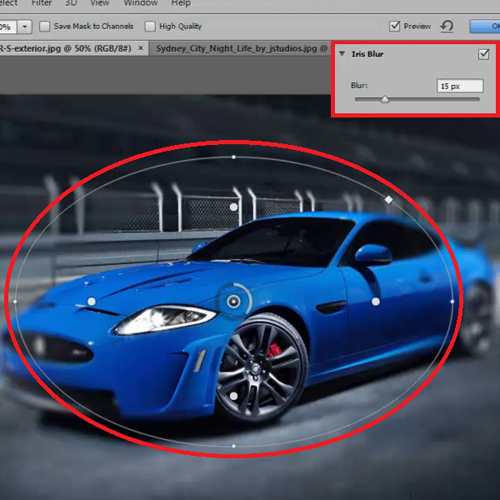
Step # 7 – Alter the area to blur
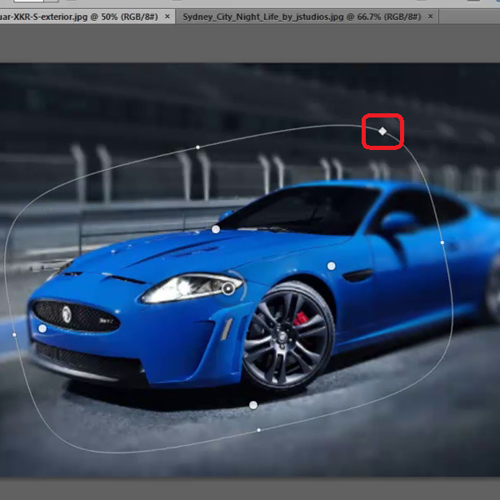
The function of the 4 dots around the adjustment ring is that the blur starts outside the dots. You can move them all together by clicking on any one of them and moving them around. If you want to move one dot specifically then press and hold the ‘alt’ key and drag the dot around. We will move all the dots separately to get the perfect blur around the car.
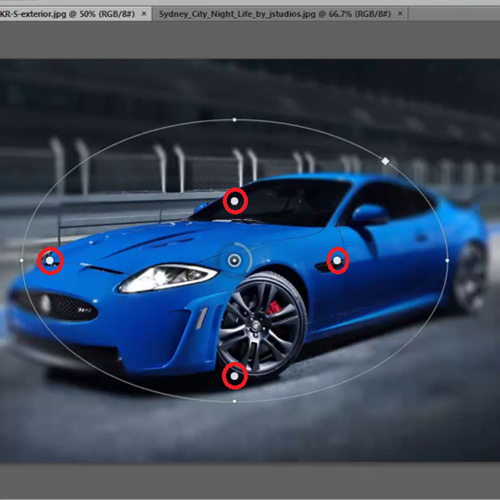
Step # 8 – Change the shape of blur field
The handles that look like small dots on the ellipse can change the shape of the blur field if you click and drag them.
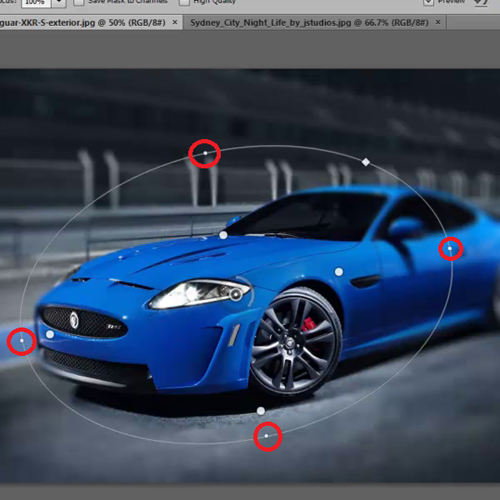
Step # 9 – Change the shape of blur field
The square on the ellipse changes the corner shape of the ellipse from an oval to a more rounded rectangle. We do not want the rectangle look in this image so we will keep the default shape on.
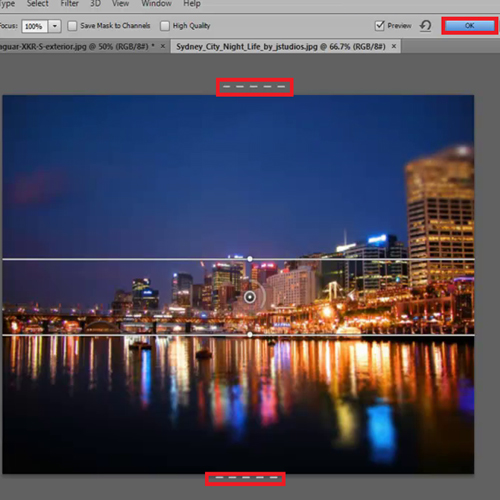
Press ‘Ok’ to finalize your image and apply the blur effect.
Step # 10 – Select the ‘Tilt-Shift Blur’ option
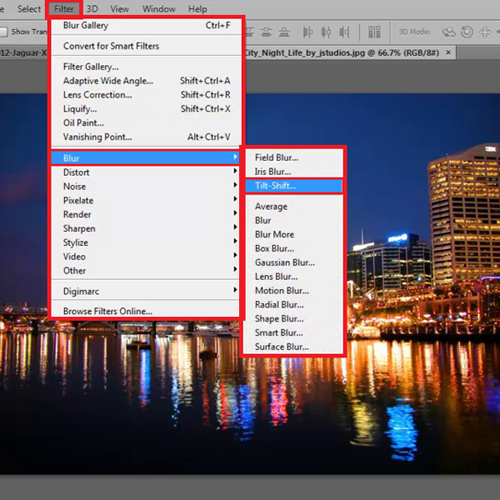
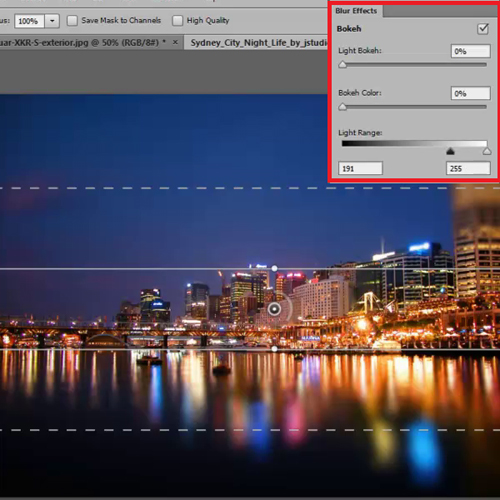
In this image what we want to do is keep the middle part of the image clear and add blur to the top and the bottom which is the sky and the water. So go to the ‘Filter’ menu, drop down to ‘Blur’ and select ‘Tilt-Shift Blur’.
Step # 11 – Enter the blur value
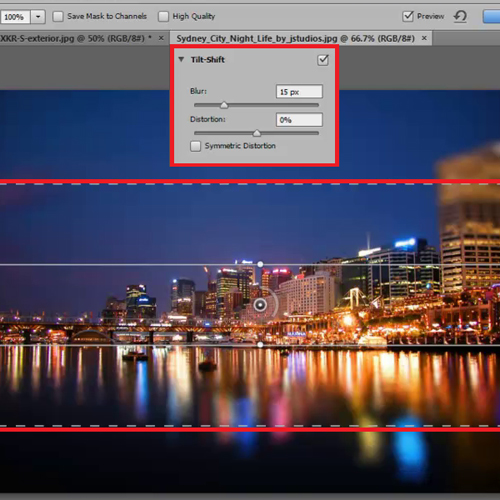
This type of blur also has an adjustment ring. It is placed at the center of the image with a set of horizontal lines appearing on either side of it. All the lines and the pin itself can me moved and titled the way you want.
Step # 12 – Drag the dash lines
The dash lines create the boundary between completely blurred options of the image and the start of a transition to the protected image area inside the solid lines. To blur the entire water area drag the dash lines till the end of the picture so that we can have an even transitional blur effect.
You can increase the blur value and adjust it according to your preference in Photoshop CS6.
Step # 13 – Adjust the Blur Effects Panel settings
While adding blur most people do not really pay attention to the other panel available to us that is the Blur Effects panel. It consists of three features; light bokeh, bokeh color and light range.
The Light Bokeh slider controls the intensity of the effect. Increase it as that will make it more prominent. The Bokeh Color slider boosts the saturation of the effect, increase that a bit too. Lastly, the light range slider lets you tone the values that are affected by the light bokeh and the bokeh color effects. By un-checking the check-box on the right corner of the blur effects panel you can spot the difference between the effects.
 Home
Home