In this tutorial on Photoshop, you will be learning about the changes when you are shifting from CS5 to CS6. This specific tutorial will show you how to work with the Adaptive Wide Angle using two different documents.
Step # 1 – Convert layer to ‘Smart Object’
The first document we have is of a wide angle image. Go to the layer, right click on the thumbnail and convert the layer to ‘Smart Object’.
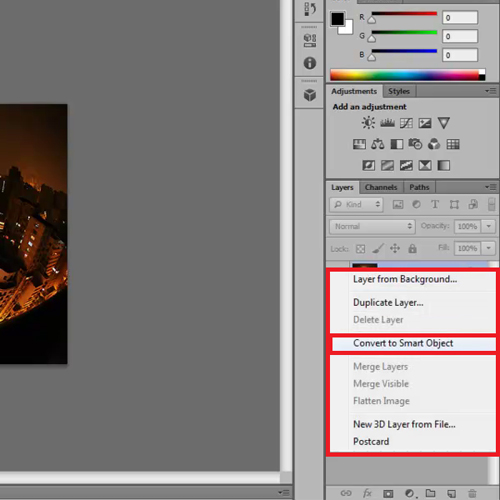
Step # 2 – Select the ‘Adaptive Wide Angle’ option
Then go to the ‘Filter’ menu at the top of the page and select the ‘Adaptive Wide Angle’ option.
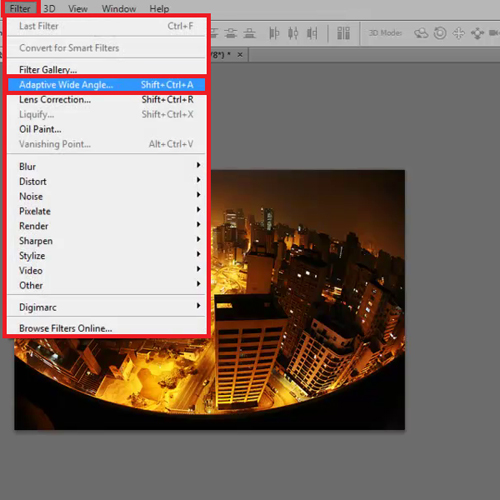
Step # 3 – Select the ‘Constraint Tool’
Once you have selected the option, an Adaptive Wide Angle box will appear. The ‘Constraint Tool’ is already selected by default, all you have to do is click where you think the angle needs to be fixed and then drag your cursor to where you want it to end.
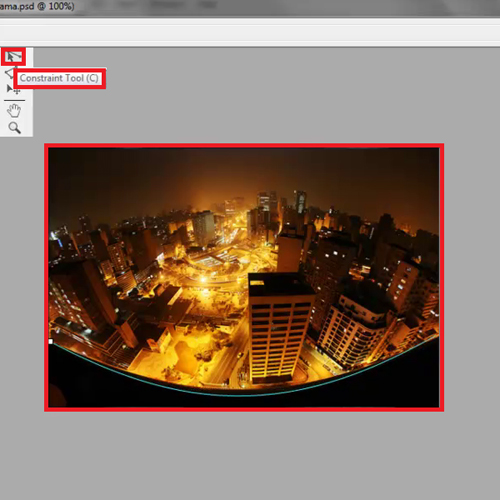
Step # 4 – Correct the angle
Photoshop will by default create the exact constraint line for you, just press ‘Enter’ and it will correct the angle. We do not have any other corrections to make so just press ‘Ok’.
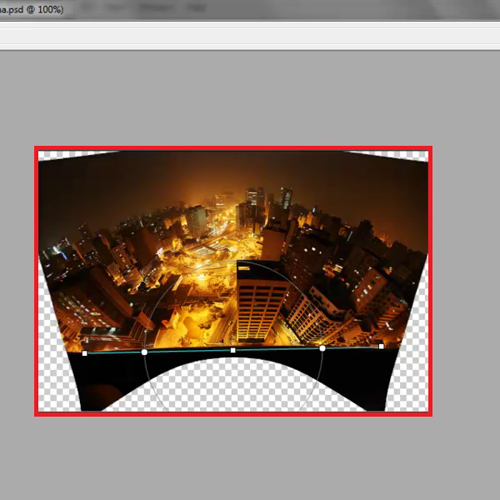
Step # 5 – Crop the image
Select the ‘Crop Tool’ from the toolbar at the left and then use it to crop the image as per your requirement.
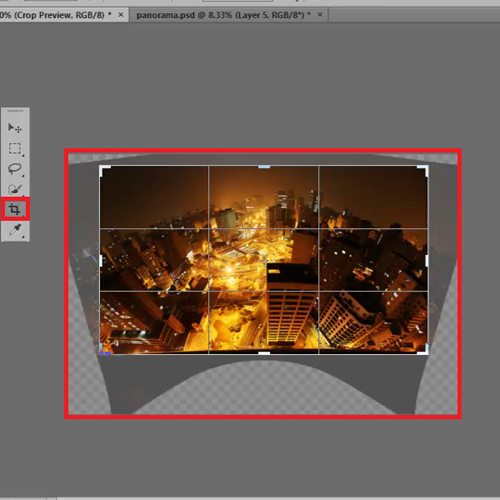
Step # 6 – Convert to smart object and open filter
The next document we will be working on is a panoramic image. This particular image does not need any extensive corrections other than that it seems to have a U-shape.
In order to work on it we need to combine all the layers into one so press ‘Ctrl + Alt + A’ to select all the layers, then click on the drop-down menu on the top-right corner of the layers panel and select ‘Convert into Smart Object’. Next select the ‘Adaptive Wide Angle ’ option from the ‘Filter’ menu.
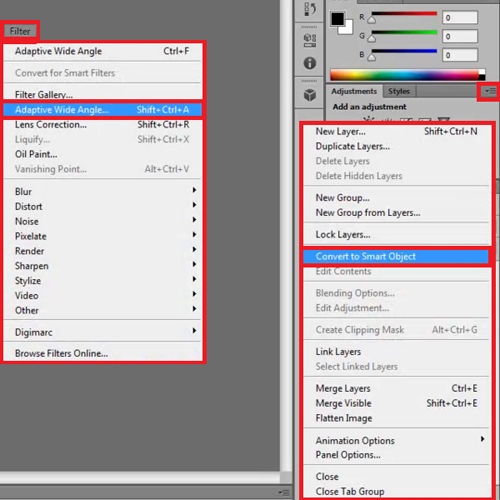
Step # 7 – Fix the angle
Mark a point at one side of the U-shape and then click at the other side where it ends. Grab this square box, drag it down a bit and then hit ‘Enter’. If you think the angle has been fixed then press ‘Ok’ to return.
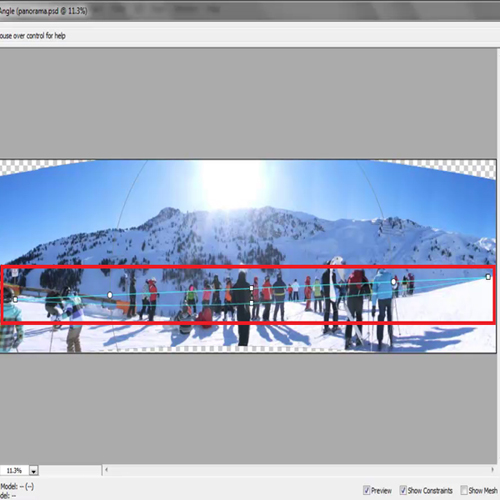
Step # 8 – Crop the image
Select the ‘Crop Tool’ and crop the image. Photoshop will take a few seconds to get that done.
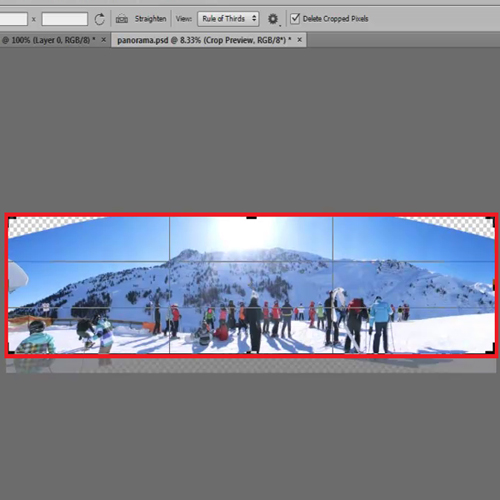
Step # 9 – Rasterize ‘Smart Object’
Over here the corners of the sky are not cropped because this will just spoil the look of the panorama. Now fill in the corners of the sky by using the ‘Content Aware Fill’ but that only works on a pixels layer so make a copy of the Smart Object Layer by pressing ‘Ctrl + J’. Then go to the ‘Layer’ menu, drop down to ‘Rasterize’ and select ‘Smart Object’.
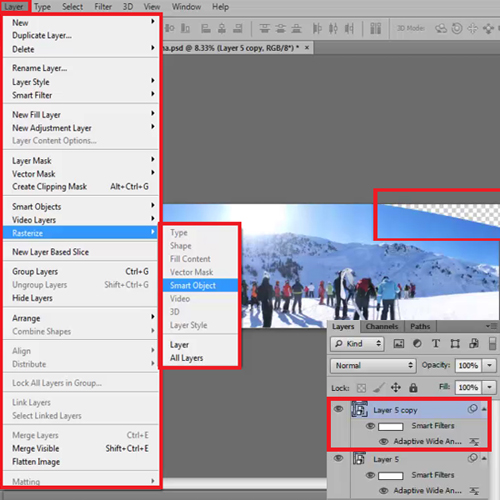
Step # 10 – Select the ‘Inverse’ option
Now, to select the corners of the image, press ‘Ctrl’ and click on the thumbnail of the layer. Then go to the ‘Select’ menu and click on ‘Inverse’.
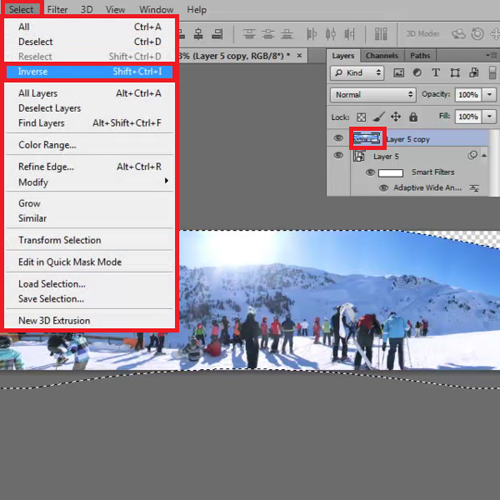
Step # 11 – Select more pixels
To select some extra pixels for the ‘Content Aware Fill’, go to the ‘Select’ menu again, drop down to ‘Modify’ and then click on ‘Expand’. Select around 25 pixels.
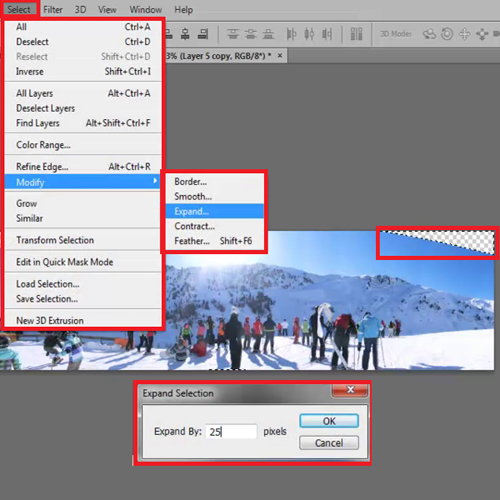
Step # 12 – Select Fill
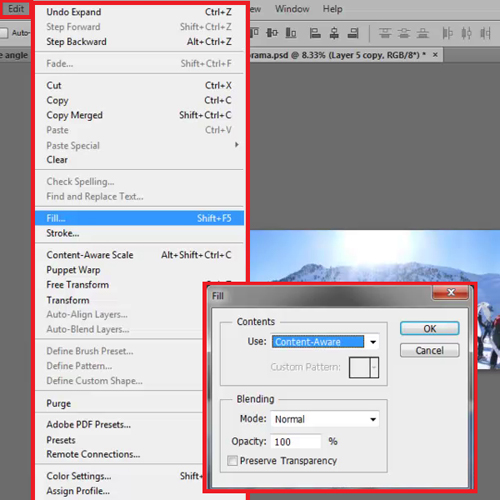
Finally we will go on the ‘Edit’ menu, click on ‘Fill’ and when the dialogue box appears make sure that you’ve selected ‘Content Aware Fill’. Photoshop will then copy the pixels and repeat them inside the selection.
This tutorial on Photoshop and others such as these allow you to learn more about the changes that you will see while shifting from Adobe Photoshop CS5 to CS6.
 Home
Home