In this tutorial, you will be learning about the Text and Style Improvements introduced in Photoshop CS6 that become more visible to you if you are shifting from Photoshop CS5 to CS6.
Text in Photoshop can be played around with and can be customized using different styles. More of this is described in the tutorial below.
Step # 1 – Use the ‘Type Tool’
Photoshop CS6 comes with a variety of text enhancements along with a new type menu, paragraph and character styles. To discover all that, get the ‘Type Tool’ from the toolbar on the left or simply press ’T’. Once you have the type tool drag a text frame to type in.
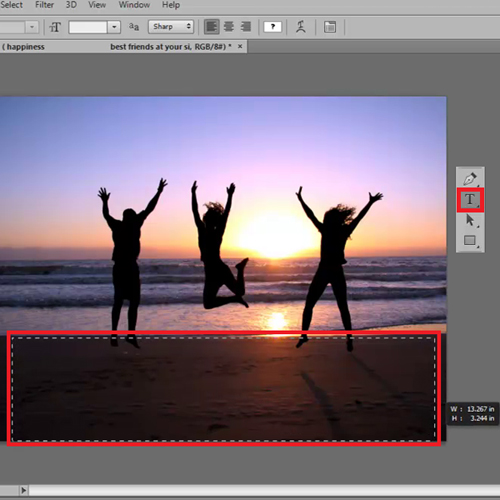
Step # 2 – Enter random text
What’s new in Photoshop CS6 here is that if you go to the ‘Type’ menu you will notice that you have an option known as ‘Paste LoremIpsum’. This command enters random text in your text frame so that you can easily know how the font looks, which size is better and what color is more suitable.
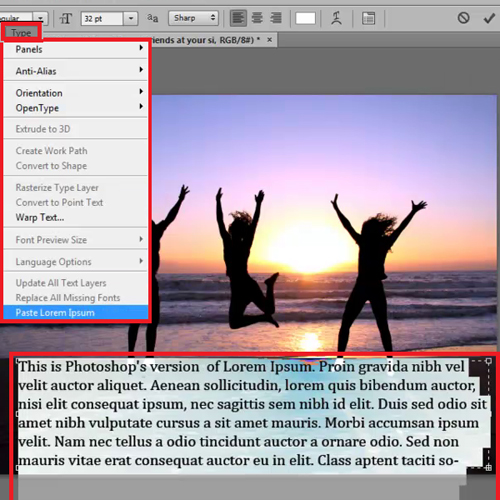
Step # 3 – Create a ‘Paragraph Style’
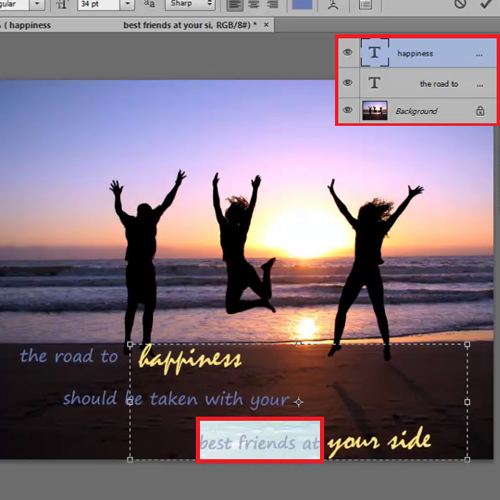
We already have some text layers on this document so hide this layer and turn the visibility on for the other text layers. In order to create a paragraph style select the text layer, go to the ‘Type’ menu; drop down to ‘Panels’ and select ‘Paragraph Styles Panel’.
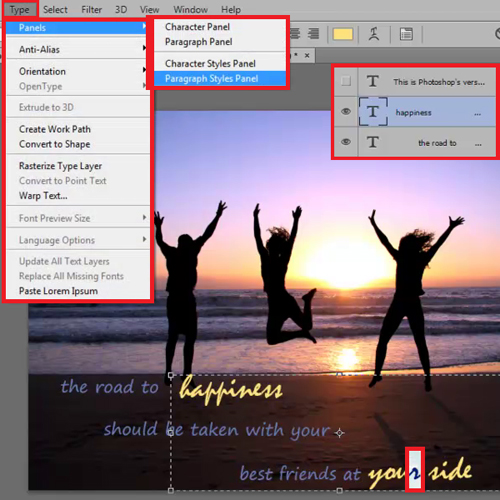
Step # 4 – Customize the ‘Paragraph Style’
Once the Paragraph Styles Panel opens up we will click on the ‘page icon’ at the bottom of its panel. This is there to create a paragraph style. You can modify it by just double clicking on ‘Paragraph Style 1’. Change its name to ‘Happiness’ and then go on to change its indents and spacing, composition and whatever else you wish. For now just go ahead and click ‘Ok’.
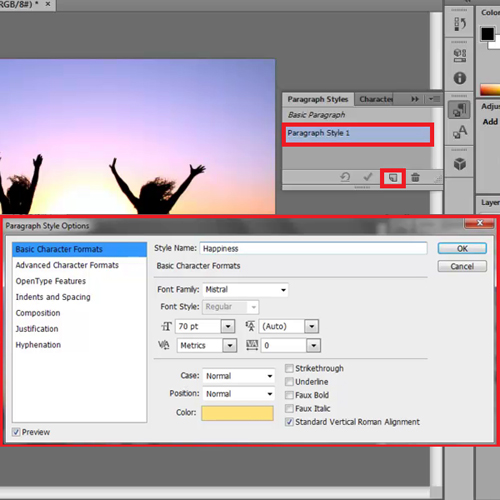
Step # 5 – Apply the ‘Paragraph Style’
If you wish to apply the ‘happiness’ paragraph style on some of the text, go on that layer where you wish to apply it, get the ‘Text Tool’. Select the text you wish to apply the changes to and then click on the ‘Happiness’ paragraph style.
Step # 6 – Clear the overrides
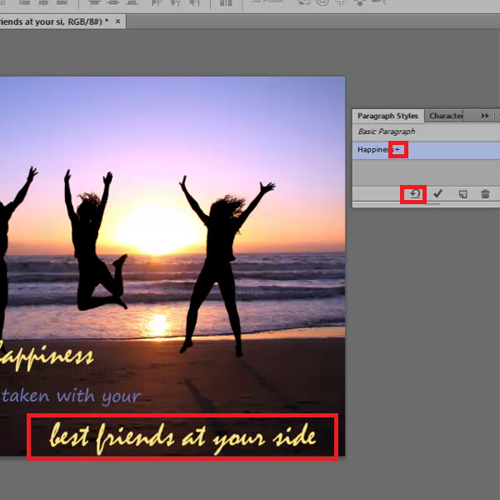
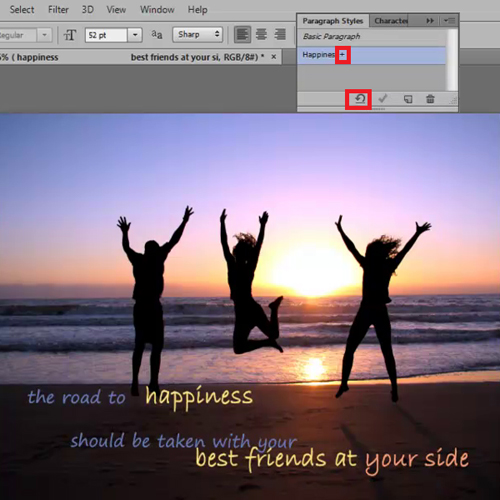
If you notice there is this ‘+’ sign in front of the ‘Paragraph Style’. In order to fix that click on the ‘arrow’ sign below to clear the overrides and the text will change its font, size and color according to the ‘Paragraph Style’.
Step # 7 – Create a ‘Character Style’
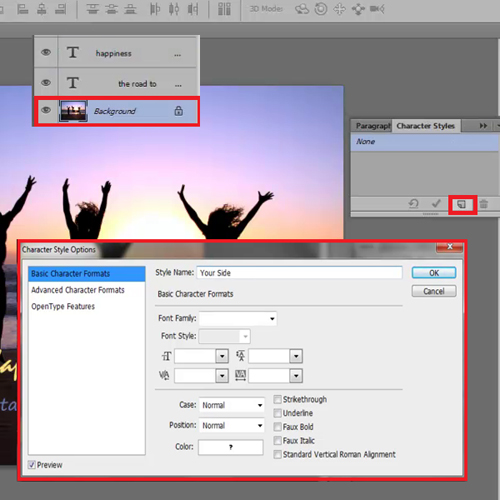
In order to create a Character Panel that we can use to make some of the text of a different color, click on the background layer and then switch over to the Character panel. Create a new ‘Character Style’ by clicking on the page icon on its panel. After that, click on ‘Character Style 1’ to open the options. Type in a name for this particular ‘Character Style’.
Step # 8 – Choose the color
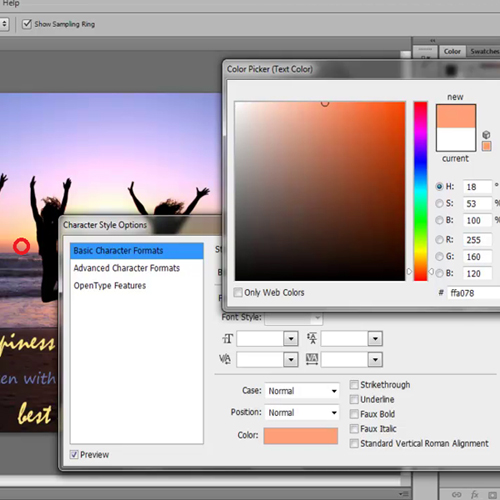
To choose the color click on its box and when the color palette opens up, drag the mouse outside the color box onto the document, pick a color from there then go ahead and click ‘Ok’.
Step # 9 – Apply the ‘Character Style’
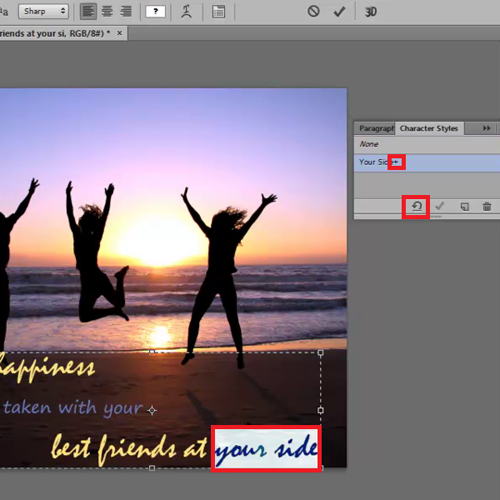
Select the type tool by pressing the ‘T’ key and then choose the text you want to apply the Character Style to. Click on the ‘Your Side’ Character Style. To make the changes visible clear the overrides.
Step # 10 – Go to the ‘Paragraph Style Options’
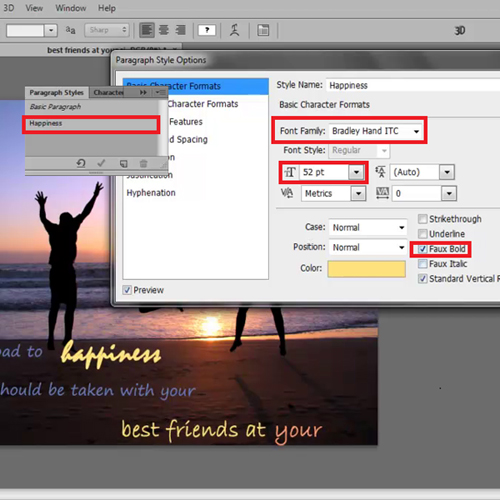
To show how the Paragraph and the Character Style work together we will go to the Paragraph Style Options. Then go on to the options of the ‘Happiness’ Style and change its font and size to alter the text in Photoshop present on your document.
Step # 11 – Clear the overrides
After that go and clear the overrides and now you will notice that all of the text and style on that layer has changed while keeping in consideration our Character Style settings.
 Home
Home