In this tutorial, you will be learning how to edit or create videos in Photoshop timeline. Adobe Photoshop CS6 allows editing videos to be done very easily and quickly.
Follow the tutorial below to understand how to edit videos in this software.
Step # 1 –Add a video to timeline
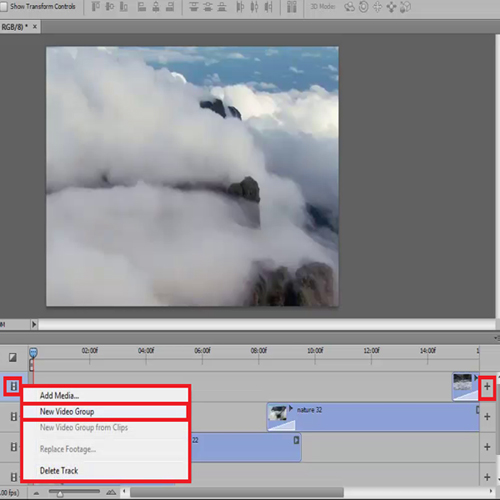
As you can see videos are already in the timeline to save up time. To add a video go to the panel on the left of the timeline, click on the video icon and select ‘New Video Group’. After that click on the ‘+’ sign at the end of that track and open the required video.
Step # 2–Place the video in the timeline
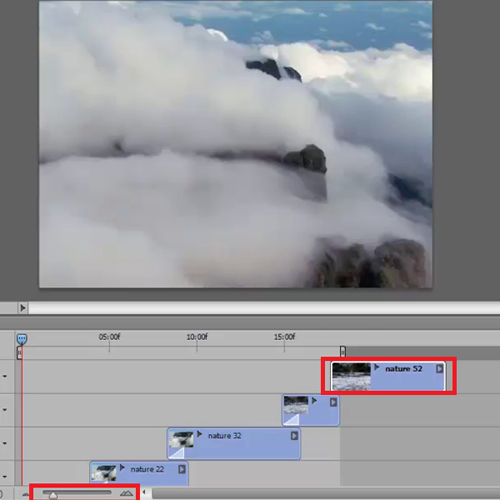
Once it opens make sure that it starts playing after the other videos. As this particular video is longer than the other ones so squeeze the timeline. Drag the video across the timeline and place it at the end.
Step # 3–Add a transition effect
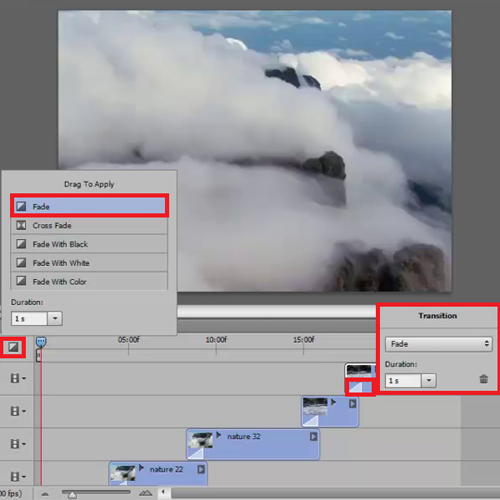
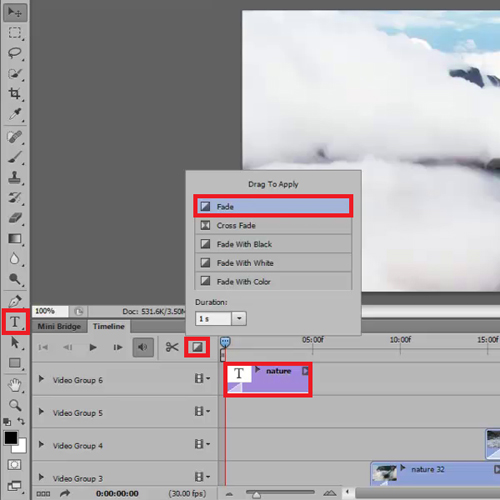
There are white triangles on every video. These show the applied transition effects on it. To apply effects on the new video click on the ‘Transition Box’ and drag the ‘Fade’ option to the video. To adjust the settings of the ‘fade’ effect right click on it, the fade duration is set to 1 second, change it according to your need.
Step # 4–Change settings via Adjustment panel
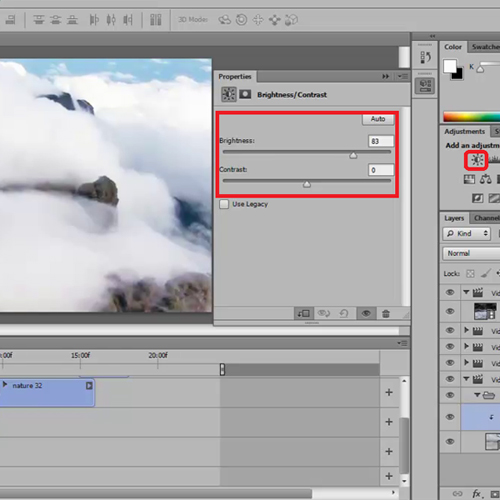
Play the video to see how it looks like. While watching the video if you think the video needs some correction just pause it by pressing the ‘spacebar’ key, click on that particular video and edit it. Over here the brightness needs alteration so go to the ‘Adjustments Panel’ and increase it a bit. Not all of the videos will need correction.
Step # 5–Add text to the video
We can add text in the videos by adding a new group video, selecting the ‘Text tool’ and eventually drawing out a text frame. Enter some text in it, the transition effect and decrease the video length of the text.
Step # 6–Have a look at the Audio and Video controls
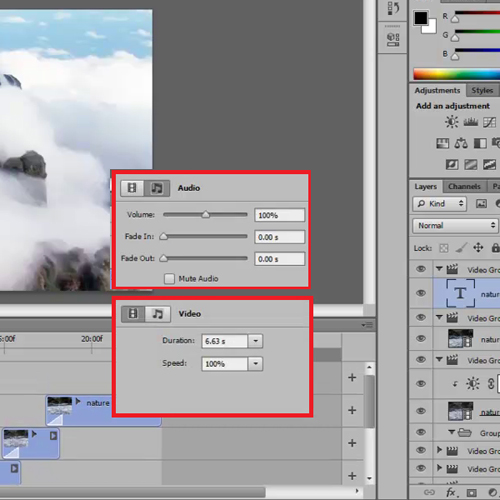
If you right click on any of the videos you will have access to what the duration of the video is and at what speed it should play. If you click on the music symbol you will have access to the audio settings of the video.
Step # 7–Export your project
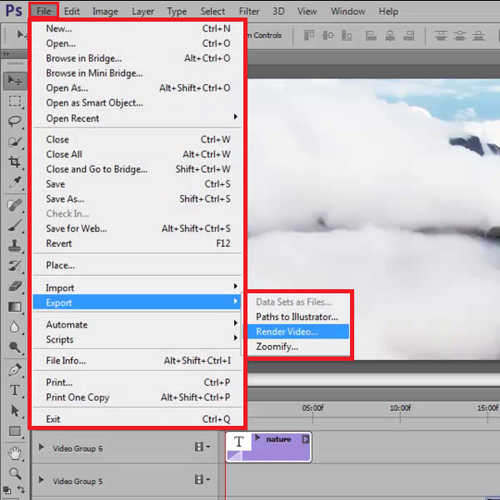
Once you are done editing the videos then go to the ‘File Menu’, drop down to ‘Export’ and click on ‘Render’.
Step # 8–Render your video
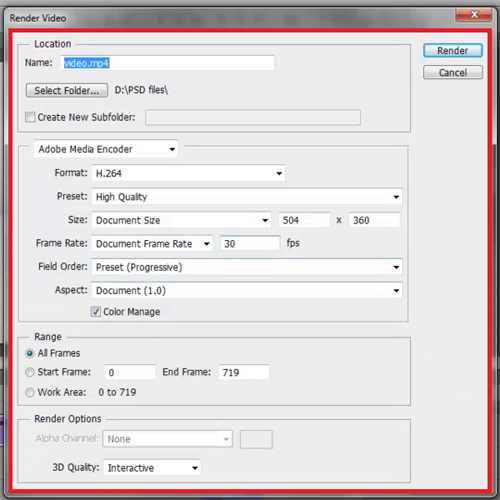
This will pop up a Render Video box which uses Adobe Media Encoder to encode your videos in Photoshop. They have various options for you to choose from. Once you have chosen them click ‘Render’ and Photoshop will render the video for you.
 Home
Home