An icon is a small picture that represents an object or a program. Icons are an important element of an effective and attractive web design. There are many types of icons, each having a specific meaning and purpose. Most of the icons are small and very detailed and often it can be challenging to create the quality ones. In this Photoshop tutorial, we will show you how to make a folder icon. Other software like Illustrator can also be used to create such icons.
This tutorial will focus on how to make a folder icon in Photoshop.
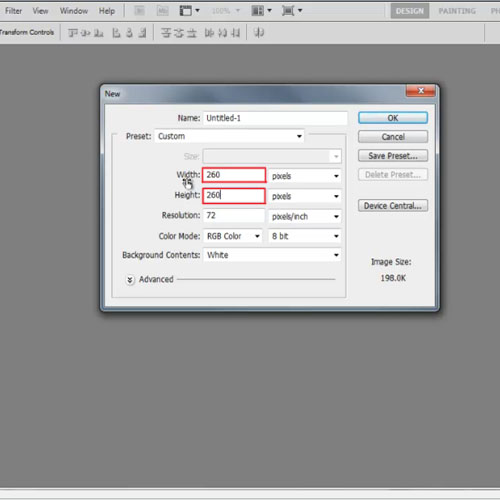
Step # 1 – Open a new document
First of all, open up a new document, keeping the dimensions 260 both for the width and height.
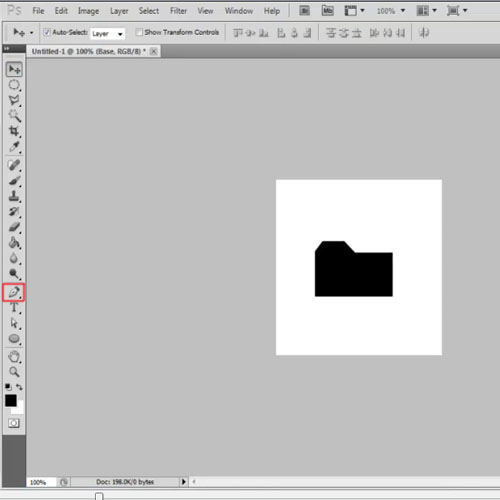
Step # 2 – Make the outline of a folder icon
Now, pick up the “pen tool” and make the basic outline for your folder icon. Keep pressing the “shift” key, so that the outline is made in straight lines.
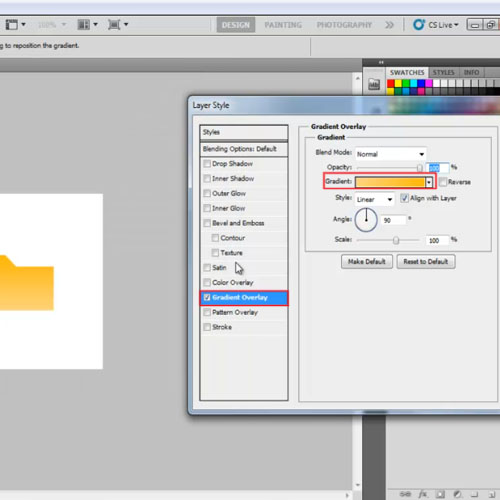
Step # 3 – Apply gradient to the folder icon
Next, move to the “Layer Style” window and click on the “gradient overlay” option. Choose “ffd27a” for the left side gradient and “ffb912” for the right side.
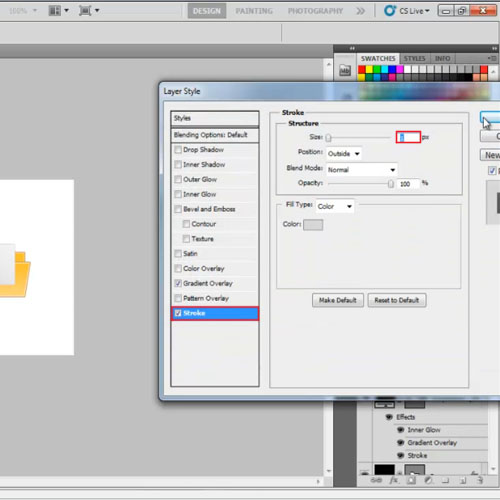
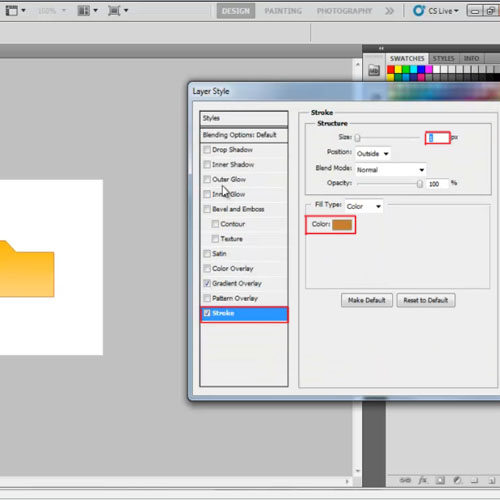
Step # 4 – Add stroke to the icon
Next, move to the stroke tab, keep the stroke weight to “1 pixel” and choose “c07c33” for the stroke color.
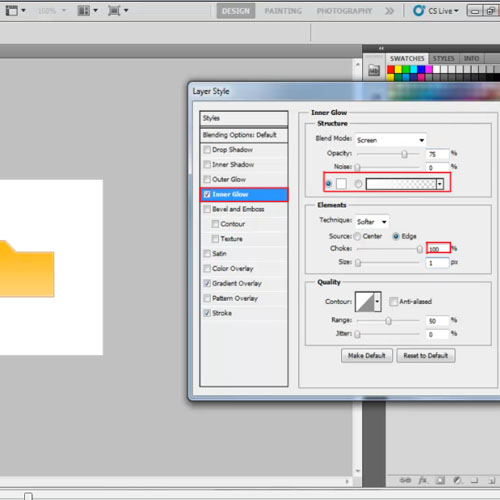
Step # 5 – Add the inner glow effect to the icon
After learning how to make a folder icon now move on to how to add effects to it. First go to the “Inner Glow” tab and choose white color for the fill. Next, increase Choke to “100%” and keep the size at “1 pixel”.
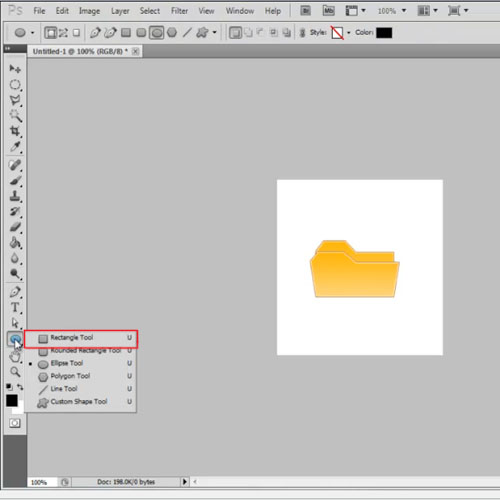
Step # 6 – Create the front part of the folder icon
Once done, click on the “Ok” button and duplicate the shape layer. Press “Control + T” to open up the “transformation tool”, right click and choose the “Perspective” option. Now click on the top right anchor point and move the cursor slightly towards the right side. You need to decrease the size of the shape layer vertically.
Step # 7 – Make a paper
Next pick up the “rectangular shape tool” and draw a rectangle on the canvas. Rename the shape layer Paper and open up the “layer style” options.
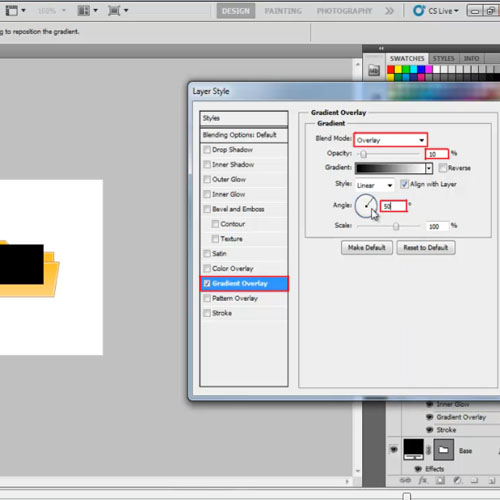
Step # 8 – Apply gradient to the paper
Move to the “gradient overlay” tab and choose a simple black to white gradient. Now reduce the opacity of the gradient effect to “10%”, change the blend mode to “overlay” and angle to “50 degrees”.
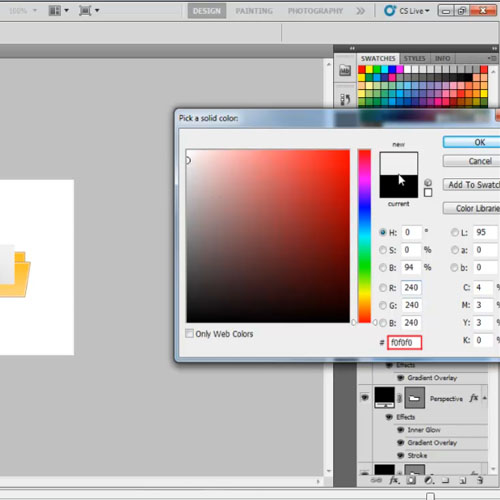
Step # 9 – Change the color of the paper
With that done, choose “f0f0f0” for the color of the paper shape layer.
Step # 10 – Add stroke and set the position of the paper
Lastly in this Photoshop tutorial we will now move to the “stroke” option, change the size to “1 pixel” and choose “d6d6d6” for the color fill. With that done, position the paper shape layer between the previously created layers, tilt the layer a bit, position it according to the illustration and you’re done.