Adobe Photoshop can be used to create different types of effects. In this Photoshop tutorial, you will learn that you can create a vintage poster in Photoshop fairly easily. Vintage is a popular style and is still used today for different designs. Follow the step by step guide to learn how to design a vintage poster for a perfume in Adobe Photoshop.
In this tutorial, we are going to use textured paper images which can be download from the web.
Step# 1 – Load an image
First of all, launch Adobe Photoshop and open a new document with a transparent background. Keep the resolution to 300.
To create a vintage background for the poster, open an image of “vintage texture”. Any other vintage textured paper image can be used according to the requirement. Resize it to fit in the canvas.
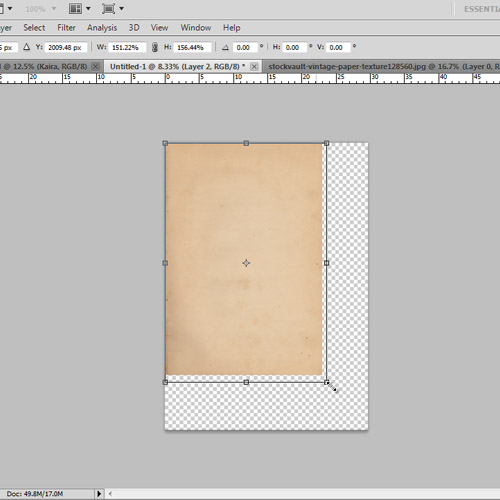
Step# 2 – Load a texture image
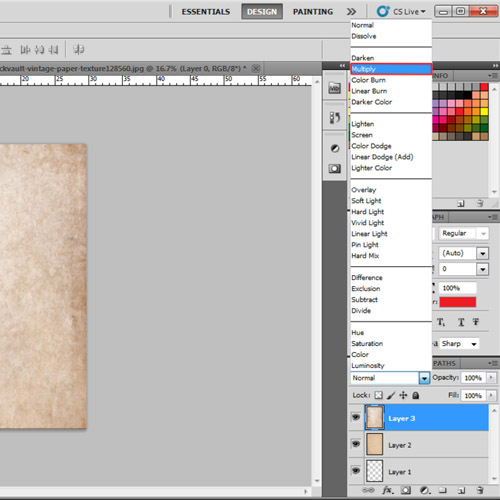
Now we will blend another image of a paper to create a vintage texture. Open an image of “grudge texture” and resize it to fit in the canvas. Change its layer mode to “multiply”.
Now we will open and use a simple “textured paper” image and blend it to create an old vintage paper look. Open the image and resize it to fit in the canvas. Change its layer mode to “Hard Light” and its opacity to 55%.
Step# 3 – Balance the brightness
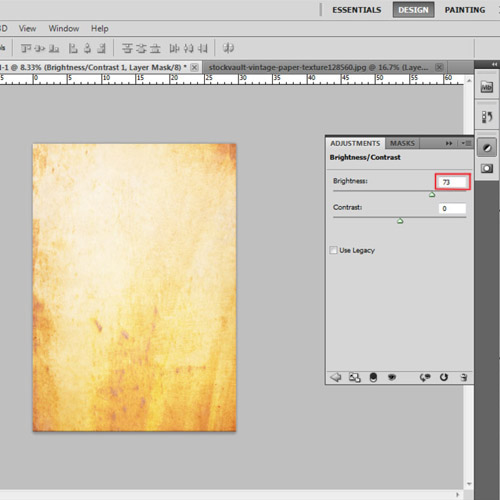
When we have combined all the textured paper images to create a new textured background, then we will adjust the Brightness/Contrast of the images to give a more realistic vintage look. Select the Brightness/Contrast icon in the adjustment panel and adjust the bars accordingly. The final image should look like an old paper.
Step# 4 – Add Paint Daubs Filter
Once the background is ready, we will place the image of the product. Right now, we are going to create a poster for a perfume. You can use any image of a vintage perfume bottle. You can easily download it from the web. Open an image of a vintage perfume bottle and use the “quick selection tool” to select the extra area around the bottle and then press “delete” to crop out the bottle from the photograph.
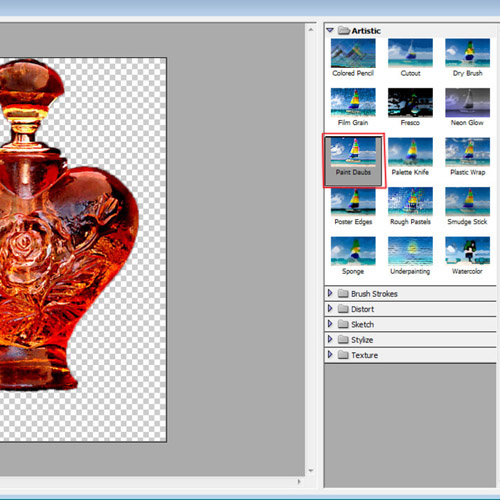
If your image already has a vintage look then it can be used directly but we can also create a vintage look by applying different filters. To give a vintage look to the perfume bottle, we will add the “Paint Daubs filter” to the perfume layer. Go to “filter”, click “Artistic” and then choose “paint daubs”. Adjust the setting according to the object.
Then we will add a Film Grain Filter to it. Go to “Filter”, then click on “Artistic” and choose “Film Grain”. Again adjust the settings according to the object.
Step# 5 – Add Blur motion
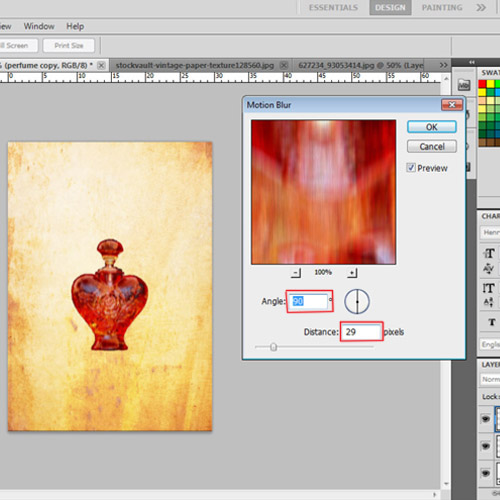
Now we will give some depth and details to the perfume bottle. Duplicate the perfume layer and then add a Motion Blur Filter to it. For that, go to “Filter”, select “Blur” and then choose “Motion Blur” with an Angle of 90° and a Distance of 29px.
Step# 6 – Use gradient overlay
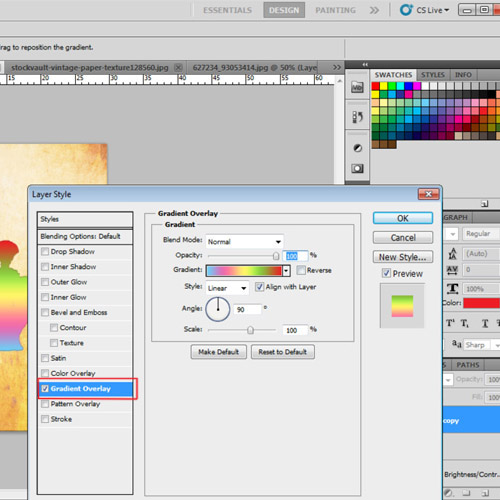
Once the motion blur filter is applied, double click on the layer to open its blending options. Apply “gradient overlay”. Use five different colors for the gradient. Change its opacity to 50%. Now you can see a shine around the bottle.
To enhance the depth, again duplicate this layer and go to “gradient overlay” options. Change the angle to “0” and apply. Now the vintage perfume bottle is ready.
Step# 7 – Add Highlights
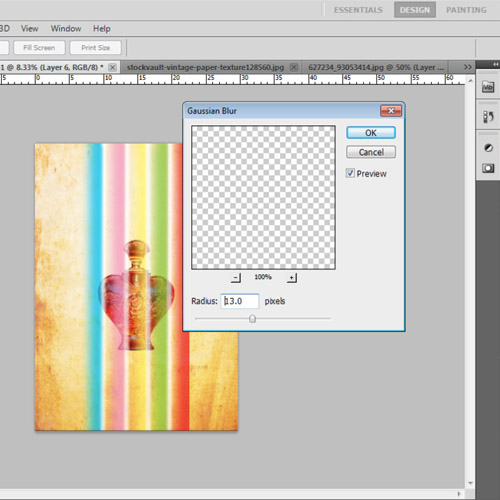
Now we will add some design elements to the poster. Add colorful lines in the background in a new layer. Use the “rectangular marquee tool” to draw an elongated rectangle and use the “round brush tool” to apply color. Repeat this step five times with the same colors as those used for the gradient previously and also use them in the same arrangement.
Now Use the “brush tool” to add white highlights in between the colors. Apply “Gaussian blur” to the layer and change its opacity to 52%.
You can set these colorful lines in any direction or can leave them in a vertical position as per your wish. Press “Ctrl+T” to select and rotate it according to the design if needed.
Step# 8 – Apply color
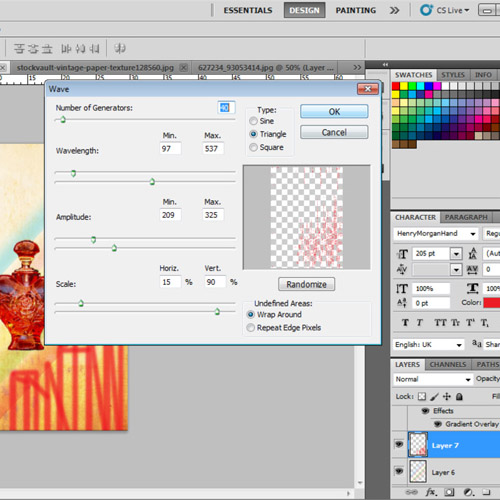
Now use the “brush tool” to apply color at the bottom right. Apply the “wave filter” to it. Go to the “filter” menu, select “distort” and then choose “wave”. Adjust the settings accordingly. This will create a nice wavy texture of colored lines.
Step# 9 – Add vintage motive
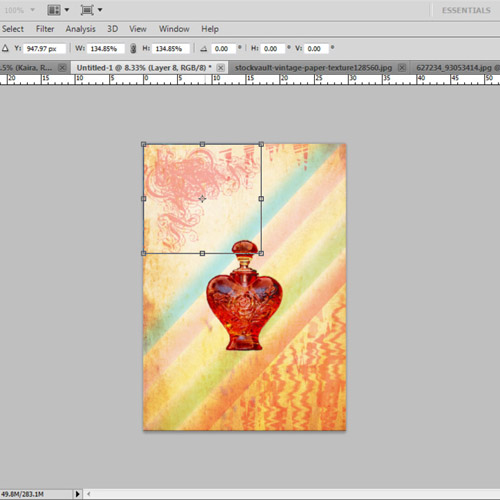
For decoration purposes, in this Photoshop tutorial we will further use brushes so as to enhance our output. Right now we will use the “Urban Brushes 2” style brush and apply a vintage motive to the upper left corner. Set its opacity to 45% so that it merges with the background. You can use other style of brushes as well.
Step # 10 – Insert text
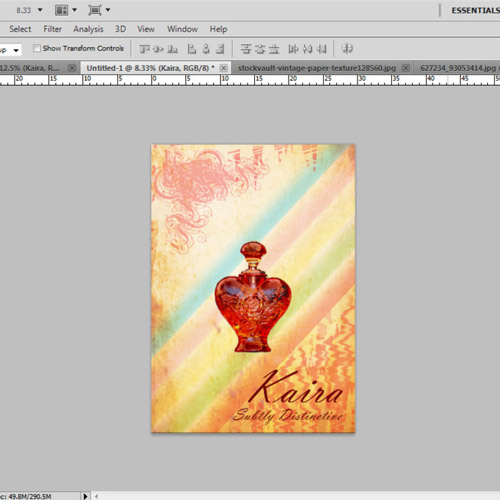
Finally insert the text. Use the “type tool” and insert the tagline and perfume name using the “Vladimir Script” font. The vintage poster in Photoshop is now ready.
 Home
Home