Sometimes, a perfect portrait image is spoiled by unwanted spots, small blemishes or sunburn. However by using a software like Adobe Photoshop, you can easily make your portrait perfect. In this tutorial, we will look at an amazing and time saving photo retouching tool available, the Spot Healing Brush tool. It is essentially a texture replacement tool which means that it tries to create a seamless repair by replacing damaged or unwanted texture from one area in an image with good texture from another area, without changing the problem area’s original color or brightness values. This tool can be used to remove pimple in Photoshop from a face in a portrait.
In this tutorial, we will teach you how to remove spots from the face using Adobe Photoshop.
Step # 1 – Load an Image
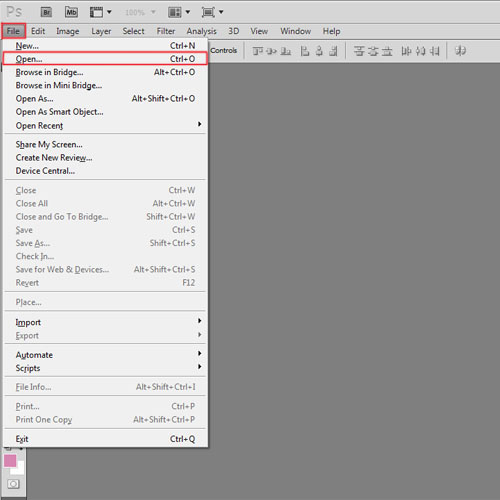
Open an image in Adobe Photoshop which needs to be edited. Go to the “file” menu and then click on “open” from the list. When the window appears, browse for your photo and then click on the “open” button.
Step # 2 – Select Spot Healing Tool from the toolbar
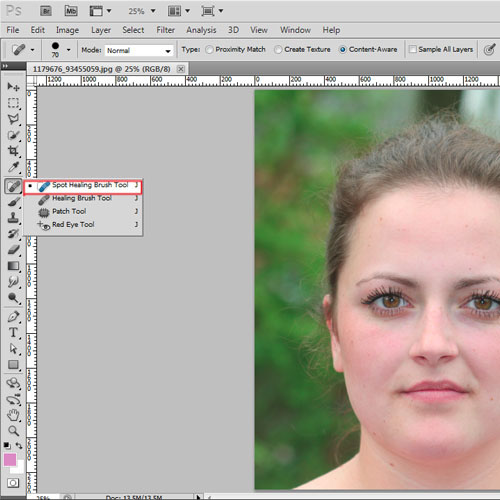
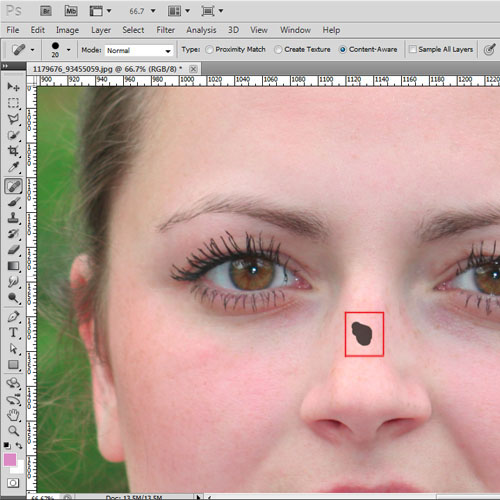
Once the image is opened, select the “spot healing brush tool” from the toolbar on the right. This tool is like the clone stamp tool, but instead of letting you define the part of the image that will replace the flaw, Photoshop will attempt to read the patterns and colors of the surrounding pixels to fill in the area you select with the spot healing brush.
Step # 3 – Click on the spots
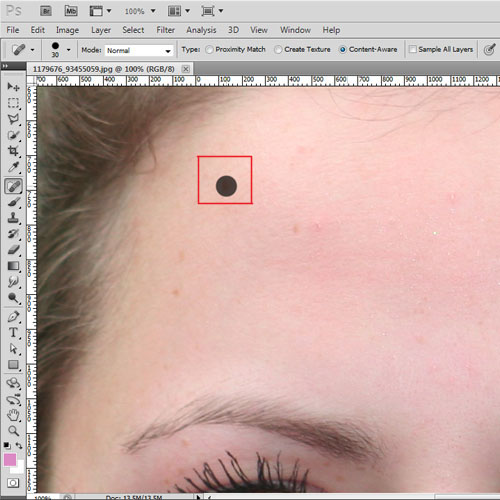
Zoom in the area as much as possible so that you have a good close up view of the blemishes or wrinkles on the face. Change the size of the tool according to size of the spot. You will need to use a brush size that is just slightly larger than the area you are trying to fix. Click on the spot and they will automatically be removed.
Step # 4 – Set the brush size
Do not use a much larger size of the brush than the spot as it can discolor the skin or create a mismatched texture on the skin which will be visible. You really need to be careful when using the spot healing brush tool especially in areas which are in the shadow.
Step # 5 – Healing larger area of skin
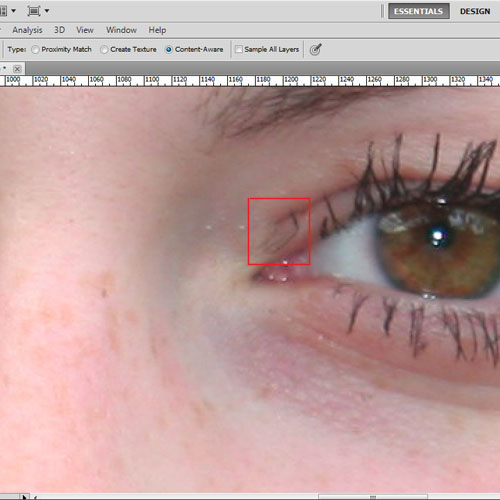
If you have a large area of skin which needs healing, then click and drag a short stroke over it. The direction you drag in can make a big difference in the results because Photoshop favors the area you started dragging from when it looks for the replacement texture. If you can’t seem to get the Spot Healing Brush to work no matter how many times you drag over the problem, try dragging from a different direction. Be careful not to over use the healing tool otherwise it will create an artificial look. To remove a pimple in Photoshop you can use the same technique.
 Home
Home