Adobe Photoshop can be used for many photo and graphic needs, either professional or just for fun. If you want to recreate a poster for a horror movie or a novelty picture of yourself, you can use Adobe Photoshop to turn yourself, or someone you know into a zombie.
In this Photoshop tutorial, you will learn how to draw a zombie in Adobe Photoshop.
Step # 1 – Load an Image
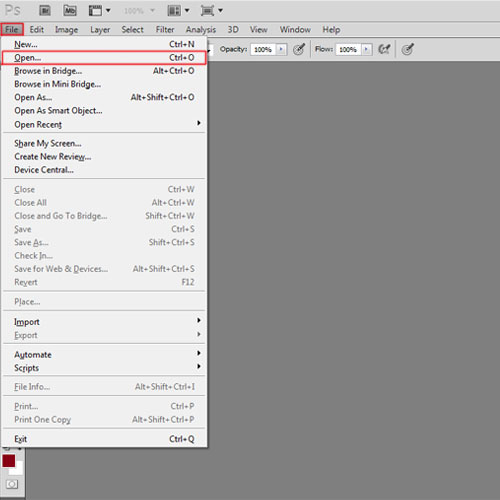
Frist of all, open an image in Adobe Photoshop on which you want to apply the zombie effect. The image can be a portrait or a complete body image. In this tutorial, we are going to use a portrait image.
Step # 2 – Create a selection
Now we will zoom in the image so that the outlines of the eyes are clear and then we will create a selection around the eyes using the “lasso tool”. You can use other methods to create the selection as well. Next, press “Ctrl+J” to create a copy of the selection on a new layer.

Step # 3 – Increase the brightness
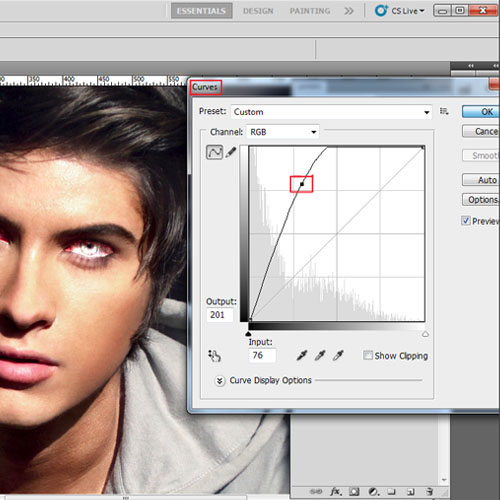
Once we have the duplicate copy of the eyes on a new layer, now we will go to the “image” menu at the top toolbar and then go to the “adjustment” option. Click on “curves” and when the dialog box appears, increase the brightness of the eyes by adjusting the graph.
Step # 4 – Apply the Diffuse glow filter
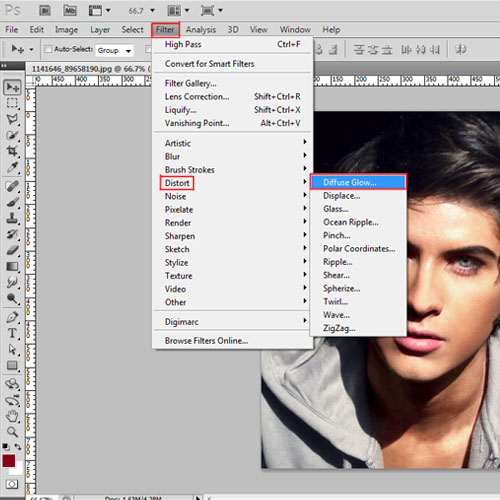
Once the eyes are done, click on the background layer, create a duplicate layer of it and drag it above “layer 1”. It is always a good practice to create a duplicate copy of the layer before applying a filter on the image. Go to the “filter” menu and select “distort”. Click on the “diffuse glow” option.
Step # 5 – Adjust the setting of the filter
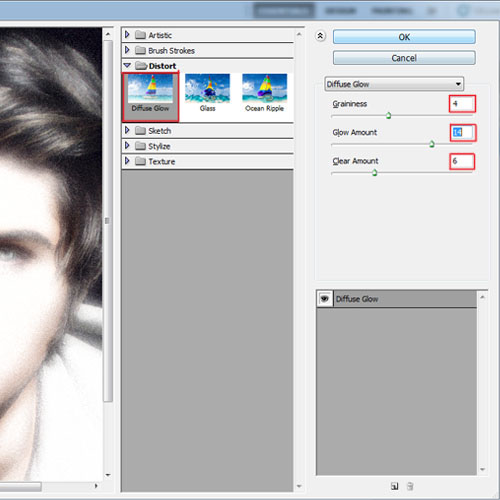
When the window appears, adjust the setting according to the image. Different images will require different settings. Now click on “ok”. As we want to create an effect of discolored skin so we will increase the glow amount.
Step # 6 – Change the blending mode of the layer
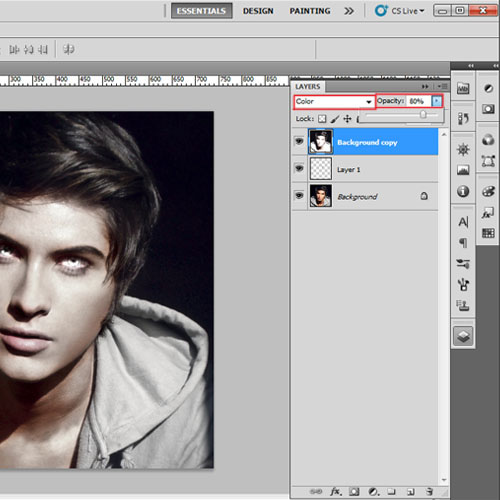
Once the filter is applied, we need to blend this layer with the original image so change the layer blending mood to “color” and reduce the opacity of the layer to 80%.
Step # 7 – Apply high pass filter
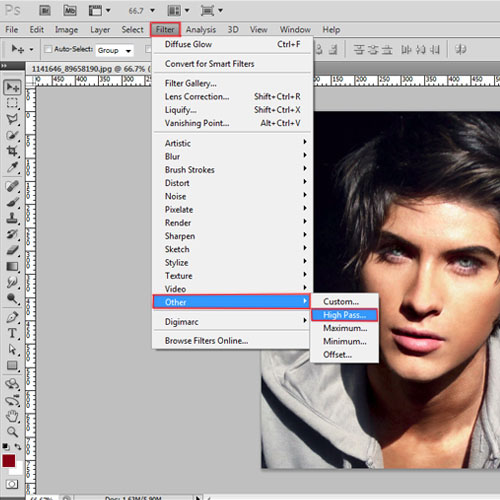
Now again go to background layer and create a duplicate layer. Then drag the layer above all the layers. Go to the “filter” menu and then select “others”. Click on the “high pass” option from the list. When the high pass window appears, adjust the radius to 17 px and press “ok”. The radius will vary for different images. Change the blending mode of the layers to “soft light”.
Step # 8 – Create crack effect on the skin
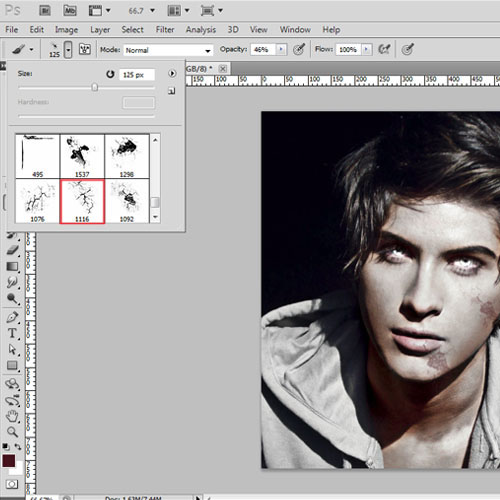
Next in this Photoshop tutorial, we will create texture on the skin. Create a new layer and select the “brush tool” from the toolbar. Choose the “crack decay brush” from the menu. You can download any crack effect brush from the web and use it. Apply it on the face and neck. If you are using a complete body image, then apply it on all the visible body parts. Change the blending mood to “linear burn”. Reduce the opacity of the layer if needed.
Step # 9 – Apply blood effect on the face
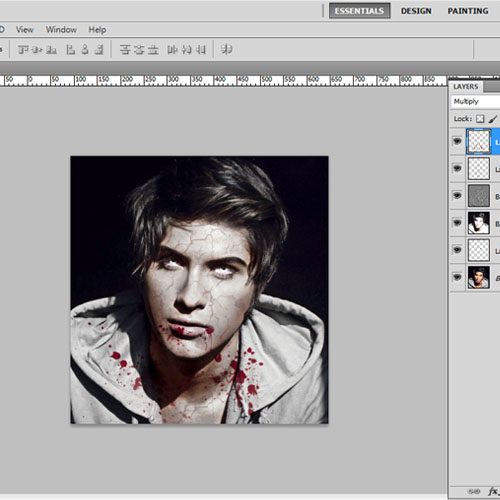
The last step to draw a zombie is to add some blood marks. Create a new layer and select the “blood mark brushes” from the “brushes menu”. You can download blood brushes from the web. Change the color to red and apply the brush near the mouth and neck. Change the blending mood of the layer to “multiply” and reduce the opacity to 90%.
 Home
Home