One of the main highlights of Photoshop is its ability to merge photos and images together, using a variety of tools. In this tutorial we will be learning how to blend two photos together with the help of this software. The very first things you need to prepare are your choice of images. Depending on what kind of image you want to portray, usually you will need a picture to be the ‘background’ and the rest to blend into the background.
In this tutorial, we will merge two photos using Adobe Photoshop so as to enhance the image.
Step # 1 – Open an Image
First of all, we will open image-1. This will be the image which will be used as a background. However, there is no hard and fast rule to open the background image first. In this tutorial we are using an image of a beach with a blank sky which will be the background image. We will add a cloud texture in the sky.
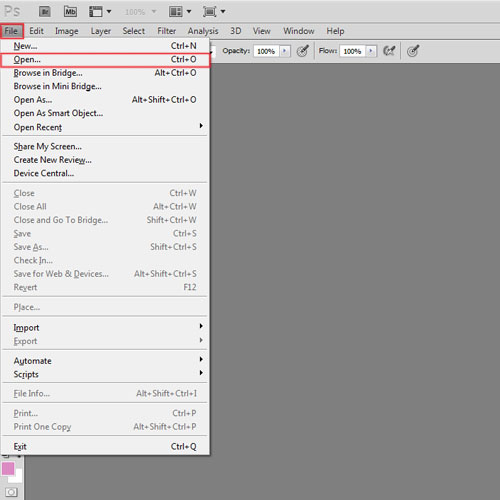
Step # 2 – Open the second Image
Now we will open image-2 which is of a beautiful textured sky. We will be merging this sky image with image-1.
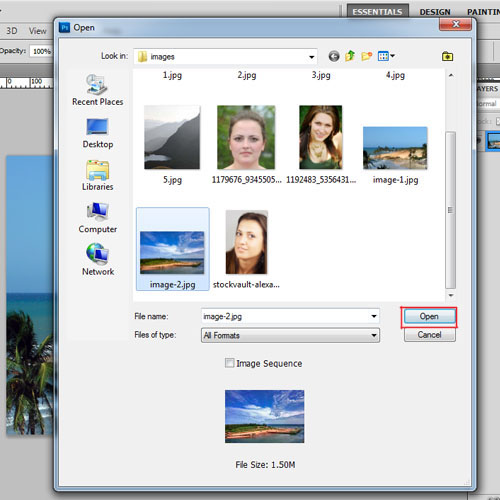
Step # 3 – Decrease the opacity of the layer
Next, we will place image-2 over the previous image. Then we will reduce the opacity to 40% so that image-1 is also visible. We are reducing the opacity of the layer so that we can see the image in the background and then adjust the position of the second image according to it. Adjust the placement of the image so that the clouds are in right position.
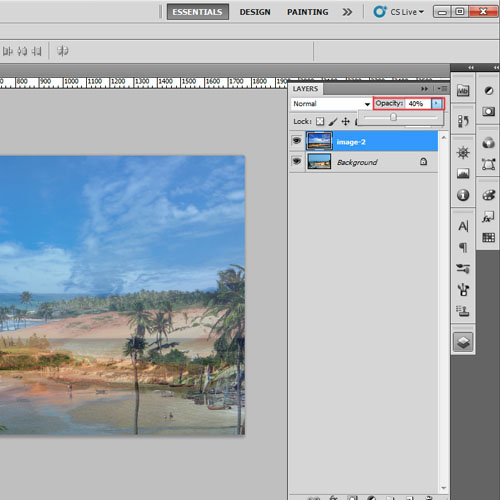
Step # 4 – Remove the unwanted parts from the image
Once the placements are adjusted, remove the parts which are not needed. Select the “rectangular marquee tool” from the toolbar and make a selection around the area which needs to be removed. You can use other tools like the “lasso tool” or “quick masking” to make a selection. Press the “delete” button to remove the extra parts from image-2.
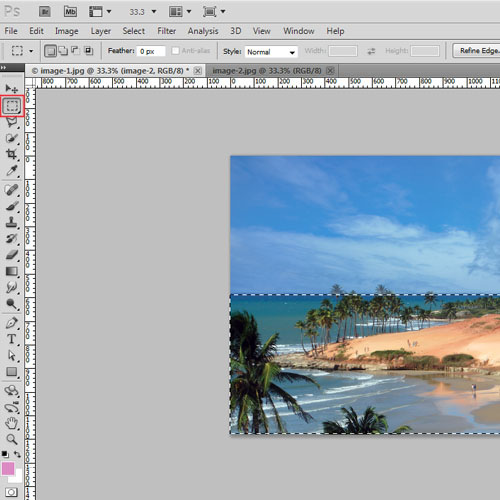
Step # 5 – Blend the layer with the background
The next step is to blend two photos together. We will increase the opacity of image-2 and then change its layer mood to “soft light”. The layer mood style will differ for each image.
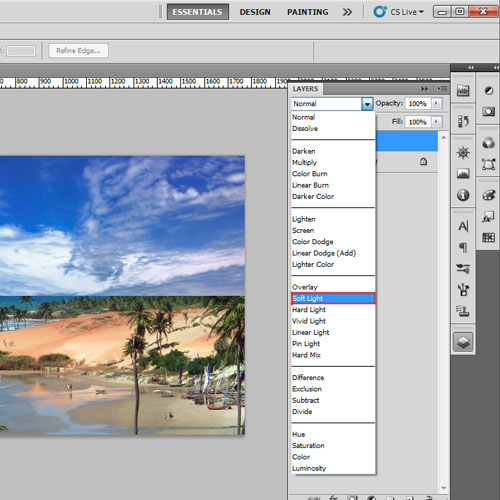
Step # 6 – Remove the sharp edges
Even after changing the blending mode of the layer, there are some visible sharp edges left. In the end, we will remove these edges so as to merge the photos that we have. Select the “eraser tool” and reduce its opacity to 40%. You can use different levels of opacity depending on the image. Apply the “eraser tool” on the edges of image-2 so that it merges with the background.
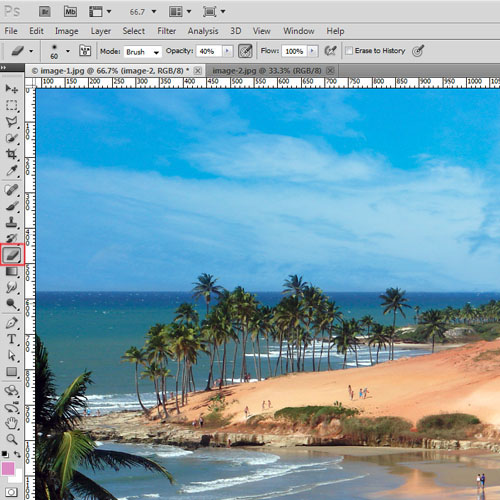
Step # 7 – Reduce the opacity of duplicate layer
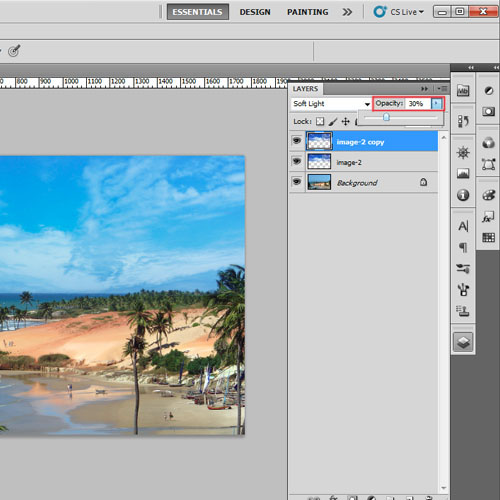
This is an optional step. If you feel that you should brighten the sky then right click on this layer and duplicate it. Reduce its opacity to 30%. The image is now ready.
 Home
Home