Adobe Photoshop is one of the most popular and versatile graphic software. It is loaded with lots of tools and functions which makes photo editing much more easy and fun. Photoshop can also be used to unite pictures together. This effect is often used in movie posters and ads. This software offers a variety of ways of blending images together. In this Photoshop tutorial, we will have a look at an easy way of uniting images.
Step # 1 – Unlock the layer
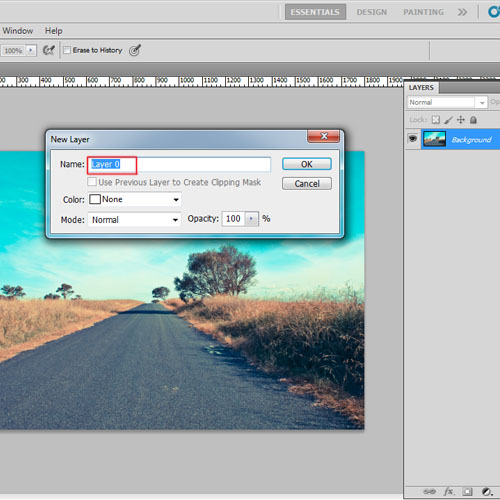
Open the first image in Adobe Photoshop. Remember that if both the images are with the same camera view, then it becomes easier to unite them. Before we start editing the image, we need to unlock the layer so that we can make changes to it. So double click on the background layer to change it to layer 0.
Step # 2 – Increase the size of the canvas
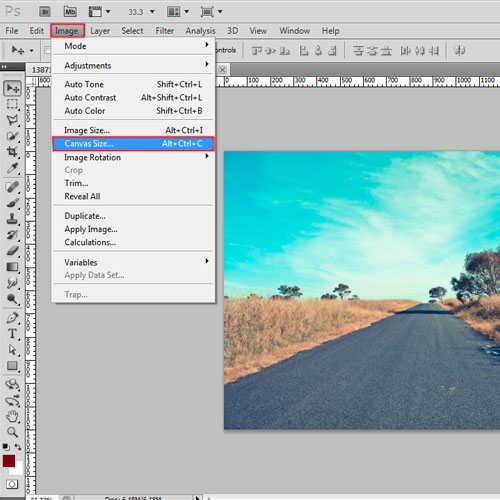
Now we will increase the canvas to make space for the second image. Go to the “image” menu at the top and then select “canvas size”. Increase the width according to the image size.
Step # 3 – Load the second image
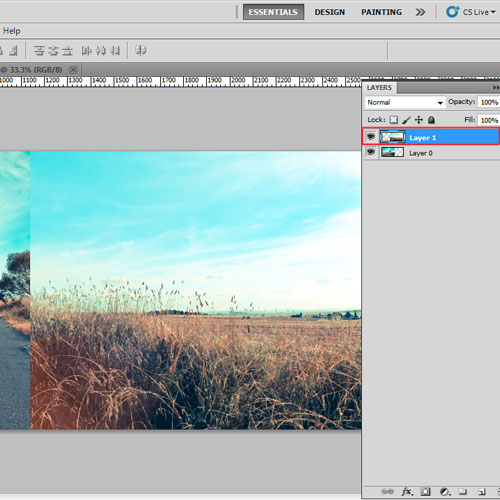
In the next step, we will open the second image and drag it over the first one. Then adjust the placement of the image in such a way that both look part of a single scene.
Step # 4 – Remove the unwanted areas
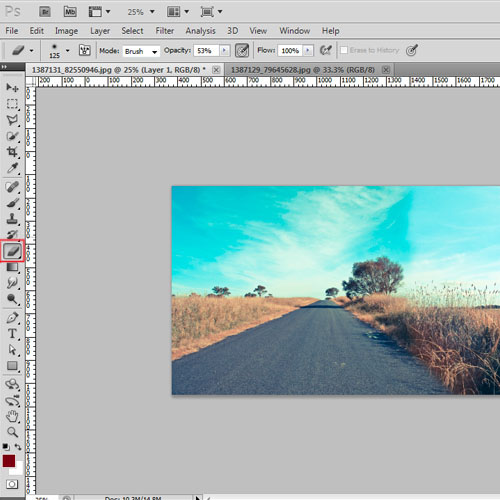
Now select the “eraser tool” from the toolbar and remove the extra parts of the image so as to unite the pictures together. You can use other methods to remove the area as well.
Step # 5 – Adjust the brightness of the image
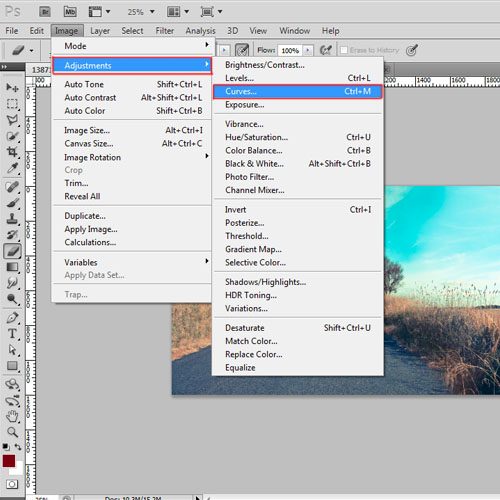
In the end of this Photoshop tutorial, we will go to the “image” menu and click on “adjustment”. Select “curves” from the list and reduce the brightness of the second image to match the brightness of the first one. This is an optional step. If the brightness of both images differs then adjust the brightness of one of the image to match the other one otherwise this is not required.
 Home
Home