In this tutorial you are going to learn how to photoshop fake blood which can be a fun effect to add to your photographs.
Step # 1 – Creating the Area for the Blood
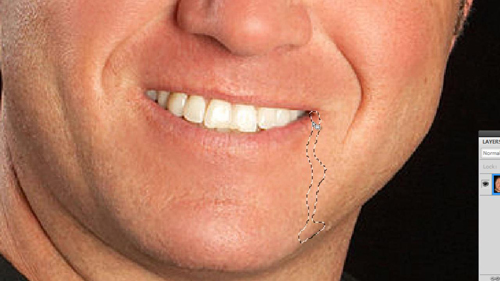
Start Photoshop and open the photo that you want to add the fake blood to, here we are using a simple portrait photograph. Zoom in on the area you want to add the blood to, in this case the mouth. Now, click on the lasso tool on the menu on the left and select the area where you want the blood to appear.

Step # 2 – Making the Selection Red
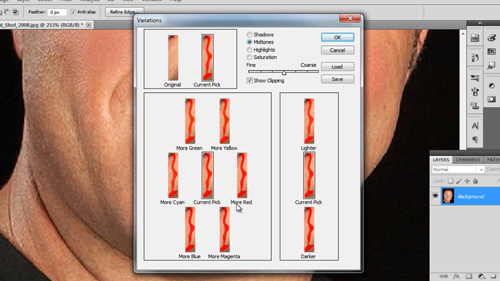
Right click on the selection and click “Feather” in the menu that appears. Enter a feather radius of “0.5” and click “OK.” Click “Image” in the main menu, navigate to “Adjustments” and click on variations. In the window click on the “More Red” and “More Magenta” options until you get a realistic blood color in the selection then click “OK.”

Step # 3 – Improving the Appearance of the Blood
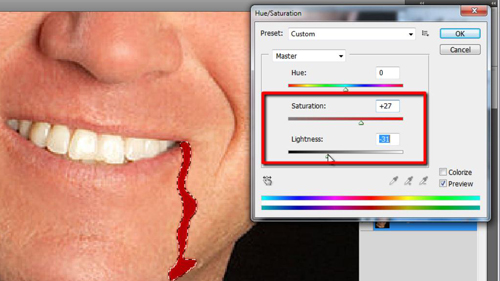
To improve the bloods appearance and make it more realistic. Click on “Image,” go to “Adjustments” then click “Hue/Saturation.” Use the “Saturation” and “Lightness” sliders to adjust the appearance of the blood until it looks just right. Finally, click “OK,” and press “Control” and “D” on the keyboard at the same time to deselect the area. Zoom out to get a good view of the result and that is how to photoshop fake blood.

 Home
Home