In this video tutorial we will show you how to photoshop merge to hdr.
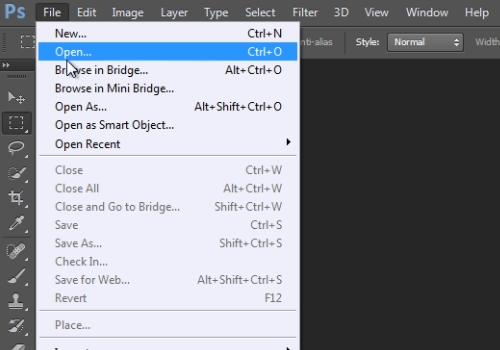
Launch the Adobe Photoshop. Go to the “File” menu, press “Open” and choose the photos you want to use.

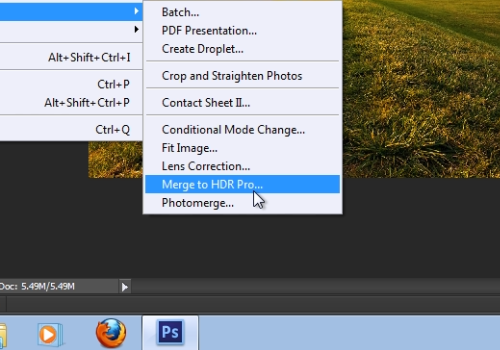
Then, go to “File” menu, click on the “Automate” option and choose the “Merge to HDR Pro” option from submenu.

In the following window click on the “Add Opened Files” and then press “Ok”. In the next window manually set EV settings and then press “Ok”. On the following window, set “32 bit” mode. Then adjust the slider in “set white point preview”. Then, check “Remove ghosts”. When it’s done, press “Ok”.

Now, your hdr is ready.
 Home
Home