In this tutorial you are going to learn how to duplicate an explosion in Photoshop – we are going to create an image of a planet exploding.
Step # 1 – Downloading a Source Image
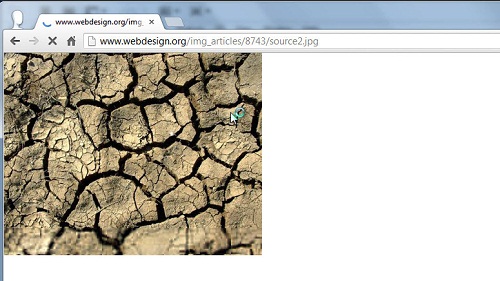
Before we begin this tutorial you are going to need to download an image. Visit “www.webdesign.org/img_articles/8743/source2.jpg” and copy the image. Paste it into Photoshop as a new document.
Step # 2 – Prepping the Image
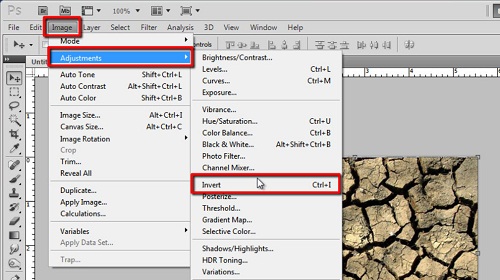
Click on “Image” in the main toolbar then navigate to “Adjustments” and click “Invert”. Now click and hold on the marquee selection tool in the left toolbar, when the menu appears select “Elliptical Marquee Tool”. Hold down the “Shift” key and drag a selection onto the image, it will form a perfect circle because you are holding shift. Now click “Select” in the main menu and click “Inverse”.
Step # 2 – Applying Spherize to the Image
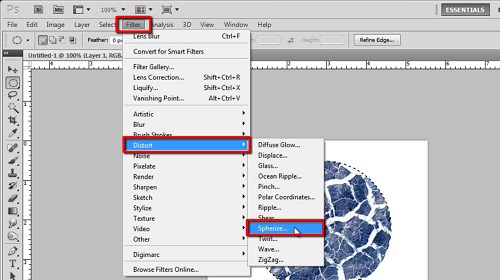
Now, press the “Delete” key on the keyboard. Click “Select” and “Inverse” again. Now click “Filter” navigate to “Distort” and click “Spherize”, make sure it is set to “100%” and click “OK” – repeat this process but with the setting at “50%” this time. Press “Control” and “D” on the keyboard to remove the selection.
Step # 3 – Merging Layers and Using an Unsharp Mask
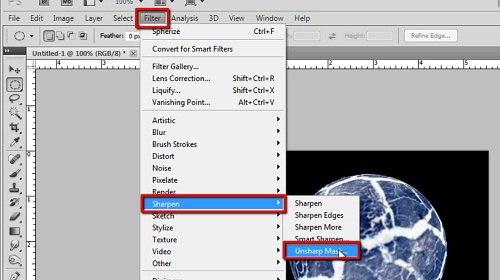
In the layers panel click on “Background” and then press “Shift” and “Backspace” on the keyboard. Select “Black” from the “Use” drop down box and click “OK”. Click “Layer” in the main menu then select “Flatten Image”. Click “Filter” in the main menu, navigate to “Sharpen” and click “Unsharp Mark”. In the window set the “Amount” to “500%”, the “Radius” to “1.7px” and the “Threshhold” to “122”. Click “OK”.
Step # 4 – Adding Effective Wind
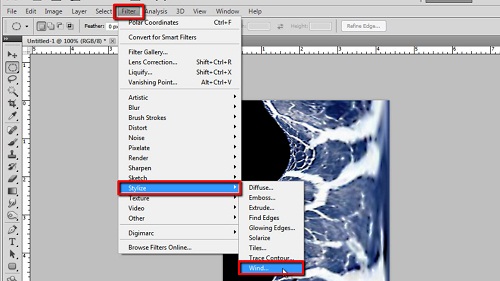
Now, click “Filter”, “Distort” and then “Polar Co-ordinates”. In the window make sure “Polar to Rectangular” is selected and click “OK”. Click “Image” go to “Image Rotation” and choose “90 degrees CW”. Now click “Filter” go to “Stylize” and select “Wind”. Make sure “Wind” is selected and “Direction” is “From the Right”. Click “OK”. Now press “Control” and “F” on the keyboard to add more wind. Rotate the image 90 degrees CCW. Now click, “Filter”, “Distort” and “Polar Coordinates” once again. Make sure “Rectangular to Polar” is selected and click “OK”. Now the image is clearly beginning to look like an explosion, just the color is off.
Step # 5 – Tweaking the Colors
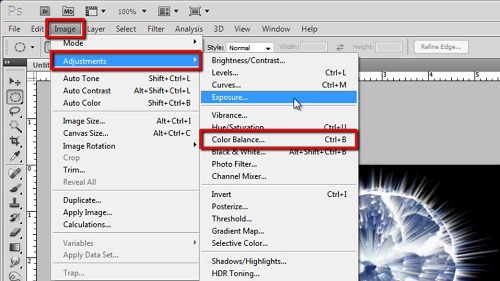
Click “Image”, “Adjustments” then “Color Balance”. Here you will need to experiment a bit to get the colors right, setting the top slider all the way “Red” and the bottom one all the way “Yellow” is a good start. Then click on “Shadows” and repeat the process – top slider all the way right, bottom slider all the way left. You should have a great result by then so click “OK” and that is how to create an explosion in Photoshop.
 Home
Home