A perfectly shot still image is better than a thousand words. To add motion to your still image is certainly an art that many want to learn. There are various techniques through which you can add certain effects in a photo that adds a sense of movement in an image. Here we are using the motion blur filter to create this effect on an image. You can also use other Photoshop filters and rendering tools to add a variety of possibilities in the overall effect.
Follow this step by step guide to learn how to create a motion blur effect in Photoshop.
Step # 1 – Load an Image
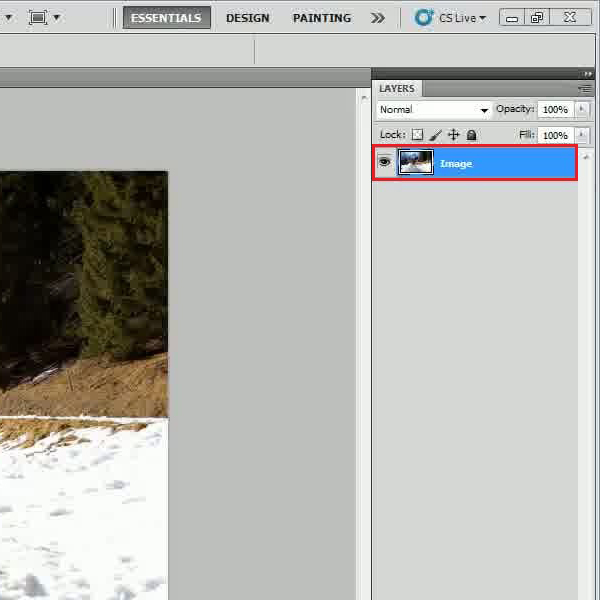
In the first step, launch Adobe Photoshop and load an image on which you want to create a motion blur effect.
Step # 2 – Insert an Adjustment Layer
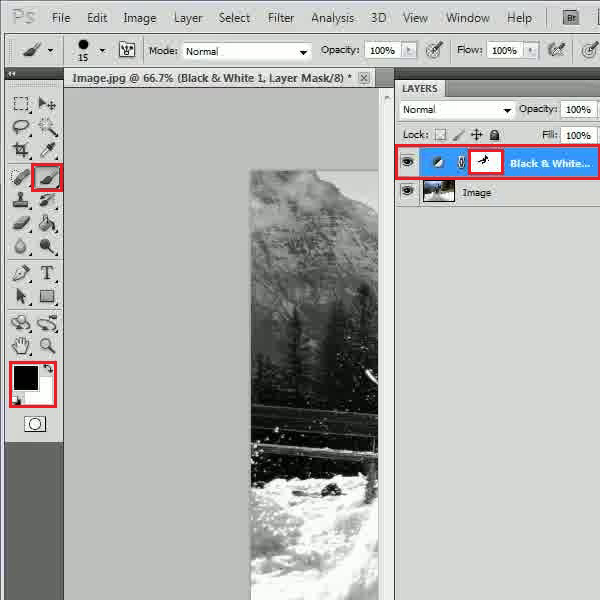
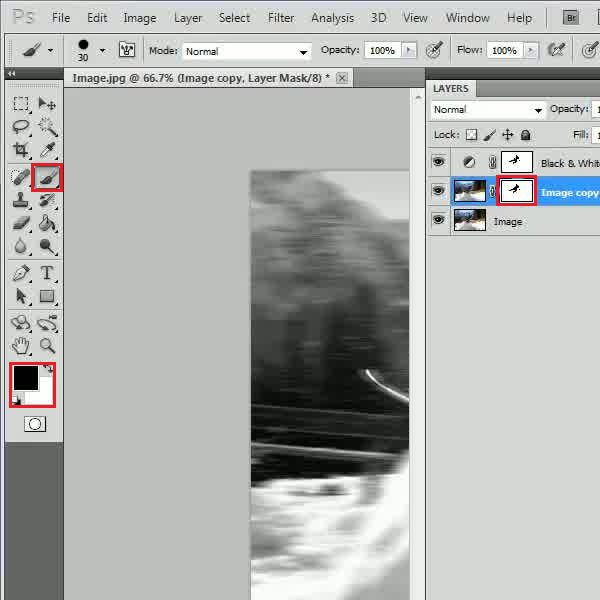
After loading the image, click on the “Adjustment Layer” icon which is available at the bottom of the layers panel. After clicking on it, select the “Black and White Layer” option from the menu. Once you have added an adjustment layer, a white box will appear next to the name of the layer, in the layer palette. This white box is the layer mask. Click on the layer mask and select the “Brush” tool from the menu. Choose the “Black” color for the “Foreground” and start painting over the image.
Step # 3 – Add a Layer Mask
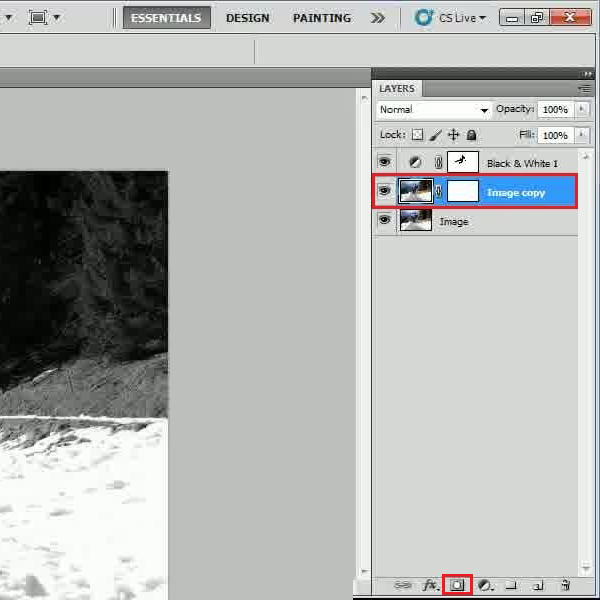
In this step, right click on the “Image” layer and select the “Duplicate Layer” option from the menu. Click on the “Add a mask layer” icon to add a layer mask on this newly created layer.
Step # 4 – Apply the Motion Blur Filter
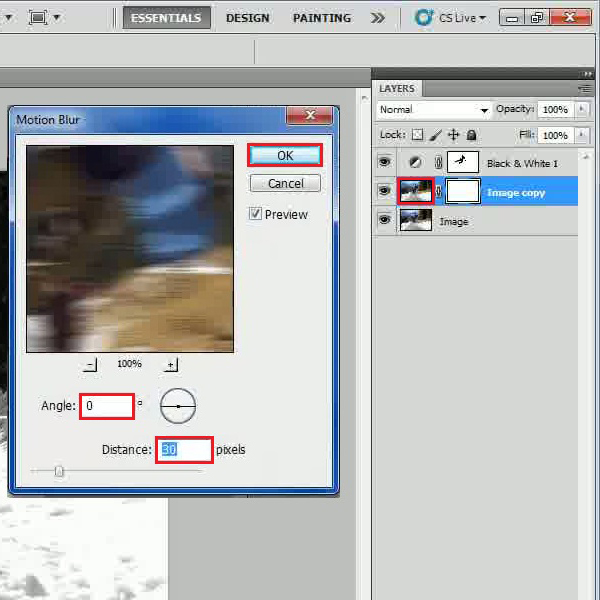
After creating a layer mask, select this layer. Now go to the “Filter” menu, select “Blur” and click on the “Motion Blur” filter from the list. In the filter settings panel, set the “Angle” to “0 degrees” and “Distance” to “30 pixels”. After changing these values, click on the “OK” button to apply this filter on the image.
Step # 5 – Apply a Brush Tool
After applying the filter, click on the layer mask to select it. Now repeat the same procedure and use the “Brush” tool to brush over the object in the image, using “Black” color for the fill.
Step # 6 – Add a New Layer
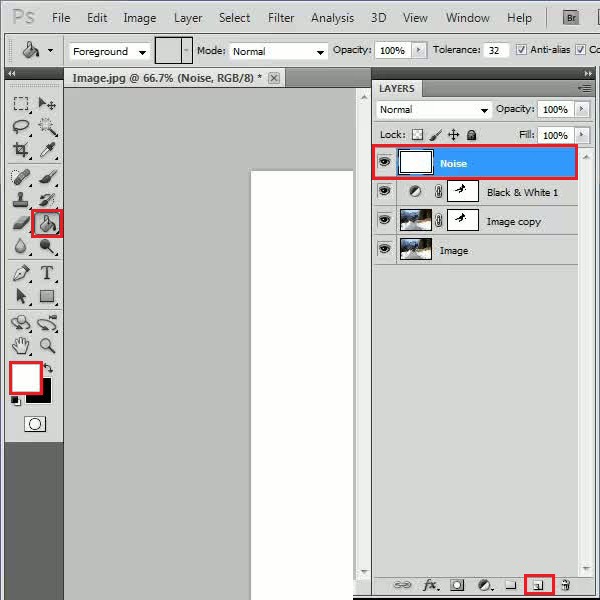
In this step, add a new layer and move it on the top of other layers. Once done, change the name of this layer to “Noise”. In this layer, select the “Paint Bucket” tool from the menu and fill it with “White” color.
Step # 7 – Apply a Noise Filter
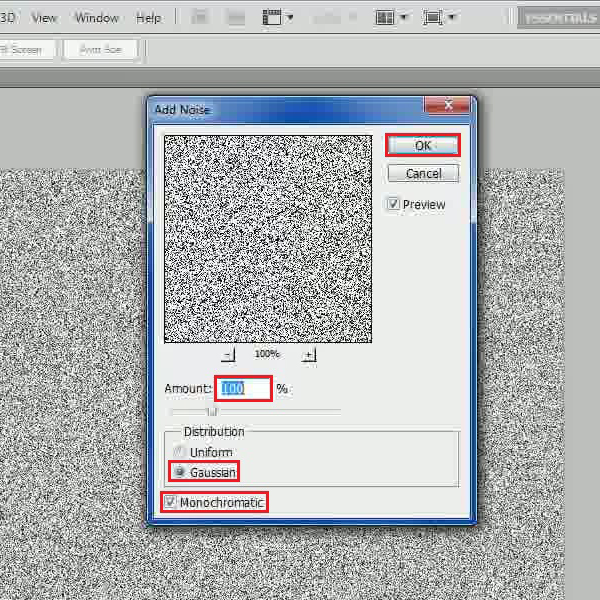
Now go to the “Filter” menu, select “Noise” and click on the “Add Noise” filter from the list. In the filter’s settings panel, set the “Amount” to “100 percent” and select the “Gaussian” and “Monochromatic” option. After changing these values, click on the “OK” button to apply this filter on the image.
Step # 8 – Decrease the Opacity
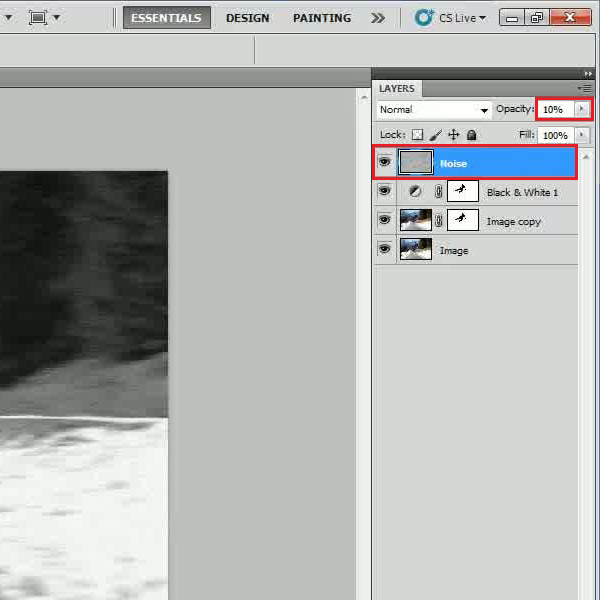
In the final step, change the “Opacity” of this layer to “10 percent”. And that’s it.
 Home
Home