In the past stitching together photos to learn how to create panorama in Photoshop was a complex process, but Photoshop now has a feature that can automate the process. This tutorial is going to show you how to use this feature.
Step # 1 – Opening the Photos you want to Merge
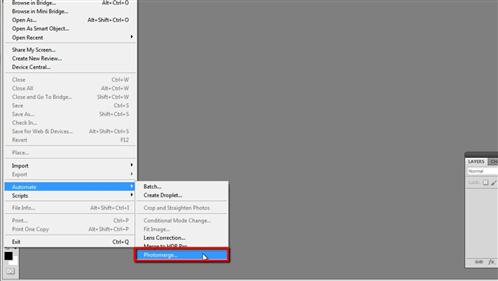
As you can see here we have three photographs that could be merged together to create a larger panoramic image. Close these images and then click “File”, navigate to “Automate” and click “Photomerge”. The “Photomerge” window will open and on the right you need to click “Browse”. Find the images you want to merge on your computer, select them all and click “Open”.

Step # 2 – Merging the Photos
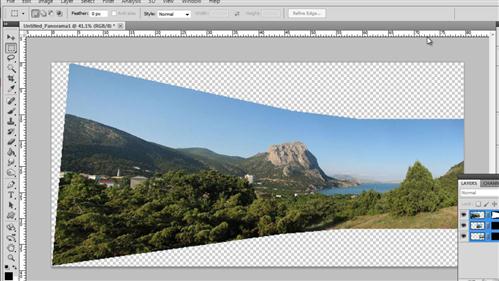
Make sure that the “Auto” option on the left is checked and then click “OK”. Now the computer will process for a moment, how long it takes to complete this merging process will depend on your computers power. Once the merge is completed the panoramic image will be displayed. As you can see here there are some blank parts around the image.

Step # 3 – Tidying up the Panorama
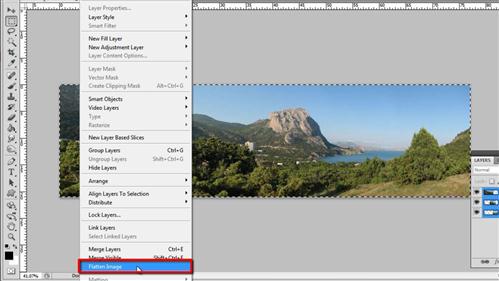
To tidy the image up, click on the “Rectangular marquee tool” in the toolbar and draw a selection around the image that you want to keep, then click “Image” and “Crop”. This gives us a very nice result and to complete the process click “Layer” then “Flatten Image” and that is how to create panorama in Photoshop.

 Home
Home