You can make your own designer Christmas card in Adobe Photoshop by following a few basic steps. Once you learn how to design a Christmas card that is basic in design, you can gradually move on to make more complicated designs in this software.
To learn how make a Christmas card, follow the tutorial given below.
Step 1 – Make a box
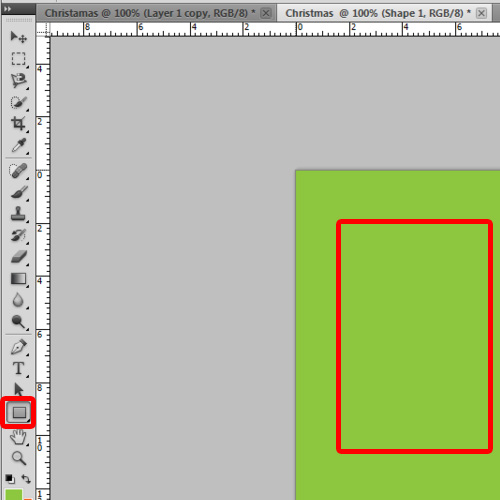
First of all, let’s open up a file with height 5 inches, length 7 inches and resolution 300dpi. Once you’ve got this as your canvas, let’s start working on the card by making a box of the same size as the canvas, by clicking on the “rectangular tool” in the tool bar on the left side of Photoshop.
Now let’s give it a color, for example over here we will use “pure pea green” present in the swatches on the top right of Photoshop.
Step 2 – Create a new layer
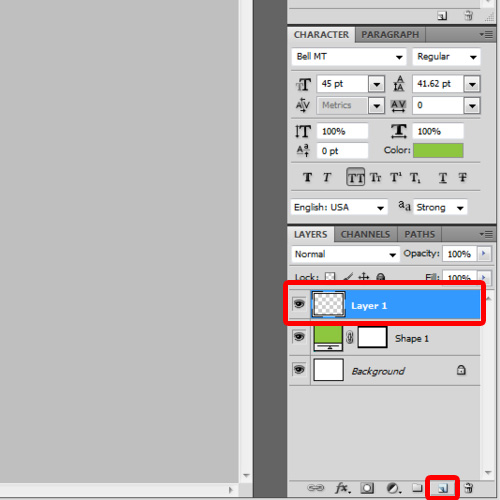
Now let’s create a new layer in which we will use the brush tool and two different brushes to give it a transparent pattern. Remember that this needs careful selection of color, opacity, brush flow and brush size.
Step 3 – Use the brush tool
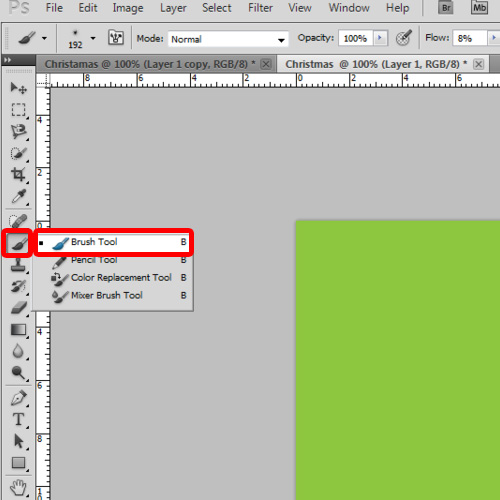
So first of all we’ll select the brush tool. Once you’ve selected it, you’ll see a new bar under the main menu bar which has options related to the tool. In this menu, the second tab comprises of a huge set of brushes that are integrated in Photoshop. Over here, you can load your own brushes too.
Step 4 – Select the “autumn leaf brush”
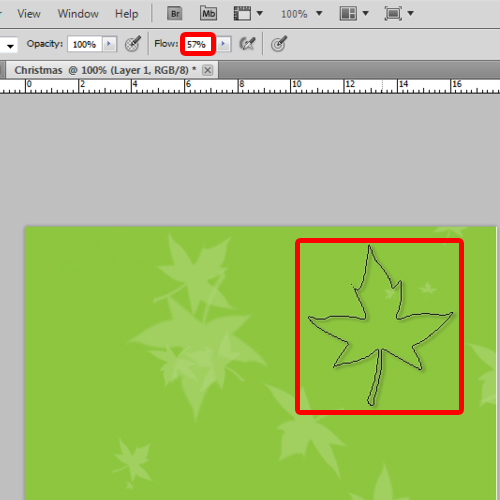
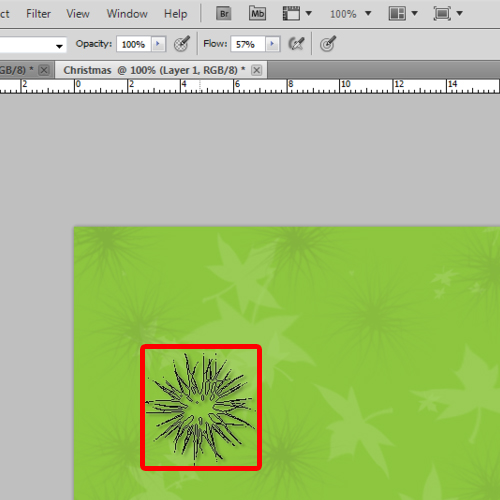
Here we’ll select the autumn leaf brush, and over here we will use different sizes and apply the brush on the canvas. We have used white color for the fill, with opacity set to 20 percent and flow set as 57 percent.
Step 5 – Select a different brush
Once we are done with it, let’s choose another brush with a different size. This time, we will choose black color for the fill with the same level of opacity. Now let’s move the brush randomly just like we did before.
Step 6 – Open the grid
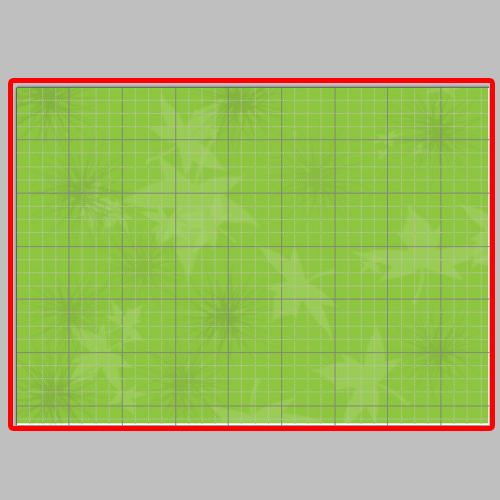
Now let’s open up the grids and ruler by pressing the Ctrl+R and the Ctrl+’ shortcut key respectively.
Step 7 – Select the rectangular tool
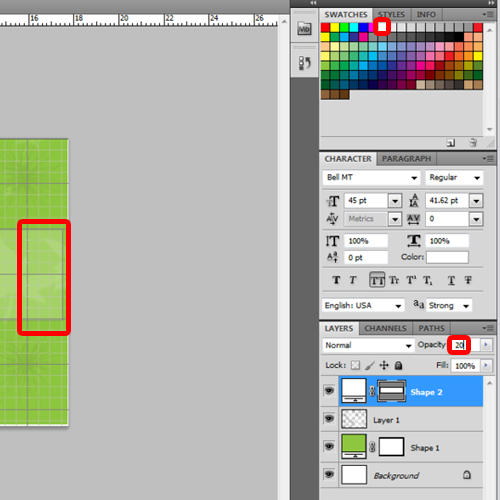
Now let’s choose the rectangular tool again, with color white and opacity set to 20%, we will make a box of 18 by 4 cm over here.
Step 8 – Make another box
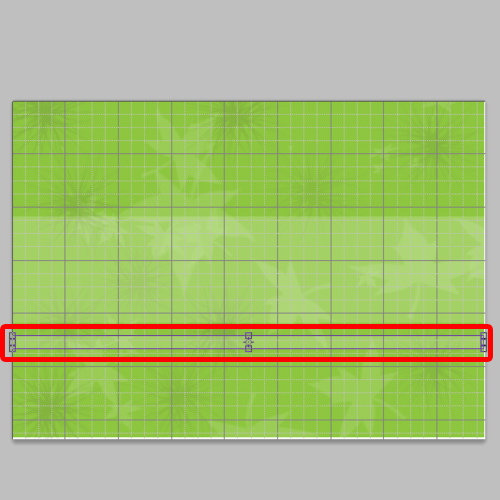
With that done, let’s place it horizontally right in the center of the canvas. Now let’s make a thinner box of 0.5 by 18cm by using the same rectangular shape, resizing it and placing it under the central box with a distance of 0.5cm.
You can see that over here, it will appear as a thick line. Copy this line by clicking on the Move Tool and let’s place it above the big box with the same distance of 0.5 cm.
Step 9 – Add more lines
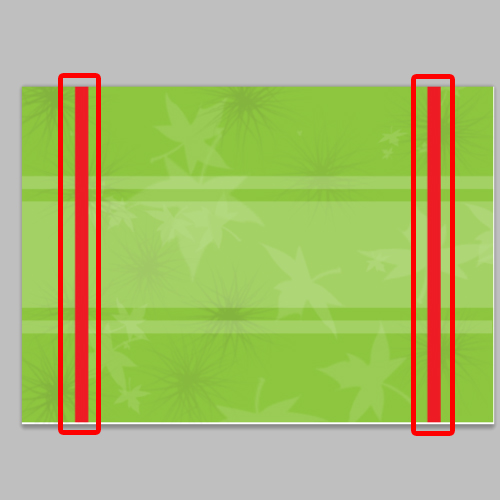
Now we’ll give the background 2 more lines which would be 0.5 by 12.5 cm, and we will place them vertically on the corners of the canvas.
We’ll place them vertically at 2cm and 15cm respectively. Over here, we have filled both these shapes with “RGB Red” from the swatches menu at the top right corner of the screen.
Step 10 – Make two more shapes and enter text
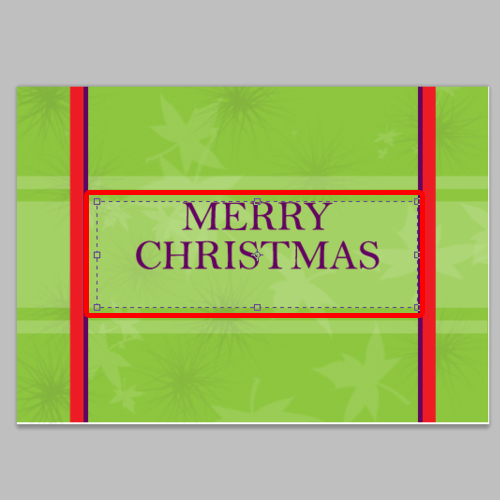
Now we’ll make two more shapes, fill them with “Pure Violet” from the swatches, resize them to 0.2x13cm and place them along with the previous shapes, like shown. Move them right next to the previous vertical shape.
With all this done our background is completely ready.
Now we’ll enter text in our designer Christmas card. For that, we will choose the Horizontal Type tool. Choosing the same color “Pure violet”, with a point size of “50” and using “Bell MT” for the font, we will write down the text in the middle of the lines here. Let’s type in “Merry Christmas”. Do remember to keep the paragraph as “Center text”.
Step 11 – Add the “Outer glow” effect
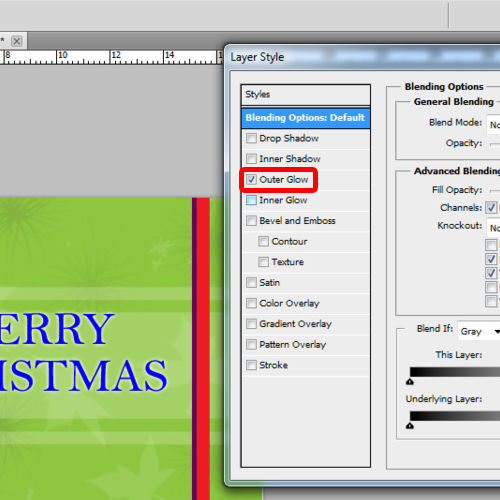
Now let’s double click on this text layer and this will bring up the “Layer styles” window. Here on its top left you’ll see default blending options from which we’ll be clicking on “Outer glow” right now.
With that done, let’s click on the OK button to close the layer style window. And that’s it.
Your Christmas card is ready for printing. By following the simple steps listed above, you can learn how to design a Christmas card using Adobe Photoshop.
 Home
Home