In this tutorial we will teach you how to create a dispersion effect on a photograph through Adobe Photoshop. A Photoshop dispersion effect is easy to give on an image with simple use of the Blur tool in this software.
To understand more of how to create this effect, follow the steps given below.
Step 1 – Select the Magic Wand tool
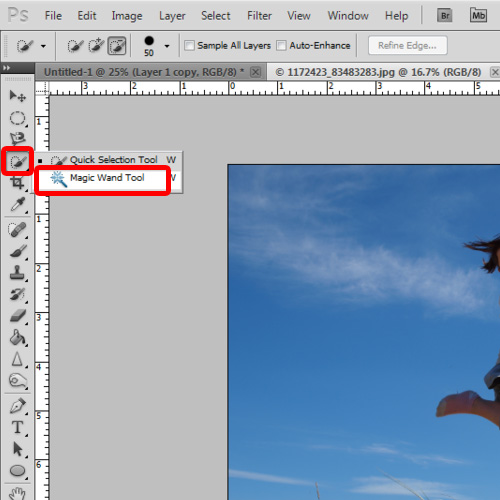
We will be working on this image over here. First of all, select the magic wand tool from the tool box and click on the ‘Add to selection’ button from the options below the menu bar.
Step 2 – Select the background
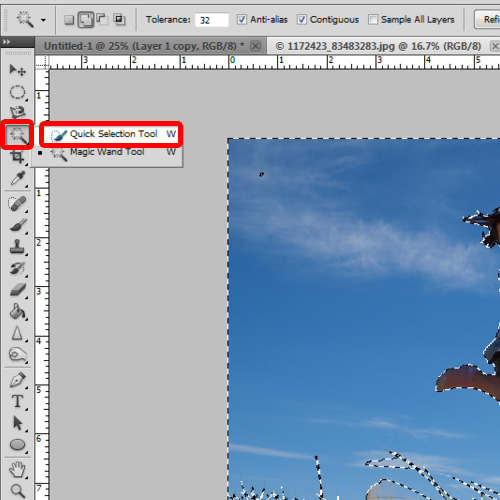
Now we will make a selection of the background. You can even pick up the ‘Quick selection tool’ from the tool bar to take a more detailed selection.
Step 3 – Choose the “Select Inverse” option
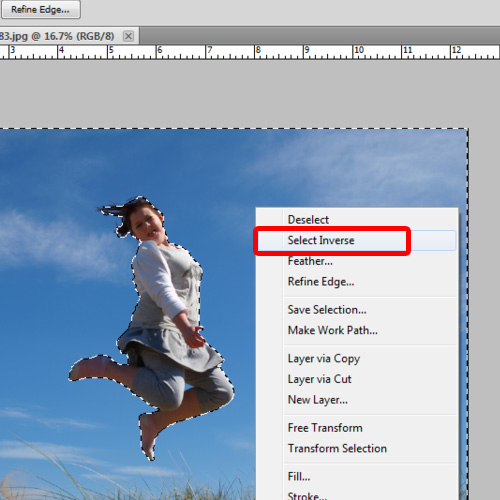
Once you’re satisfied with the selection, right click and choose the ‘select inverse’ option from the drop down menu. This is so that we can have the selection of the main object that we will be working on over here. Now copy the selection onto a new layer. With that done, remember to duplicate the layer once more.
Step 4 – Transform layer and add layer mask
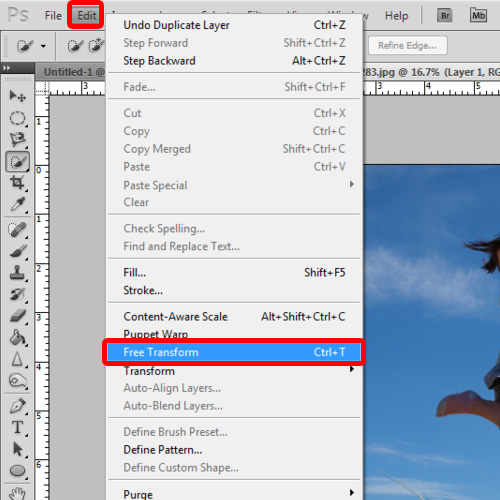
With that done, let’s go to the edit menu, and click on the ‘Free transform’ option from the drop down menu. Over here, we will be increasing the size of the layer here. Make sure you are transforming the layer which is behind the main layer, which we will be working on We will be adding the dispersion effect to this layer over here. Now go to the layers tab and click on the icon for adding the layer mask. Select “#000000” for the layer mask color.
Step 5 – Work with the eraser tool
Now select the eraser tool from the tool box and click on the ‘toggle the brush panel’ icon in the options bar. Here you can choose any brush shape for your eraser. We will select the set of splatter brushes. Keep choosing different splatter brushes for your eraser from the brush presets and use them in different sizes and apply it on the main image. You can even change the angles and spacing of your brushes.
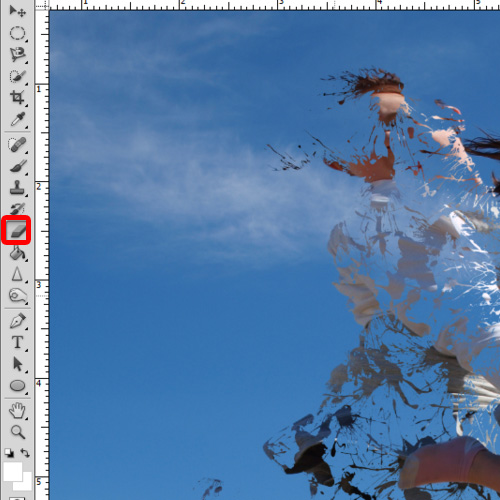
Step 6 – Add effects to the image
Keep using the brush randomly on the layer in order to add to the effect. Play around with the idea a bit, see what you can come up with. Over here, this is the basic layout that we made. Now we will add some more effects to the image.
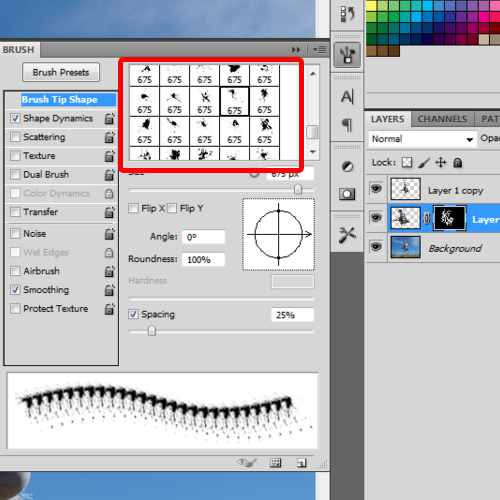
Step 7 – Alter the Adjustment layer options
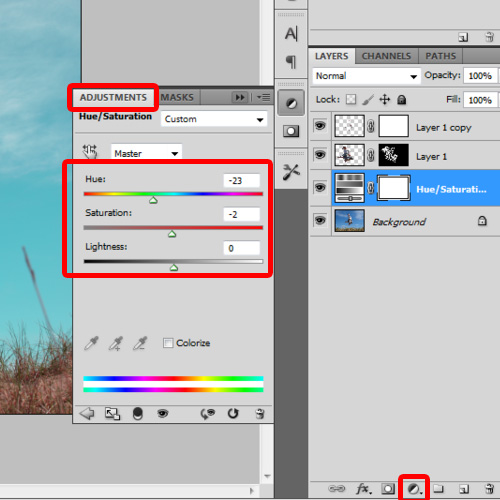
Now to further carry on with the process of creating a dispersion effect we will select the background layer and go to the adjustment layer icon that is situated at the bottom of the layers tab. Over here, we will click on the ‘hue and saturation’ option. Keep the hue to -23, saturation to -2 and lightness to 0. Again click on the adjustment layer and select the ‘curve’ option this time. Here, after playing with the curve graph, keep the output to 131 and input to 129. The output may differ according to your image, so play around with the curve adjustment layer a bit.
Step 8 – Add the blur effect
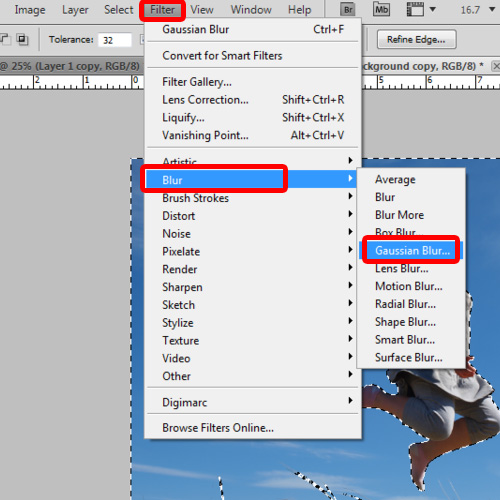
With that done, let’s hide all the layers except the background layer for now. Now we will duplicate the background layer and make a selection of the clouds with the magic wand tool. Once we’ve done that, we’ll use the Gaussian blur filter. In order to do so, go to the Filter menu in the main menu, move over to Blur in the drop down menu and click on the ‘Gaussian blur’ option. We will keep the radius as 34.5 over here.
Now let’s make the rest of the layers visible. To give a final touch to the image, we will use the ‘burn tool’ from the tool box and apply it at the edges of the duplicated background layer. And that’s it. Our image with a Photoshop dispersion effect is now ready.
 Home
Home