In this video tutorial we will show you how to install Adobe Photoshop CS6 on Windows 8.
In order to install Adobe Photoshop CS6, first of all we need to find and download it. For this we open Internet Explorer and enter www.adobe.com. Than we go to Downloads section and choose “Photoshop CS6”.
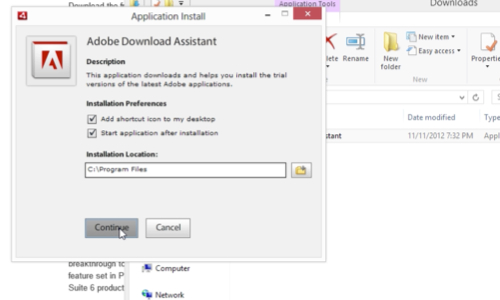
In opened page we choose “Download now” and save the “AdobeDownloadAssistant” file on your hard drive. Open the downloaded file and install the application. In next step you will be offered to “Create and Adobe ID” or “Enter your Adobe ID” if you have one or to fill up the registration form if not. After you sign in with your Adobe ID, you will be given an opportunity to choose a download folder for installation files and then wait while assistant download files. After the download is complete wait until the extraction is done.
At the beginning of installation we must select between Install(if you have a serial number) or Try Photoshop CS6 for a limited period of time.
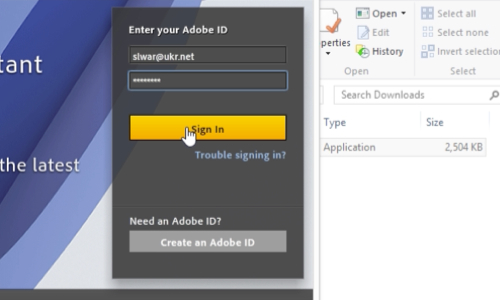
In next step we press “Accept” to agree with Adobe Software License Agreement. And again to continue the installation we must sign in with an Adobe ID, after it is done we choose the product and destination to install to. Than wait until the installation process is complete. When the installation is complete, we close the application. We can launch Photoshop CS6 from Start menu.
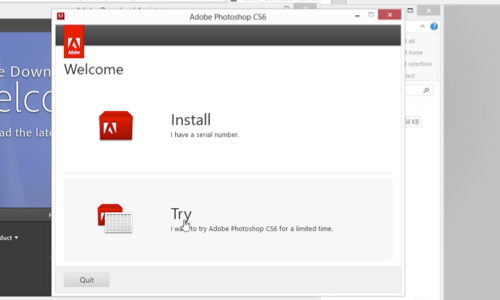
In the following window we can choose “Start trial”.
Now you can and use and work with Photoshop CS6.