Learning how to use the component options window in Google SketchUp is very beneficial while working with this software. Different components for SketchUp are already in the window while more can be downloaded from 3D Google Warehouse.
You can learn more about SketchUp components by following the steps given below.
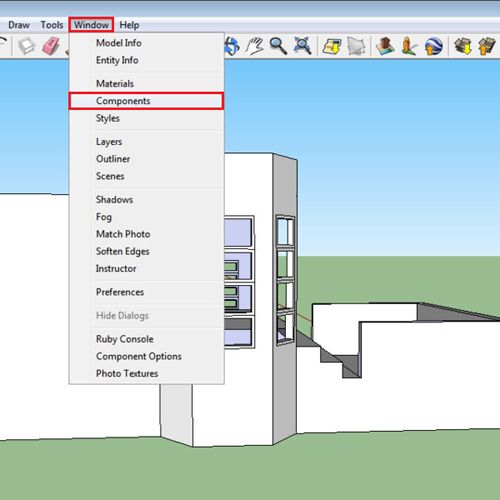
Step # 1 – Opening the “components” window
To work with components efficiently it is important to know your way around the component window. To open it, go to the “windows” menu on the top and from there drop down to the “components” option.
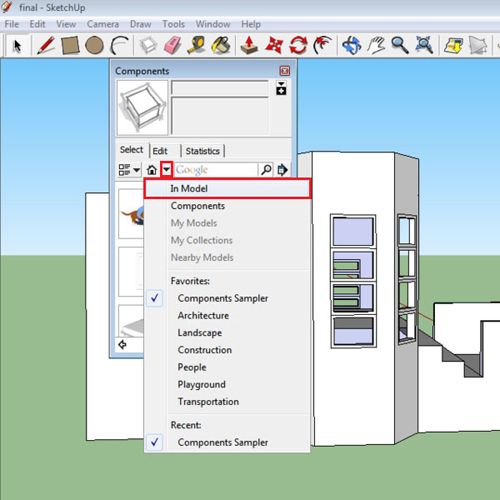
Step # 2 – Going to model components
This opens a window which shows different objects that you can drag out and add to your model. There are different sets of things present in it.
Press the button which has a house made on top of it. This brings you to the section that displays the components present inside your drawing.
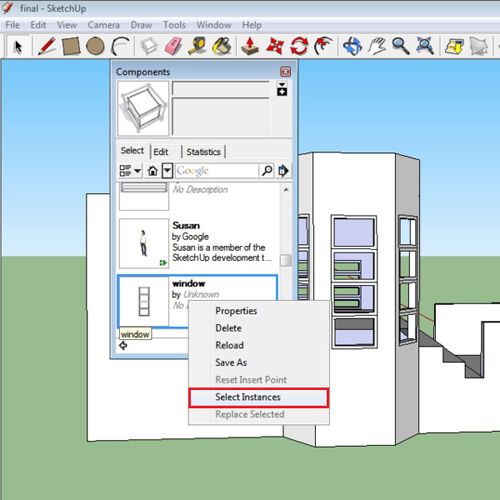
Step # 3 – Selecting all instances
You can select all of the instances of one component from here. Simply right click on it and choose the option “select instances”. In this case wherever the “window” component is present on the model gets selected.
Step # 4 – Replacing component
You can even replace one component with another. Go to the long window at the other side and select it. Right click on the component you want to replace it with. Once you do so, select the option of “replace selected” and the other window replaces the long one.

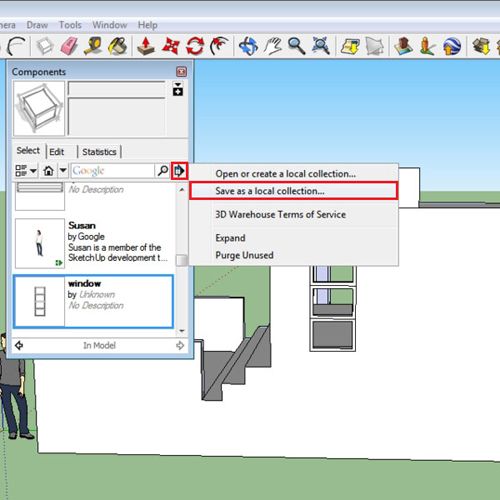
Step # 5 – Saving your components
To create or save your current collection or even a new one, go to the arrow button on the right side of the panel and choose whichever option you want.
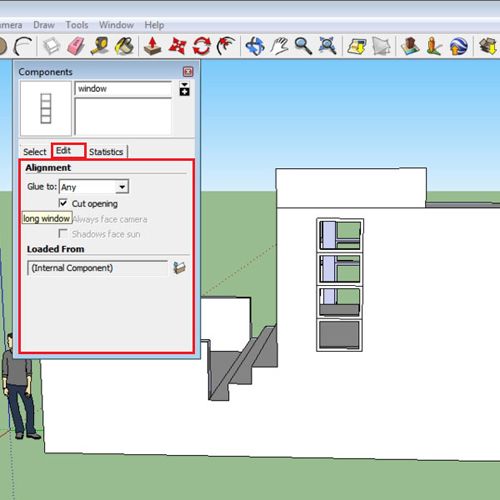
Step # 6 – Editing a component
If you want to change the settings of any current Sketchup components, simply select it and go to the “edit” tab on the top. From there you can alter it however you want.
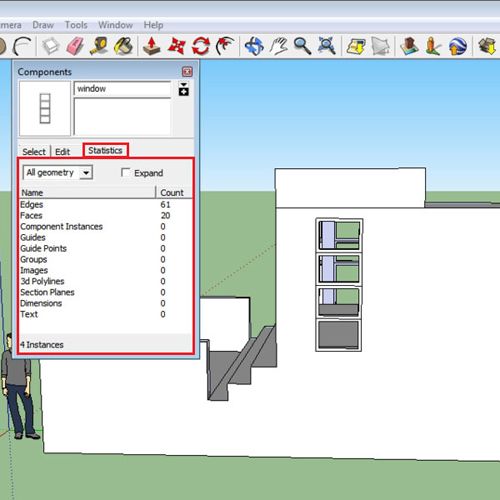
Step # 7 – Going to the “statistics” tab
The statistics tab gives you a mathematical overview of the component like for example like the number of edges it has.
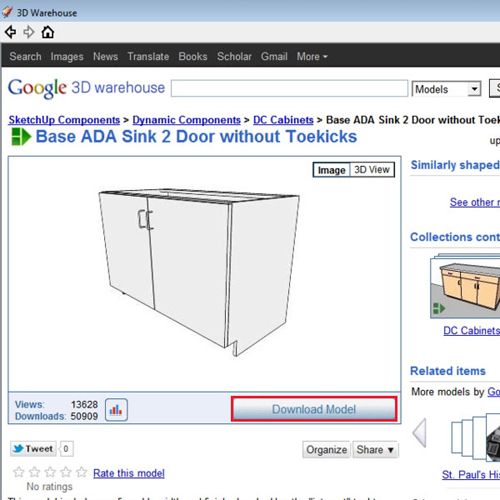
Step # 8 – Opening “Google Warehouse”
If you click on the drop down arrow next to the house button you will be able to see different options of the components for Sketchup that are available. Most of these are at the “Google 3D warehouse” which you can access by clicking on these options. Select the “architecture” option and the Google warehouse takes you to several options you can choose from.

Step # 9 – Downloading a model
Click on any object and once you select the one you want, press the “download model” option. Google SketchUp now gives you an option of whether you want it to be directly downloaded in your model or not. Clicking “yes” brings this component directly into your drawing and you can move it around to place it according to your requirement.