If you want to create a magical scenery and add essence to your landscape image, then you can certainly make use of the rainbow effect. With basic image manipulation techniques you can add a realistic effect to your image. To create a rainbow in Photoshop you would be using the gradient tool as the basis for the whole effect, adding colors to your imagery.
Follow the step by step guide to learn how to add a rainbow in pictures in Photoshop.
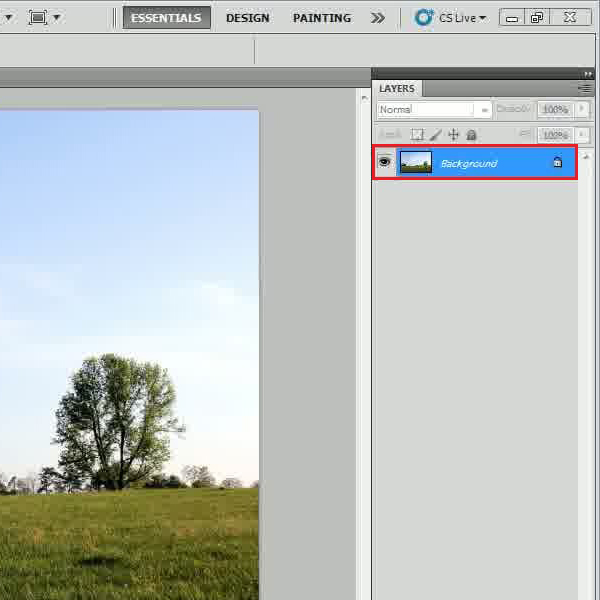
Step # 1 – Open an Image
In the first step, launch Adobe Photoshop and load an image on which you want to create a rainbow effect. Choose a landscape image with a beautiful scenery. An image with a clear blue sky would be preferred for this effect. With such an image you can make a more realistic effect on Photoshop.
Step # 2 – Choose a Rainbow Gradient
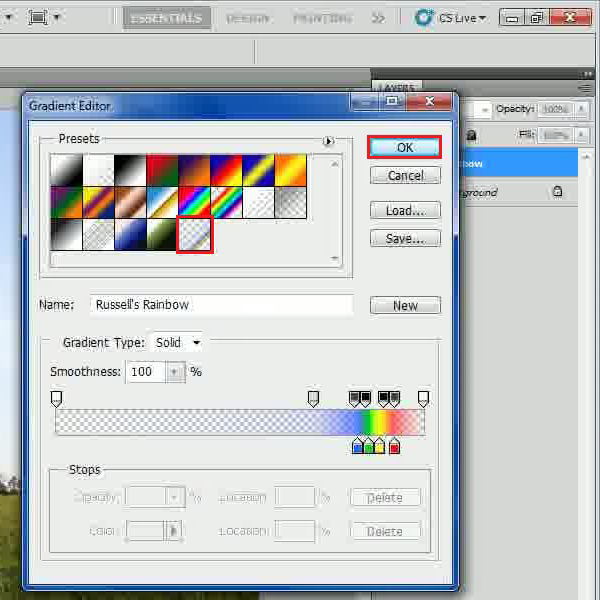
Now add a new layer and change its name to “Rainbow”. Once done, select the “Gradient” tool from the menu which is available at the left corner of the screen. After selecting it, click on the “Gradient Editor” option and select the “Russell’s Rainbow” option from the menu. After selecting this, click on the “OK” button to continue.
Step # 3 – Apply a Rainbow Gradient
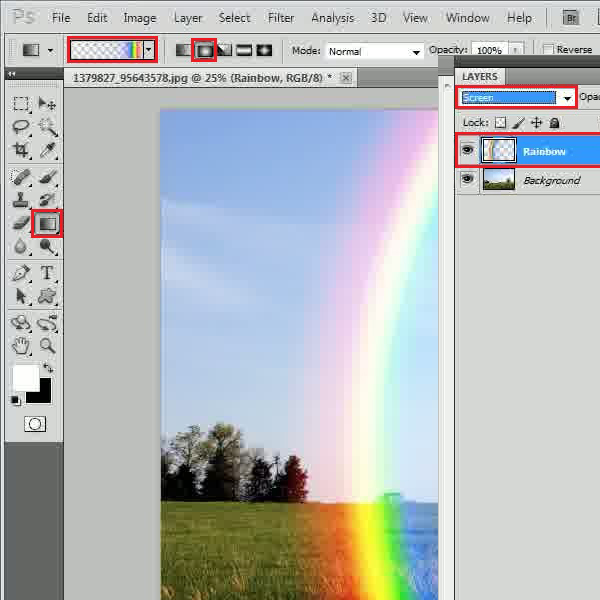
Select the “Radial” gradient option from the menu and draw a straight line from right side to the left side of the image by holding the “Shift” key on the keyboard and dragging the cursor. This will create a rainbow gradient over the image. Now change the “Blending Mode” of this layer to “Screen”.
Step # 4 – Apply a Gaussian Blur
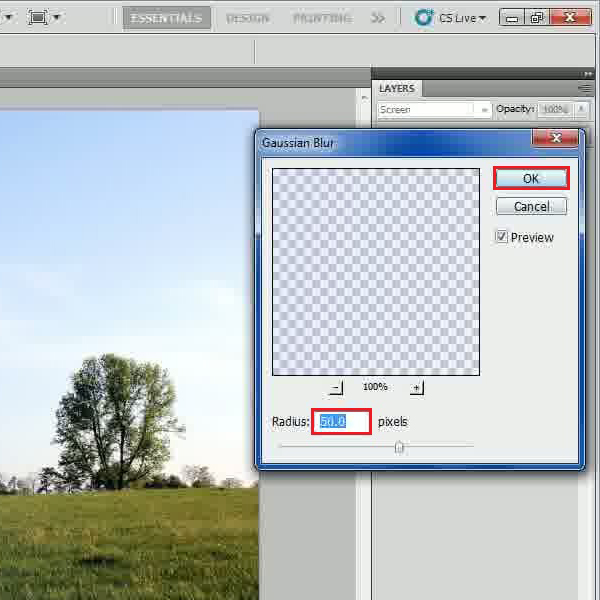
Now go to the “Filter” menu, select “Blur” and click on the “Gaussian Blur” filter from the list. Set its “Radius” to “50 pixels” and click on the “OK” button to apply this filter on the image.
Step # 5 – Add a Layer Mask
Click on the “Add Layer Mask” icon which is available at the bottom of the layers panel. This will add a layer mask on the “Rainbow” layer.

Step # 6 – Setting up the Gradient options
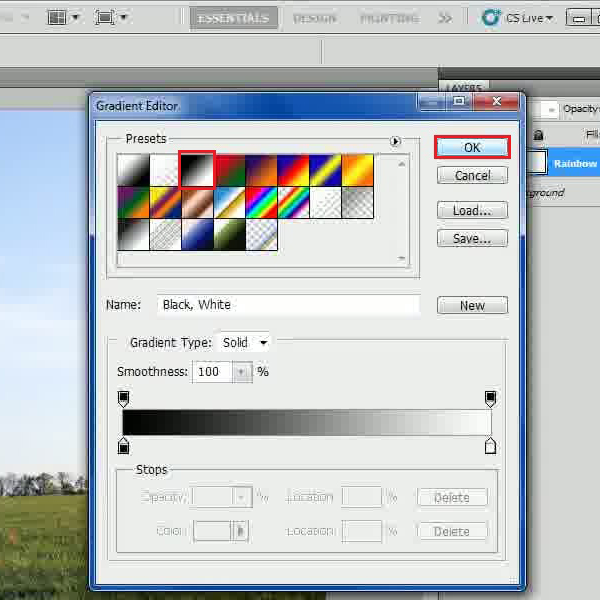
Select the “Gradient” tool from the menu and click on the “Gradient Editor” option. In this window, choose the “Black to White” gradient from the menu and click on the “OK” button to apply the changes made.
Step # 7 – Apply a Black and White Gradient
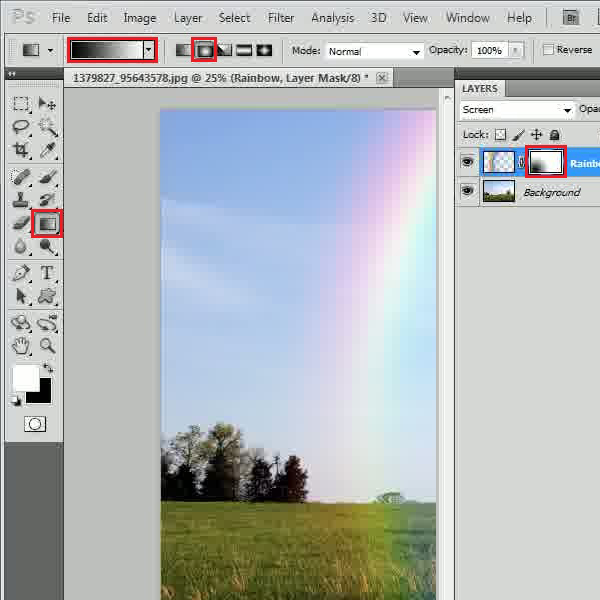
Select the “Radial” gradient option from the menu and draw a straight line by holding down the “Shift” key on the keyboard and dragging the cursor from the bottom left corner of the image towards the top. This will dim the rainbow color on the ground.
Step # 8 – Using the Brush Tool
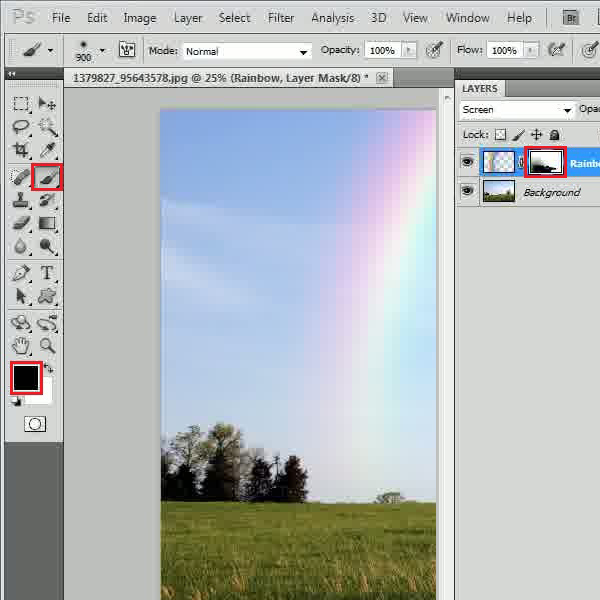
Click on the “Layer Mask” on the “Rainbow” layer and select the “Brush” tool from the menu. Now use the black color for your fill and start painting over the grass. This will remove the rainbow color over the ground, completing the rainbow effect on the image.
 Home
Home