Working on Adobe premiere may often be considered slightly difficult and confusing .Yet, once a person gains a complete understanding of how this software works and discovers the various options and tools it provides that can be applied, using it might not be that difficult after all. Adobe Premiere is a time line based video editing software used by uncountable individuals and a number of TV channels and shows. It makes work on videos easier and also allows one to open up Photoshop files directly in this video editing software.
In this Premiere tutorial, we will teach you animation in CS6.
Step 1 – Decreasing the scale value
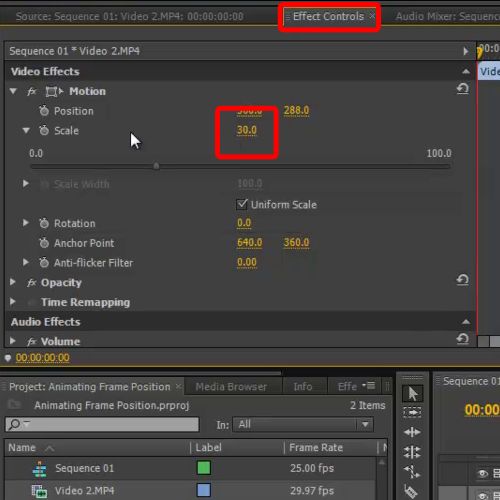
In order to start off with the process of animating frames and tracks in Adobe Premiere Pro CS6, you will first need to go to the “Effect Control panel” and expand the “Motion” menu.
Here, you must replace the scale value from 100 to 30 and press the “enter” key on your keyboard. Once this has been done, you will further need to click on the “toggle animation” icon represented by a clock given on the left side. This would set the point from where the frame would start zooming in.
Step 2 – Increasing the scale value further in the timeline
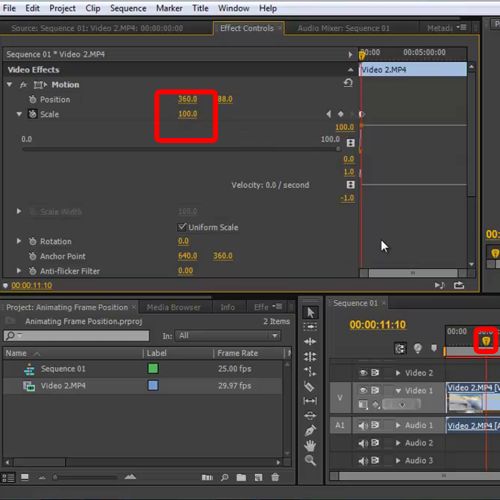
Now, you must continue and drag the timeline seek bar forward and increase the scale value from “30” to “100”.Once again, press the “enter” key on your keyboard. This will allow you to define the ending point where the frame should stop zooming in.
Now your job is done; you can simply hit the play button in order to see the results of the work you’ve just done.
Step 3 – Animating frame position
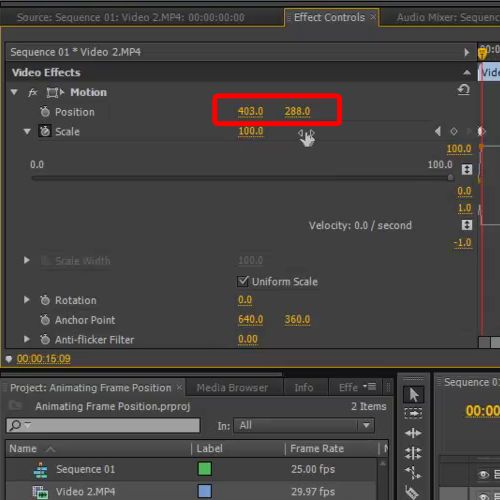
You can further animate the frame position on both X and Y axis. In order to do so, you must simply change the Position values of both the axis and the clip will move accordingly. Make sure you perform all the steps as shown in the tutorial in order to get the desired results.
Step 4 – Animating different tracks
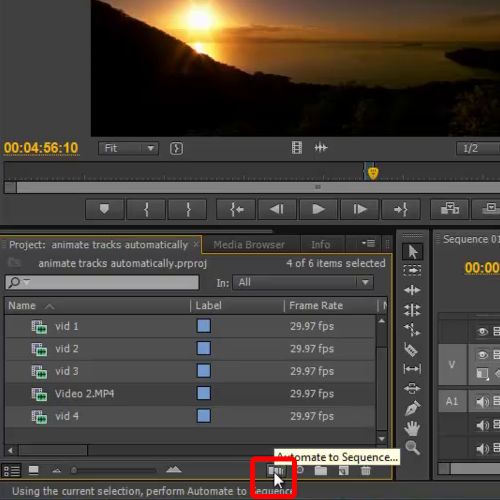
Track animation in cs6 can be done automatically. In order to do so, you must go to the media library and select the video clips which you want to add in a single sequence.
After selecting the video clips, you will need to click on the “Animate to sequence” button located at the media library menu below in order to animate the tracks.
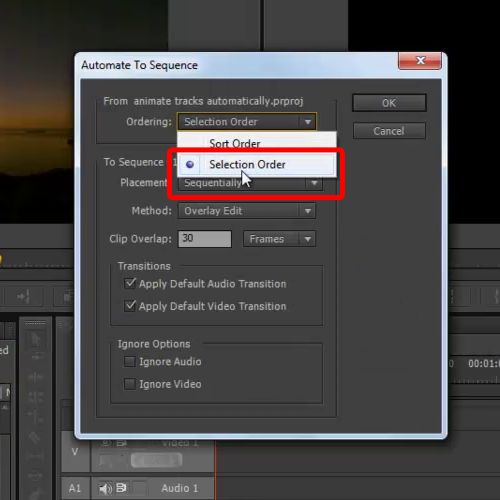
Step 5 – Choosing the selection order
A new window will pop up where you will have to configure the playback setting for the whole sequence.
You can expand the ordering menu and select the “Selection Order” option in order to set the range. Once done, click the “Ok” button.
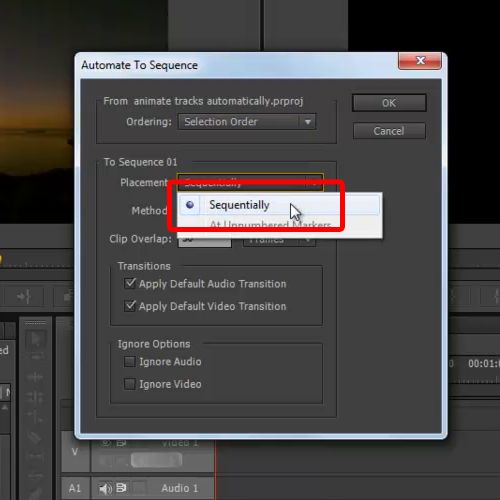
Step 6 – Setting the placement option
Now, move over to the placement menu and select the “Sequentially” option from the menu. This option will allow you to play the entire frame in one series.
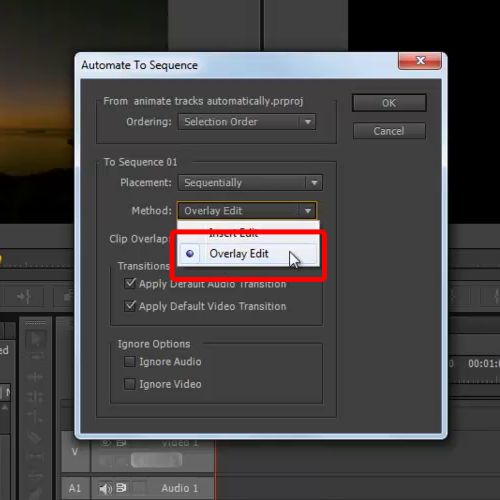
Step 7 – Choosing the method
Next, you will need to select the option titled “Overlay Edit” for the method menu and set the “Clip Overlay” to “30” frames.
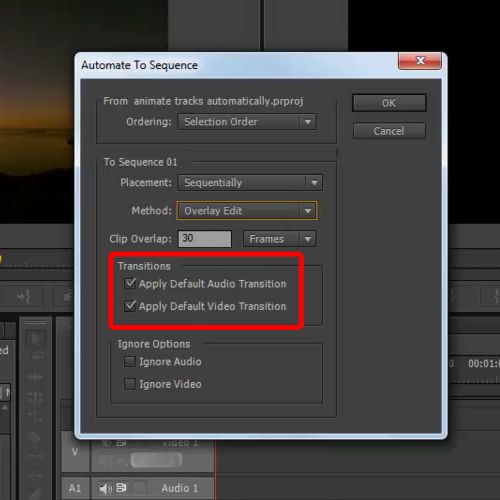
Step 8 – Audio and video transition
You can also set the default Audio and Video transition in both the layers by checking both the options in this window and you’d be done with the procedure. Click on the “OK” button. Next, hit the play button and watch the result of the changes that you have just made play right in front of your eyes. In this premiere tutorial you have learned how to animate.
 Home
Home