Effects in After Effects do the final touches to your sequence and refines the composition. They can also be increased by applying 3rd party video effect like Boris. The software offers various video effects such as lens flare, blur, camera stabilization and other productive video effects.
After effects not only provides you with these various video effects but also allows you to animate these effects. It gives you the opportunity to be creative and dynamic in your work.
In this tutorial, we will teach you the basics of applying an effect and animating it in Adobe After Effects CS6.
Step # 1 – Add lens flare effect
Notice that we have a solid layer in our timeline and we will be adding two effects here, the lens flare effect with the combination of the fast blur effect. For that, move to the effects panel and type “lens”. Drag and drop the lens flare option from the results to the timeline.
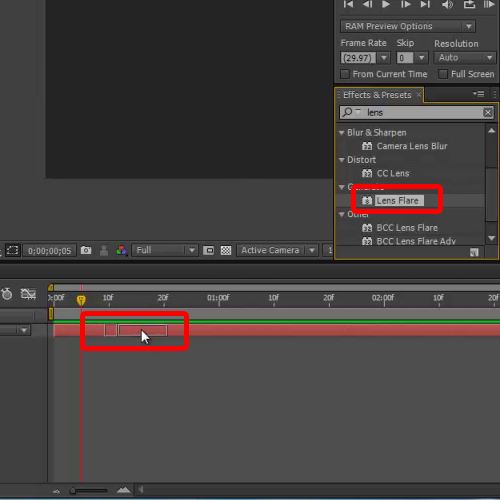
Step # 2 – Preview two anchor points
Now expand the layer and move to the lens flare video effect from the effect category. Move to the preview monitor and you will see two anchor points, one is for the solid background layer while the other is for the Lens flare effect.
As we move the solid layer’s anchor point, changes are made according to the cursor movement. Similarly, if we click on the anchor point of the lens flare effect, you can move the effect on the canvas.
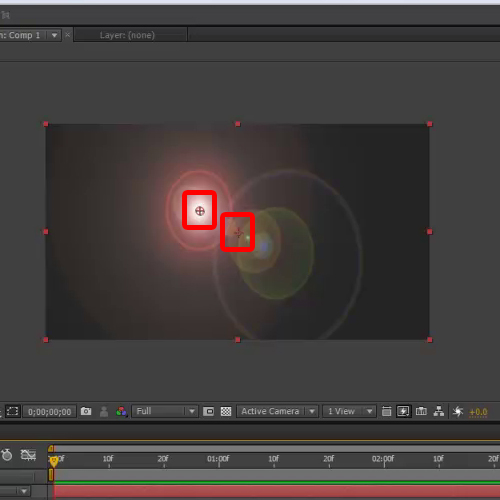
Step # 3 – Add lens flare effect
In order to animate the lens flare video effect, click on the clock icon right before the flare center from the lens flare video effect menu. This is how you animate effects.
Notice how key frames are automatically applied to the timeline once we are done.
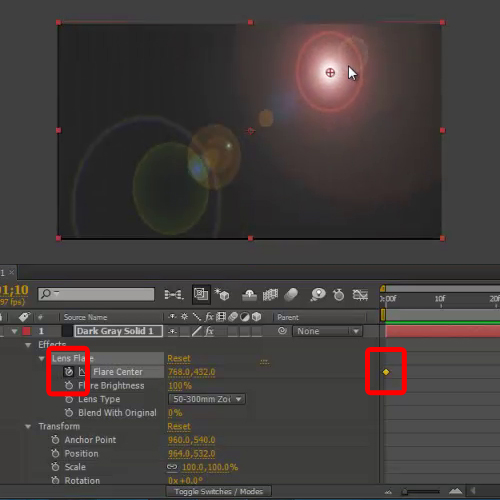
Step # 4 – Add fast blur effect
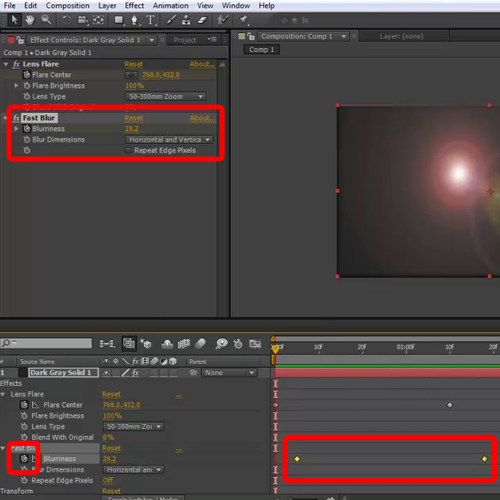
With that done, we will add the fast blur effect from the effect menu and repeat the same steps for animating the video effect. In this manner, you can add effects in After Effects.
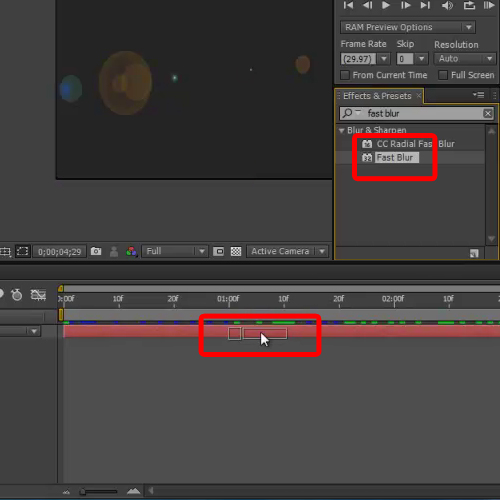
Step # 5 – Render the sequence
Configure the fast blur effect in such a way that the clip should start from focusing on the lens flare and add offset in the end to give the clip a fading effect towards the end.
Once done, hit “0” on your keyboard to render the sequence.
 Home
Home