Different in built styles can be applied to your model in Google SketchUp. These various styles can be applied to give your output different effects.
To learn how to apply and edit styles in Google SketchUp look at the steps below.
Step # 1 – Opening the “styles” panel
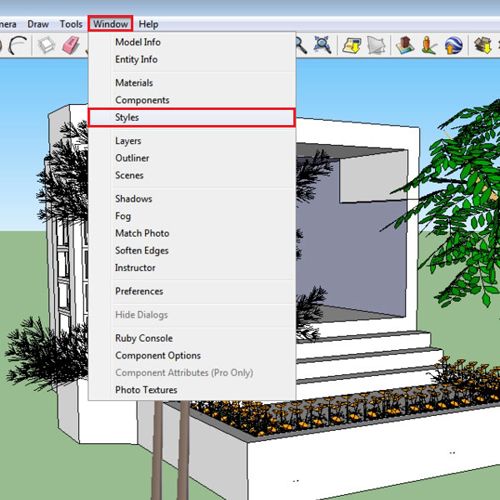
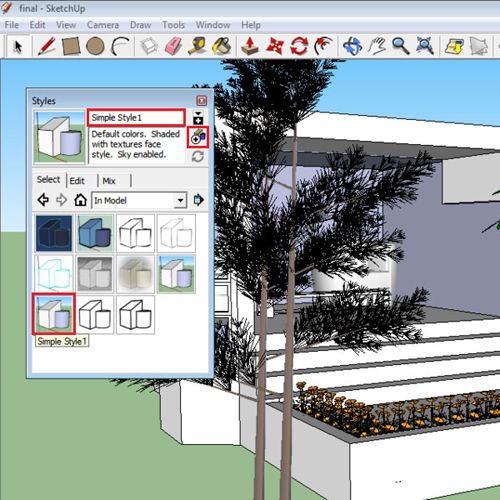
To open the “styles” panel go to the “windows” menu on the top and select its option. The panel that appears shows the style being used in the model at that moment.
Step # 2 – Going to different types of styles
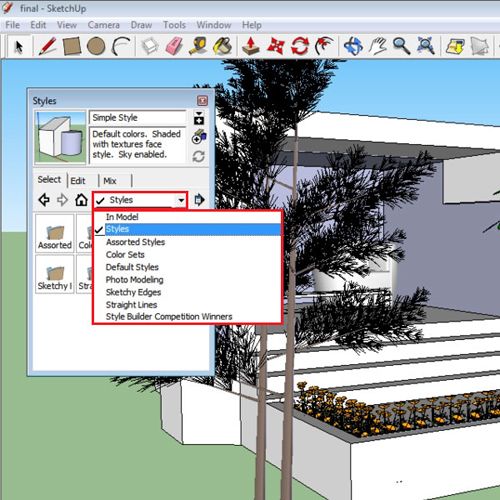
Go to the drop down menu that right now states “in model”. Over there you will see different categories from which you can select different types of styles.
There are different assorted styles; ones with different colors, one with various sketch effects and many more. You can choose whichever you wish to use. The style that you select or the one you even apply for a second on the model gets imported to the “in model” section.
Step # 3 – Editing the “styles”
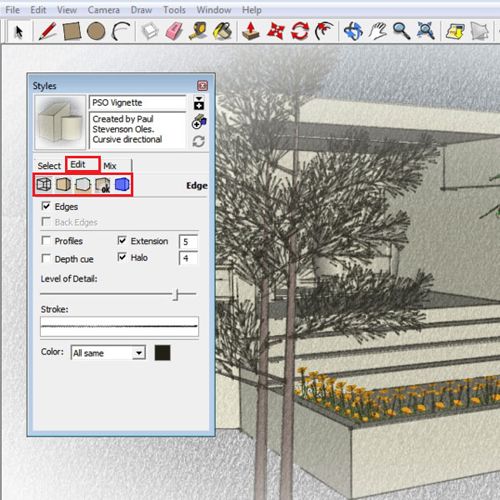
Any style that you apply can also be modified from the “edit” tab. There are five different settings here that you can alter. You can change the edges, the face style, alter the sky and ground, and create different watermark and modeling settings.
Step # 4 – Mixing “styles”
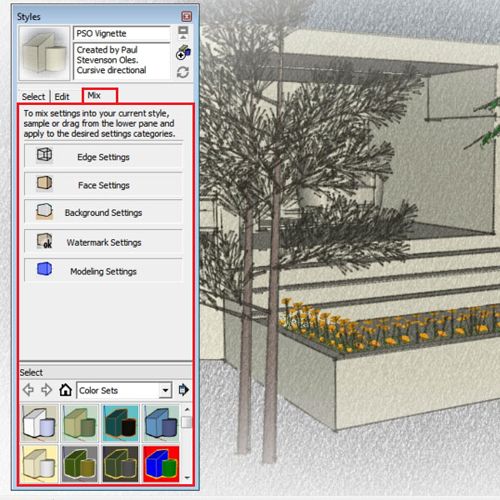
In Google SketchUp two styles can also be merged into one through the “mix” tab. When you open this tab, the edit settings are present at the top and different styles at the bottom. Choose a style and add it to any of the settings above, this creates a mixture of the two.
Step # 5 – Creating a new style
The “create new style” option on the top right of the panel allows you to make a new style as per your requirement. You can make a new one that will be a copied one of the current style you are using. You can then edit and mix it with other styles to create one that is custom made.
 Home
Home