Learning how to apply images in Google SketchUp is not a difficult task. The simple feature of knowing how to import to SketchUp can allow you to bring external images into this software. You can even render in Sketchup by applying different materials which are either inbuilt or can be applied in the form of images onto your surfaces.
To learn more of how to work with images in Google SketchUp look at the steps given below.
Step # 1 – Go to the “import” option
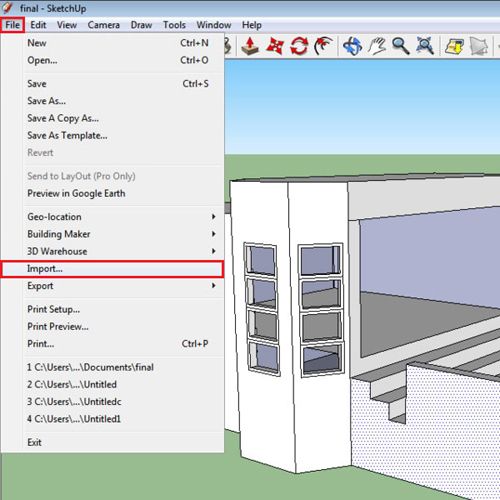
Go to the “file” menu on the top left and select the “import” option. You can then open the file where the images to be imported are saved.
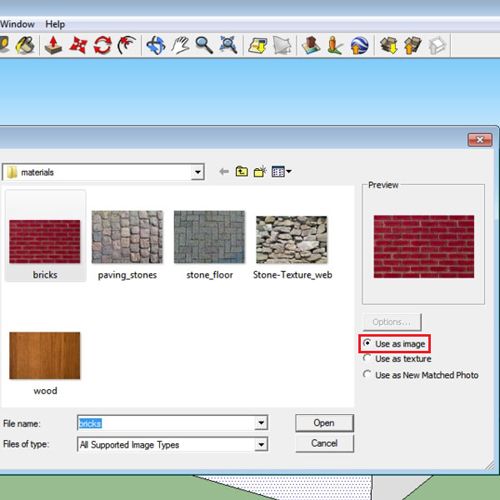
Step # 2 – Select the “use as image” option
While importing pictures Google SketchUp gives you three options on the right side. Select the picture you want to upload and choose the “use as image” option.
Step # 3 – Place the image
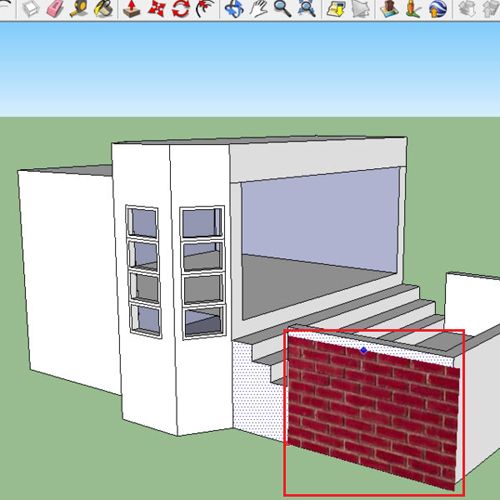
Click on the point where you want this picture to start covering the surface from. Notice, the image will decrease and increase in size according to the proportions of the picture.
Step # 4 – Select the “use as texture” option
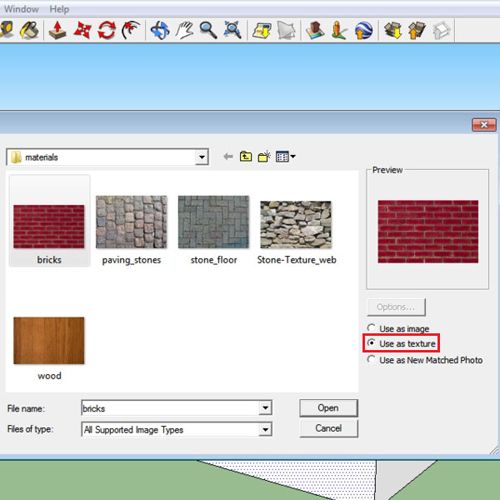
On the other hand, if you import the same image as a texture then it can be used to cover complete surfaces. Select the “use as texture” option while importing the picture.
Step # 5 – Place the texture
Place the picture on top of the wall you wish to cover. When you first place the image, keep its proportions the same as you want to cover the whole wall with. This way, import to SketchUp different pictures that you can use as textures for the existing surfaces.
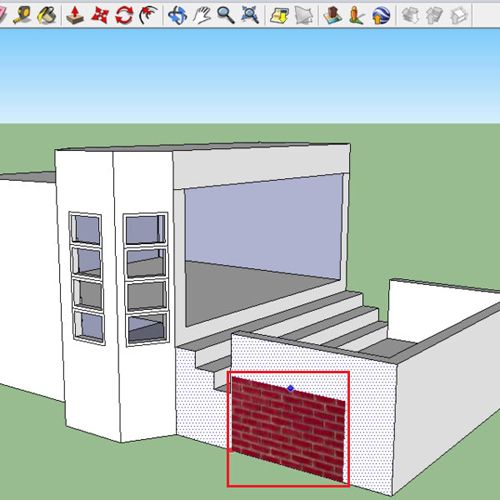
Step # 6 – Cover the wall with the texture
When you leave the mouse button and then click it again the wall gets covered with the picture, the proportions of the bricks remain the same as you defined earlier.
You can use this same method to cover any wall that you want no matter which shape.
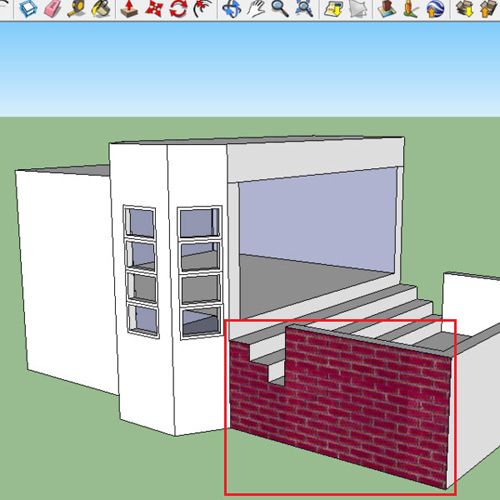
Step # 7 – Select the “position” option
The position and perspective of the image can also be altered. To do this right click on it, drop down to “texture” and select the “position” option.
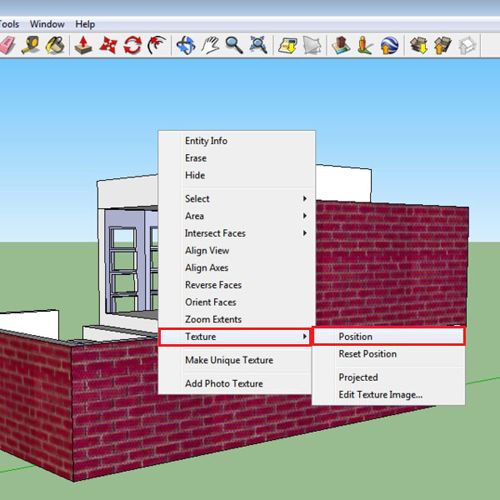
Step # 8 – Alter the texture
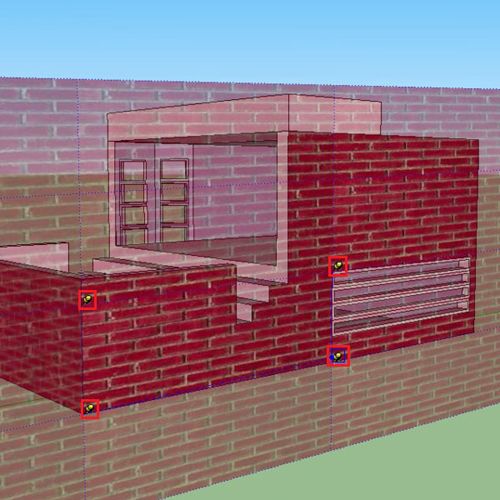
This provides you with four points that are fixed right now. Therefore, when you move them the whole image moves. It can be moved sideways, can be rotated while pivoted from one point or brought into perspective.
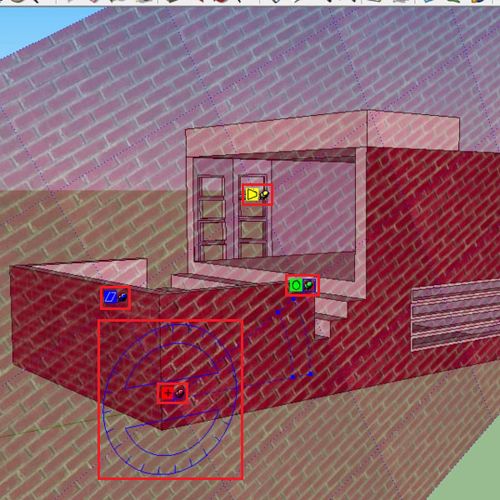
Step # 9 – Uncheck the “fixed pins” option
To alter the size of the bricks in the image, select the “position” option again and then right click to uncheck the “fixed pins” option.
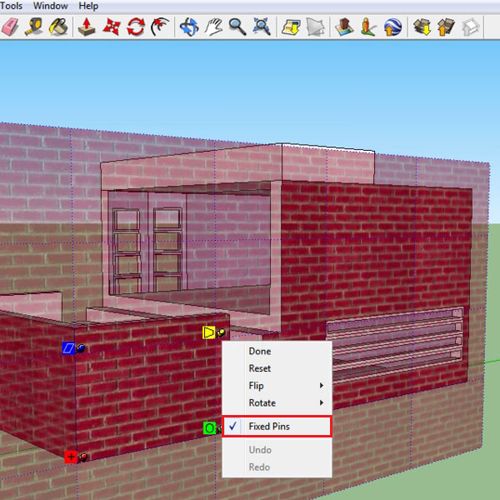
Step # 10 – Alter the size of the bricks
Now when you move two points from any side the proportions of the bricks can be changed.
Thus this way using different images you can render in SketchUp to enhance the output of the drawing.
 Home
Home