In this tutorial you will learn how to effectively blur background photoshop which can really help bring the viewers attention to the subject matter of the photo.
Step # 1 – Selecting the Area to Keep in Focus
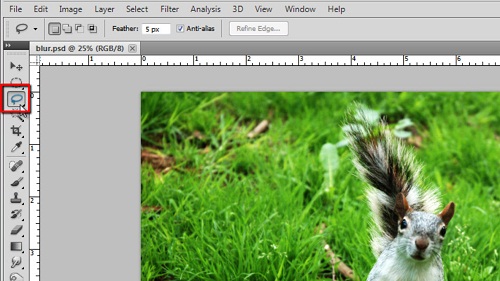
Open Photoshop and make sure you have the photo open that you want to blur the background of. Select the lasso tool on the left and roughly draw around the subject matter as well as some of the foreground. When drawing around the subject leave a little extra space – about the amount you can see I am leaving here. Don’t be too worried about accuracy here.

Step # 2 – Feathering the Selection
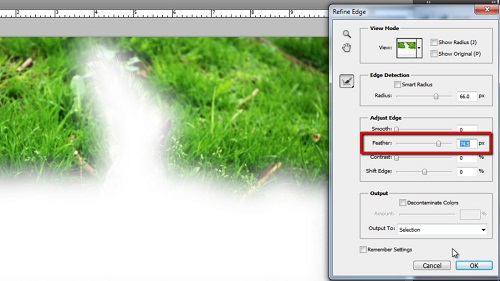
In the main toolbar click “Select” and then “Inverse”. Now click on the “Refine Edge” just below the main toolbar. In the window that opens adjust the radius to have a good level of blur around the photograph. The pixel amount will vary depending on the resolution of the photograph, so try to base the radius figure on the image you can see here. Here around “66 pixels” works. You should also adjust the “Feather” slider – again try to replicate the amount you can see on the screen here. Click “OK”.

Step # 3 – Applying the Blur
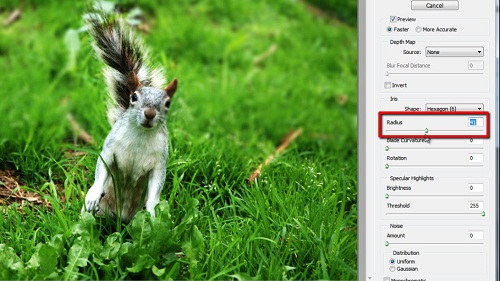
In the main menu click “Filter”, navigate to “Blur” and click “Lens Blur”. Leave all the settings at the defaults except for “Radius” which you should drag until the photo looks just right – try not to overdo things or the blur will not look realistic. Here a blur of “42” works well. Click “OK” to apply the blur and close the window. Press “Control” and “D” on the keyboard to deselect and that is how to blur background photoshop.

 Home
Home